Barszcz: Polish Beet Soup

I’ve always wanted to try borscht, called barszcz in Polish. I love the taste of beets and figured all those jokes about the soup being awful soup were from McDonalds-addicted, over-processed food lovers. Now that I’ve tasted it, I know that is exactly the case. It has a mild and slightly rich flavor, totally in love.  My mom say it’s ok, but my grandma said she loves it too. Although she loves, my mom said she didn’t make it very much while my mom was growing up because my grandpa hates beets. Apparently he didn’t even want them in the house! I must confess that grating beets is a pain, so I shared my grandpa’s hatred while I was prepping everything at least. This recipe is based on one from cooks.com called Polish Beet Soup.


Barszcz
4 cups water
1/2 stick of vegan butter (I used Earth Balance)
4 good-sized beets
1 medium-sized onion
Salt

This part really sucks to do. I suggest wearing gloves so your hands do not turn bright red.  Peel and grate the beets and onion.

Add the 4 cups of water to a large pot and bring to a boil. Once boiling, add the vegan butter.

Once the butter has melted, add the grated vegetables and salt to taste.

Cook for about 1/2 an hour, until the beets and onions are cooked.

If you want hot soup, serve it immediately. But I wanted mine cold so I made mine earlier in the day and then let it chill till dinner.

Top with some vegan sour cream (try Tofutti) and some dill or chives. My dad and I loved it, my mom wasn’t a big fan. I guess she takes after her dad.

One last Polish recipe posting up soon.

Polish Rye Bread

The Polish side of is calling out again. I am heading back to Hawaii in a few days and won’t have my lovely parents to cook for. So I decided to make Polish food for dinner tonight, embrace our heritage once again. Like I said on my pierogi post, a lot of polish food is not vegan so I need to change the recipes a bit. But despite the lack of eggs or pork here and there, they are pretty authentic.

I have never had barszcz, Polish variant of borscht, so I thought give it a try. I love beets so why not try a beet soup? While I was looking for recipes online, a bunch more Polish recipes came up too. I asked my mom what kluski is and when she explained they are delicious little homemade noodles, I knew I had to make them. Then I thought well, what would a Polish dinner be without kapusta? Kapusta is pretty much just plain sauerkraut and it is delicious….makes the house stink though. 
Then I thought a nice home-baked rye would go lovely with the barszcz so I added that to the list too.  I love its dry but savory taste. Plus, my dad was practically drooling over some we saw on TV last night so I figured he would be happy. 
Rye bread is not that complicated to make, just like with any bread you just need to be patience and not overwork it. And it’s already vegan! I found a recipe for a simple breadmaker version called Polish Rye Bread on Group Recipes, but adapted it for normal baking methods. 

Polish Rye Bread

1 cup warm water
1 packet dry yeast
1 and 1/2 tbs molasses  
3/4 cup rye flour
2 cups bread flour
2 tps caraway seeds
1 tps salt 
1 tbs vegetable oil 

Dissolve the packet of yeast into the warm water. I suggest doing this in a measuring cup. Add the molasses. Stir lightly if needed. Set aside until it all bubbly and frothy. 

I did my mixing and kneading in a stand mixer. I wish I had one of these in Hawaii. Can’t wait to not be a broke college kid and have a real kitchen. In the mixer bowl, add both flours, caraway seeds, and salt. Mix together well by hand. 

Turn on the mixer to the lowest setting and slowly add the yeast mixture. Use bread hook attachment. Then add the oil. Continue mixing until smooth and slightly elastic. 

Remove the bowl from the stand, cover with plastic wrap (I suggest putting a rubber band around it too) and cover with a dish towel (ścierka in Polish, I’ve been taught a few random words). Put in a warm place like the laundry room to proof. If you live in humid place, that’s really not an issue so just set aside anywhere really. My bread proofs so quickly in Hawaii. 

Momma rolled it out for me.

Once it’s risen, punch it down again. Sprinkle some flour on the counter and roll the dough out on it a bit. Shape into the size of pan.

Spray a bread pan with cooking spray and place in the dough.
Cover with plastic wrap and a clothe again, then set aside to proof a second time. 
Pre-heat the oven to 350 degrees.  
Once it’s risen the second time, pop it in the over for 20 minutes. My mom made the suggestion of putting some hot water in a pot in with the bread to help crisp up the crust. 

Next, remove the pot of water and remove the bread from the pan. Put the freed bread back in the oven and bake for 10 more minutes. 

Your baking times may vary based on your oven. 

My bread skills need some work…my bread came out kinda dense. But  it was still pretty good. Like I said, if you are patience and take your time, your bread should come out lovely.  I would suggest more salt, my mom thinks more molasses. 

It smells so good. 
I’ll post the rest of the Polish recipes later. Still in the process of cooking all of them! 

Guacamole 3 ways

I’ve lived in my new place all summer now and apparently never bothered to look up when I walked out the door. My friend Shane last week mentioned there was an avocado tree right outside my door and I was surprised. He picked a whole bunch of them for me and I’ve been patiently waiting all week for them to ripen.

I decided to make 3 types of guacamole: basic, mango, and hot roasted pepper. The basic is just the traditional with some tomatoes, onions, garlic, and lime juice. The mango is the same, just add some chopped mango. The roasted pepper obviously has a roasted bell pepper, and for some kick, some Serrano hot peppers.

Basic Guacamole
1/4 cup onion
2 cloves of garlic
2 medium tomatoes 
2 large ripe avocados
Juice of 2 limes 
Pinch of salt

Chop the onion and garlic into desired sizes. I like my a little guacamole a chunky so I did mine into small chunks. Add to a large bowl.

Cut the tomatoes into about the same size the onion. Add to the bowl.

Avocados aren’t hard to cut up, but they can be messy. Alton Brown explains it better than I can, so watch from minutes 2:50 to 3:40 of this clip if you don’t know how.


Chop the avocado into equal size pieces to the onion and tomato and add to the bowl.

Now squirt on the juice from the limes and sprinkle on the pinch of salt.

Mix it all up, breaking up the avocado chunks a little bit as you go and now you have yummy basic guacamole!

Mango Guacamole
1/4 cup onion
1 clove garlic
1 cup mango
1 medium tomato
2 large avocados
Red pepper flakes
Juice of 1 lime
Pinch of salt

 
Peal and chop up the mango into desired chunks.

Follow all the directions above for the basic guacamole, but just add the mango and some red pepper flakes. I add the red pepper in this one because I like the contrast with the sweetness of the mango.

Hot Roasted Pepper Guacamole
1/4 cup onion
1 clove garlic
1 medium tomato
1 bell pepper, roasted
2 ripe avocados
2 Serrano peppers
Juice of 1 lime
Pinch of Salt

I decided to puree this version because I thought the flavors would mesh together better. This is my new favorite way to make guacamole now!

You can buy the jarred roasted red peppers if you like for this, but I roasted my own. Just spray a pan with cooking spray and the pepper as well. Place under the broiler until the skin is charred black.

Once it is cooled (unless you like burning yourself on hot vegetables), peal off the brunt skin and chop into chunks.

Follow the steps for the basic guacamole, but this time throw everything, including the roasted pepper but not the Serrano pepper, into a blender or food processor. Blend until smooth.

Next chop the stem tops off the Serrano peppers. Then cut in half lengthwise. If you don’t like it hot, you can tone it down by scraping out the seeds.

I like it hot so I so i added the whole thing to the blender. Blend until it is incorporated.

I topped some homemade black beans with the basic guacamole for lunch today.

Good thing I like guacamole because I’ll be eating the rest of the week now!

Curried Split Pea Soup

I’ve had a bag of dried split peas sitting in my cupboard for awhile now. I saw them while I was cleaning my kitchen today and thought I should actually do something with them. So I decided to make good ol’ split pea soup. I hated split pea soup as a kid. Canned ones were way too mushy and way too salty. And homemade ones had chewy, overcooked ham pieces. So gross. But awhile ago I saw Alton Brown make a Curried Split Pea Soup on Good Eats and my faith was restored. His soup was smooth, not mushy, and properly seasoned. My version is based on this recipe, just minus the ham and add some green bean for extra nutrients. 


Curried Split Pea Soup
1 cup dried split peas
1 tps of vegan butter
2 cups water
Pinch of Salt
2 cups green beans, fresh or frozen, cut into bite size pieces
1 cup vegetable broth
2 cups water
1 tbs curry powder
1 tbs garlic powder
salt and pepper to taste

Put the split peas in a bowl and pick out all the bad looking pieces. Cover with water and soak for at least 2 hours, overnight if you can.

Drain and rinse the peas.


Heat a skillet over medium heat and melt the butter. Add the peas and cook until slightly tender, about 5-7 minutes.

Add the two cups of water and the pinch of salt. Bring to a simmer then cover and cook until completely tender, 10-15 minutes.

Transfer the peas to a bigger pot. You could saute them in the pot too, but I think they cook more evenly in the skillet.

Whether using frozen or fresh green beans, cook them first. I used frozen so I microwaved them. I suggest steaming fresh ones. Add the cooked beans to the pot along with all the remaining ingredients, then mix together.

To make the soup a thicker, puree it in a blender. Reserve about a cup and half of the pea and bean chunks first to add back in after. This way the soup has some texture and isn’t just green mush.

Once it is pureed to a smooth texture, return it to the pot and add the reserved chunky soup back in. Bring to a simmer and cover. Cook for about 25 minutes.

Ladle into serving bowls and enjoy. The curry gives it nice background flavor without overpowering the richness of the peas and beans. Love the color too.

Hawaiian Mac Salad

When you order a Hawaiian plate lunch, you can be certain of two things: large portions and macaroni salad. They usually aren’t vegan so I have to order all rice instead.  But to keep up with my Hawaiian post trend, I thought I should make my own version. There isn’t anything that makes this dish unique to Hawaii besides the fact it’s very popular here. It’s pretty much the same recipe you mom makes for picnics. I kept everything traditional, the only difference is I used Veganaise instead of mayonnaise.


Mac Salad
2 cups large elbow macaroni, dry
1/4 cup carrots, grated
1/4 cup celery, finely chopped
1 cup Veganaise
1 tbs sweet relish
Salt and pepper to taste

Bring a large pot of water to boil on the stove. Cook the macaroni according to the directions on the package.  Drain and set aside.


Broke college kid doesn’t have a grater, so I chopped my carrots

Grate the carrots and chop the celery.


The glass bowl makes it look like it’s sitting on the counter.

In a large bowl, add the macaroni, carrots and celery. Add the Veganaise and relish then mix together. Season with salt and pepper to taste.


Veganaise is the best thing ever. Way better than dairy mayo.

Cover and chill in the fridge for at least 2 hours. This gives the macaroni time to absorb all the flavors.

I ate mine on it’s own, but it’s a fabulous side dish for any entree…man, now I wish I made some BBQ tofu to go with this.

Purple Sweet Potato Salad

I realized I live in Hawaii but haven’t made any Hawaiian food yet! So the next few posts will be devoted to Hawaiian dishes.

I knew sweet potatoes came in other colors, but I have only seen orange on the mainland. The first time I went to the Hilo Farmers Market, a lady was selling a bag marked “potatoes” for $2. I thought awesome! Cheap fresh little finger potatoes. When I cut into at home, I was surprised that they were purple inside.  I asked my roommate at the time, who was from Maui, and she looked at me like I was crazy. “They are sweet potatoes…You know like Thanksgiving casserole?”

Purple sweet potatoes, or ‘uala,  are a member of the morning glory family and are native to Japan.  Japanese immigrants brought them to Polynesia more than a century ago. However, it is believed that the Polynesians brought some form of sweet potatoes with them on their travels throughout the Pacific prior to the Japanese introduction. All sweet potatoes are loaded with antioxidants and have anti-inflammatory properties. They also have tons of fiber and vitamin A.

Although common to Hawaiians, they were totally strange to me. I love them now though. Not only are they my favorite color, but they are also delicious. They aren’t quite as sweet a the orange or yellow ones, and bit more starchy. They are great for fries or chips, but I love them in curries.

I decided to make a healthier version of a very common side dish in Hawaii: potato salad. Potato salad and macaroni salad are  are always part of the classic Hawaiian plate lunches. But, they are loaded with fat and calories, and I have yet to find a plate lunch place that has a vegan version. For this recipe, so no one can argue I took the Hawaiian-ness out of the salad, I used as many local products as I could. Local organic purple sweet potatoes, and carrots, plus Sweet Maui onions, and Maui Sweet Onion dressing from Rainbow of Tastes.

This recipe calls for some very specific ingredients and if you can get them, great! If not, you can always adapt the recipe to what you can get. However, I would not recommended using regular orange sweet potatoes in this recipe. Like I said, purples are starchier and sturdier, more like a real potatoes than creamy orange sweets. If you cannot get purples, just use regular potatoes.

Purple Sweet Potato Salad
8-10 small purple sweet potatoes, peeled and chop into chunks
2 medium carrots, diced
2 stalks of celery, diced
1/4 Sweet Maui Onion, diced finely
2 tbs sweet pickle relish
1/2  to 1 cup  Maui Sweet Onion by Rainbow of Tastes
Salt and pepper, to taste

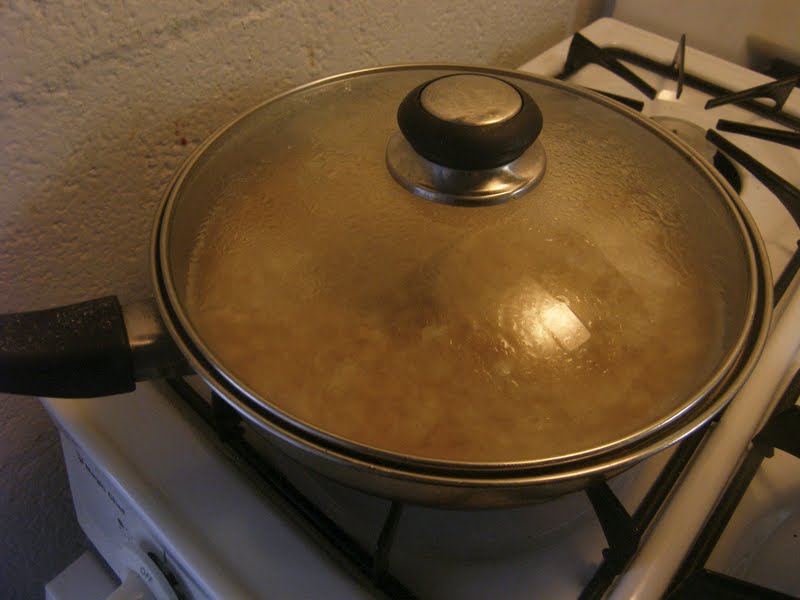
Fill a pot 2/3 of the way with cold water.

They aren’t solid purple, more like marbled.

Rinse, peel, and chop the sweet potatoes into chunks. Put in the pot and bring to boil over medium-high heat.

 You can shred the carrots if you like too.

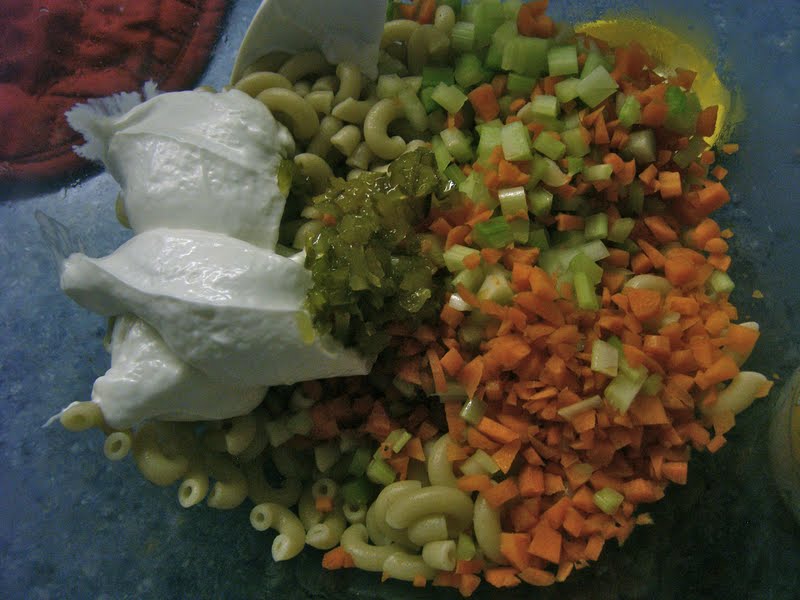
While the potatoes cook, dice the carrots, celery, and onions.


Still purple when cooked.

Once the potatoes are soft enough for a fork to be inserted with little resistance, remove from the heat and drain. You do not want them totally smushy like for mashed potatoes, but soft enough to eat and still remain in chunks. Do not rinse, it will make them smushy. Let them cool for a few minutes. The potatoes will absorb more flavor while warm, so don’t let them cool entirely before dressing.

I should have got a bigger bowl…

In a large bowl, add the potatoes, diced veggies, relish, and dressing. I recommend putting the dressing in a little at a time so you don’t over do it. It takes a minute for it to absorb. Mix it all together, seasoning with salt and pepper to taste. Try not to mash up the potatoes too much.

Cover and let it chill in the fridge for at least 2 hours.

I love the colors, and the sweet onion dressing is the perfect compliment to the sweet potatoes.
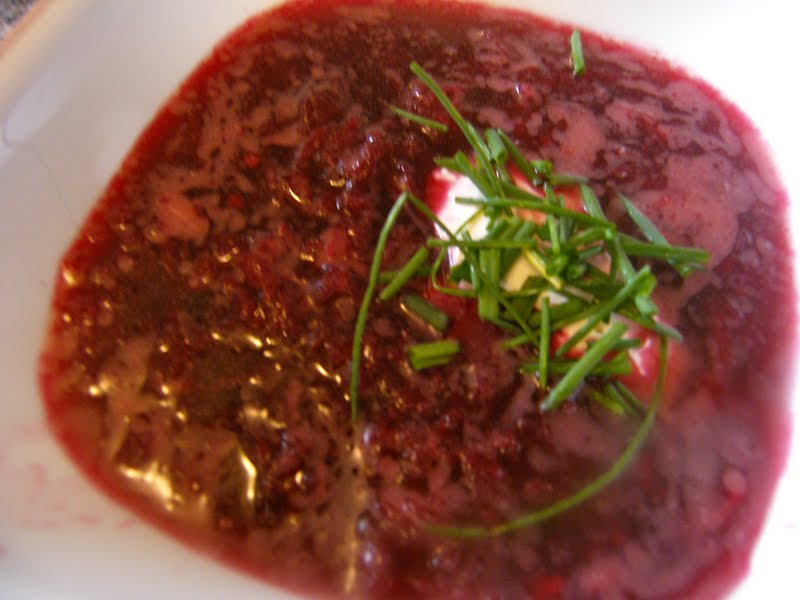
Quinoa with Cucumber and Clilantro Salad

Quinoa is one of my favorite foods. It’s been a staple of most South American cultures for centuries. My Bolivian friend Leslie has asked me several times to post a recipe with it.  It is eaten like a grain, but actually is a seed. It’s related to spinach and beets. It’s a very strong little bugger, capable of surviving in poor soil and high altitudes. 

It’s a complete protein, and is high in calcium, iron, and fiber. And it’s gluten free, so it’s great for people with gluten allergies. Don’t listen to the rumors it tastes like mud. Unwashed quinoa is a bit muddy tasting, but majority of the quinoa sold in stores is washed so don’t worry about it. I think it tastes like any other grain, like rice or wheat. I like it because it has a soft texture.

I came up with this recipe by myself. Every time I Skype with Leslie, she asks me for a simple quinoa dish and this is what kept coming to mind. Once again, all my veggies came from the Hilo Farmers Market and were very cheap. The veggies, including the garlic and onion, are raw in this dish. Raw veggies hold more of their nutrients and although I am not really into the whole raw food diet, it is still important to eat raw veggies often. Raw garlic is amazing for your digestion, just eat it in small dozes so it isn’t overwhelming. I use canned beans because even I think soaking dried beans is a pain.

Funny story how I got my quinoa. I drove to Kona last weekend to have some nice beach time before finals and met some nice tourists. They rented a timeshare so they cooked some of their meals. They were leaving that day and offered to give me their unopened stuff. Score for a broke college kid! Thanks Jason and Rick! 
 

Quinoa with Cucumber and Cilantro Salad
1 cup quinoa
2 cups water
1 large cucumber
1 large tomato
1 can of red kidney beans, drained and rinsed
1/2 medium onion
1 clove of garlic
1/2 cup fresh cilantro
1 tbs lime juice
1 tbs olive oil
Red pepper flakes, to taste
Salt and pepper, to taste

Add the quinoa and water to a pot, and bring to a boil. Then cover and reduce to a simmer.

They must be Duck fans, they yell “O,” ha!

Cook for 10-15 minutes, until all the water is absorbed and the grains are translucent with the little inner ring is visible. Set aside to cool while you make the salad. Hot quinoa will warm your salad and wilt the cilantro. 

I add a lot of red pepper because I like it hot.

Chop the cucumber and tomato into bit-sized pieces. Finely chop the onion and garlic. Remove the cilantro leafs from the steam and chop if you desire (I left mine whole, they aren’t that big). Drain and rinse the kidney beans. Add everything to a large bowl and mix.

Although it’s good fat, it’s still fat so don’t over do it with the oil.

Next add the lime juice, olive, oil, red pepper, and salt and pepper. Mix well to coat everything evenly. I suggest under red-peppering  and salting at first, it takes a little for them to reach full potency.  I chilled mine for a half an hour before serving to let the flavors really set in.

You can mix the quinoa in with the veggies or just serve the salad on top. I just topped mine. I am so glad I finally made this, I’ve been thinking about it for awhile.

Clean, crispy, but very filling.

Italian Herb Oat Bread

Italian Herb Oat Bread

My mom was a baker for several years, so I grew up eating delicious homemade breads. I loved coming home from school to the smell of fresh baked sourdough or banana bread. Since I  inherited most of my cooking skills from her, I am giving baking a shot too. I found a recipe from Alicia Silverstone’s website  The Kind Life for Rustic Bread and Eggplant Lasagna (which I will be making tonight and will post later) and thought it would be a good opportunity to make the bread for it. Her recipe calls for sourdough, which is beyond my skill level at the moment so I decided to make something using the ingredients I have on hand.  I made up this recipe based on my current knowledge and some web research.  Since it is for a lasagna, I thought an Italian bread would be lovely. I also love the texture of oat bread so I decided to attempt a Italian-ish, oat-ish bread.  I drew inspiration from two recipies, both from Veg Web. The first is for Outrageously Easy BIG Bread, which I have made before, and is exactly what the title promises.  The second is for Garlic & Basil Bread, which I thought would fulfill the Italian part of desired outcome. I consulted my mom on the oats. I have instant oatmeal and old fashion oats in the cupboard, she told me that instant oats were a bad choice so I went with the old fashioned. I live in sunny and humid Hawaii, so my dough rises pretty quick and usually has the perfect texture without adding extra water or flour. You will need to adjust according to your climate. My mom told me that baking is done best by feel, so do what you feel is right.

Italian Herb Oat Bread
1 packet active yeast
1 cup warm water
1 tps brown sugar
3 cups white flour
1 tbs olive oil
1/2 tbs dried Italian seasoning
1/2 tps garlic salt
1/2 cup old fashion oats

Proof the yeast by add the packet of yeast to the warm water. I usually do this all in a measuring cup. The water should be warm to touch but not hot (about 105 degrees F if you want to measure it). My mom told me the water should be a bit cooler than you think it should be. Once it is fairly dissolved, add the sugar. It’s ready when it gets all bubbly and frothy. If nothing happens, your water was either too hot (my problem when I first started making dough) or too cold. Or, your yeast could be bad too. You will have to throw it out and try again.

In a large bowl, mix together the flour, oats, basil, and garlic salt then add the oil on the top. Once your yeast is ready, add it to the dry mixture and carefully mix. Work until it all comes together into a doughy ball. The dough should be moist and pliable. If it’s too gooey, add a bit more flour until it reaches the right consistency.

Cover the bowl with a moist towel and set aside to rise for about 45 minutes.

Risen twice and kneaded

Once the dough has puffed up, put it on to a well-floured countertop and knead gently.  Try not to overwork the dough, otherwise it gets tough and chewy. Just work it until it’s smooth and soft, but not overly wet. Add additional flour as needed.

Shape into a loaf or whatever shape you desire, cover with a cloth and let it rise again for another 30 to 45 minutes.

Pre-heat oven to 375 degrees F.

I checked mine after 45 minutes since my oven isn’t the greatest.
After it’s done rising the second time, place on a baking sheet or baking pan. Cut a few shallow slits in the top. Brush on a little olive oil or an egg substitute so it gets golden and crunchy. Sprinkle some oats on top for decoration if you desire.

Bake for about 45 minutes, adjusting the time for your oven (I have a crappy dorm room oven so mine takes 5-10 minutes longer some times). It should have a nice golden crust on the top.

Let it cool for an hour before slicing.


It smells soooo good. It’s hard to resist, but let it cool a bit, it’s easier to cut.