There is no question that America is an consumerism-drive country. I have a love-hate relationship with this idea, especially in terms of parenting. You really don’t need a lot of stuff to raise a child. And it gets overwhelming for parents to decide what stuff is the best for their child. Part of my life’s mission and the purpose of this blog is to live a more simple life.
But that being said, stuff does make parenting easier. And easy is definitely a big part of a simple life. I have come to terms with the idea of parenting with a few, good quality items is vital.
These vital items will look different based on your lifestyle, parenting choices, and family’s needs. Thus, it is hard to make blanket statements on what is the “best” this and best “that”. Just like I say when I am teach babywearing, there is no such thing as the perfect carrier for everyone, but some where is a perfect carrier for you! You just need to look, try, and think to find it—baby carrier or any other product.
This is why I highly suggest baby/kid/parenting expos. Events where many retailers, businesses, and organizations have tables, displays, and demonstrations of their services and products. They usually have a mix of local and national companies. It’s a great way to see what products and services there are, and even compare offerings.
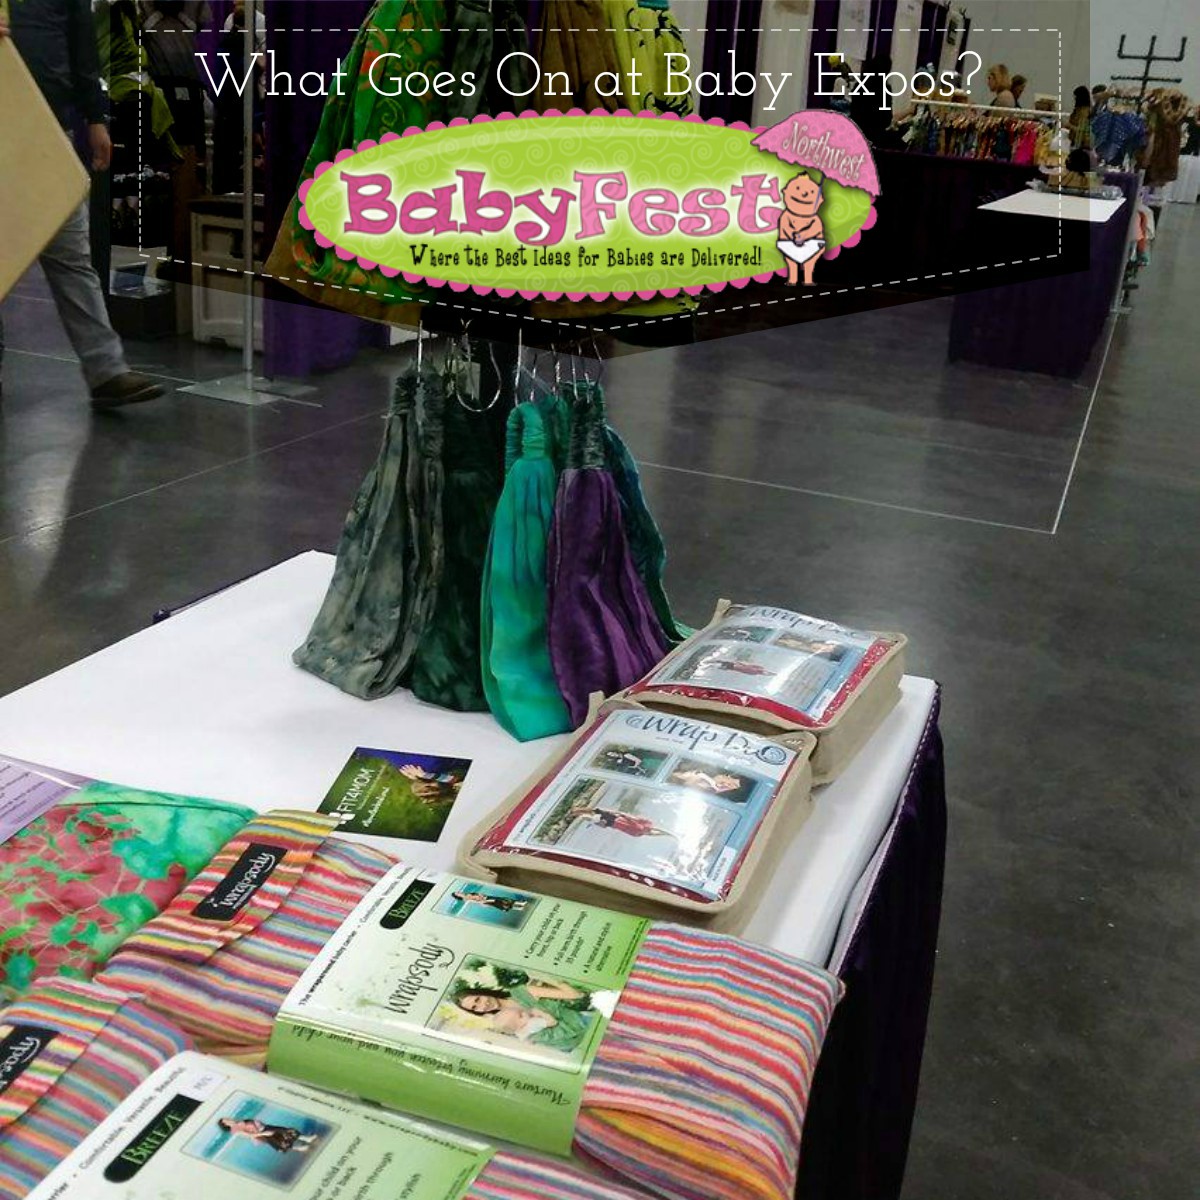
 One such event in BabyFest Northwest. This year was my second year attending and it’s truly a fun, jammed-packed event. Last year I taught in the Babywearing Lounge for Babywearing International of Portland and attended as normal attendee. This year I was very busy working/teaching at the Wrapsody booth and covering it as a blogger.
 Speaking as a retailer/organization representative, we put our heart and soul into these events. We want everyone and anyone to come to our booth. We want to talk to you and hear about your family. We want to share how our product can help your family. And sometimes we event want to give you stuff or offer you a discount for coming to talk to us. So please stop by every booth possible, we are there for YOU!
 At BabyFest this year, I stood in front of the booth greeting everyone and handing out as many Wrapsody stickers as possible. I truly wanted to hear everyone’s story and see if our product could help them. And honestly, for some people our product was not the best fit. I pointed them to another booth and thanked them for chatting with me. This is a great way to not only share our product, but to gauge the needs of our customers. Hearing directly from them what they want and need. So please, talk to the booths! We want to share and have you share with us.
 Now, speaking as an attendee/blogger, all this booth visiting can be overwhelming! There can easily be 100+ retailers, organizations,and companies to check-out. If you are pregnant, bringing kids—or both— it might be impossible to talk to everyone! Don’t feel bad if this doesn’t happen.
My advice is to make a plan. Find the list of who is going to be there beforehand if you can. Check out each booth and see if it’s something you might like. When you get to the event, check out the map when you first get there. Find where the booths you don’t want to miss are and plan a simple route to include as many as possible. That way you don’t miss something you really want to check out! While you follow your route, don’t forget to check out all the booths you can along the way. You might find something awesome you didn’t even know about!
 You don’t have to spend 30 minutes chatting at every booth, or even 5 minutes really. But don’t just snag the swag and run off. Say hello! Ask about the product or service. Are they local? Can you find them in store? Order online only? Suitable for what ages? You get the idea. You may discover this was the exact thing you were looking for, if you take a little time.
For example, across from the Wrapsody booth was Grapple. I was so busy I never got a chance to walk over to say hi. I saw the toy on their table, but didn’t think too much of it. Later on I noticed one in my gift bag. It’s exactly the toy I’ve been wanting for Bear! I had no idea because I never asked.
BabyFest had amenities to make navigating the crowds easier too. Many booths had places to sit if you needed a break.
There were plenty of bathrooms. Concession stands and Snack Bars for food and drinks (though you are welcome to bring your own food too).
A nursing/pump lounge with plenty of chairs and tables for your comfort.

Whether you come for a few hours or the whole day, expos like BabyFest are a great way to learn what you want in terms of baby products. So brave the crowds and come see for yourself!


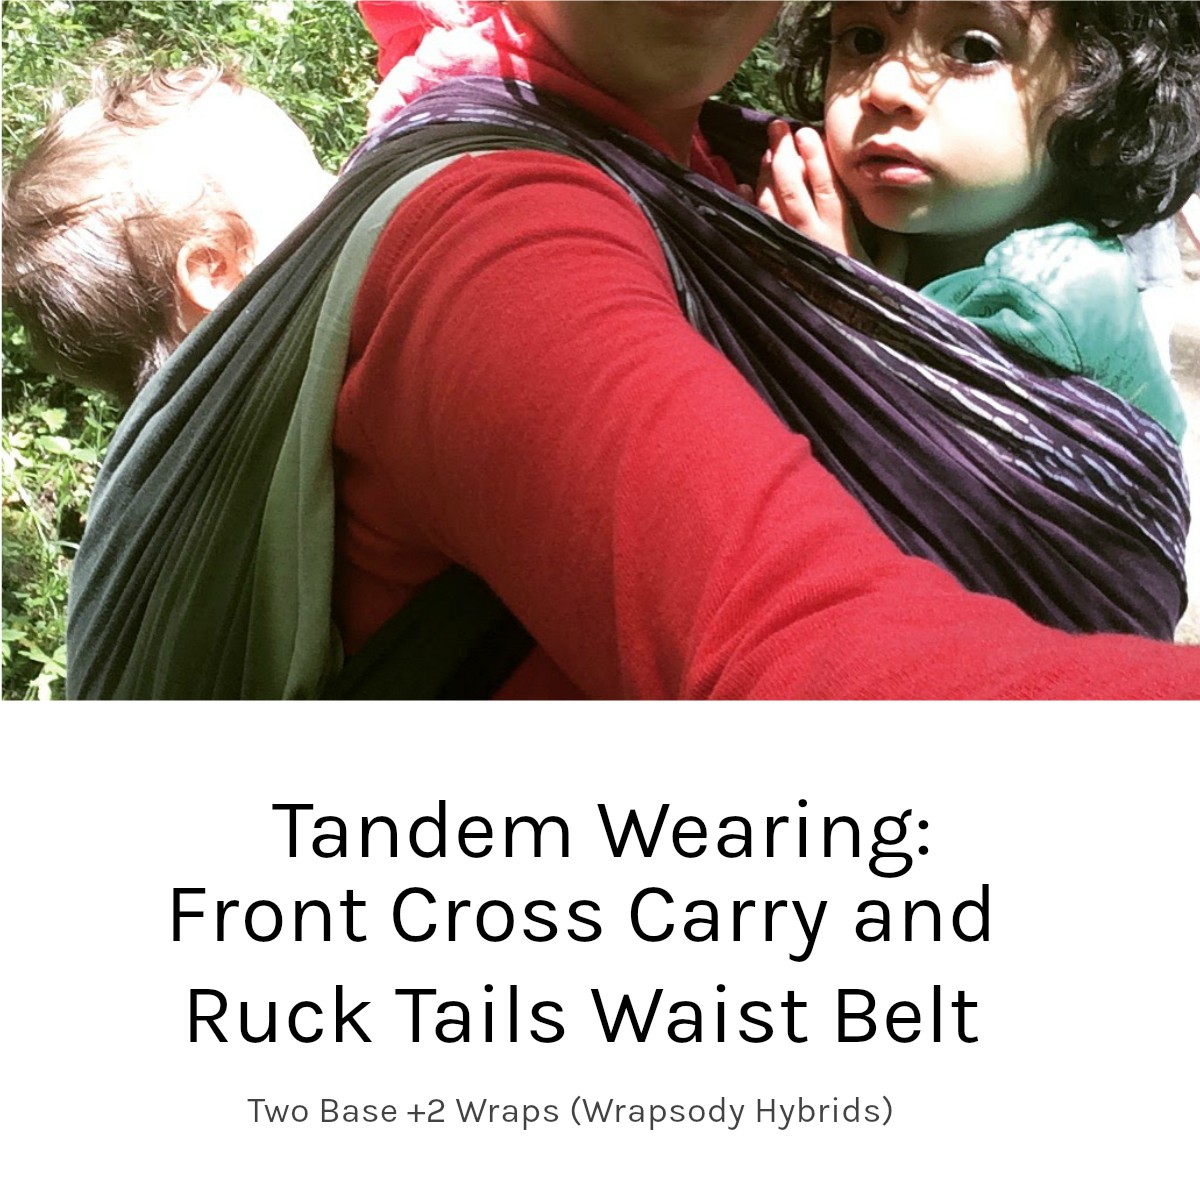
 The variation starts just like a Tied At Shoulder Slip Knot. Measure about twice your basic often distance, place that spot on baby’s back, get baby up, and make a seat. Bring the longer tail under your arm and around your chest for a chest pass. Then spread the fabric over’s baby back for sling pass. Bring that that same tail around under your arm for a bunched horizontal pass over both of baby’s legs.


 Like with the other previously mentioned tied at shoulder finishes, this carry has no cross passes. So this carry may not work for seat poppers. The bunched horizontal pass does make it good for leaners though.


 Now start twisting the tails together tightly across your chest. The number of twists needed will vary depending on your body shape. The chest belt should be long enough to just reach your other shoulder. Too short and it will pinch your chest together. Too long and it won’t be supportive.

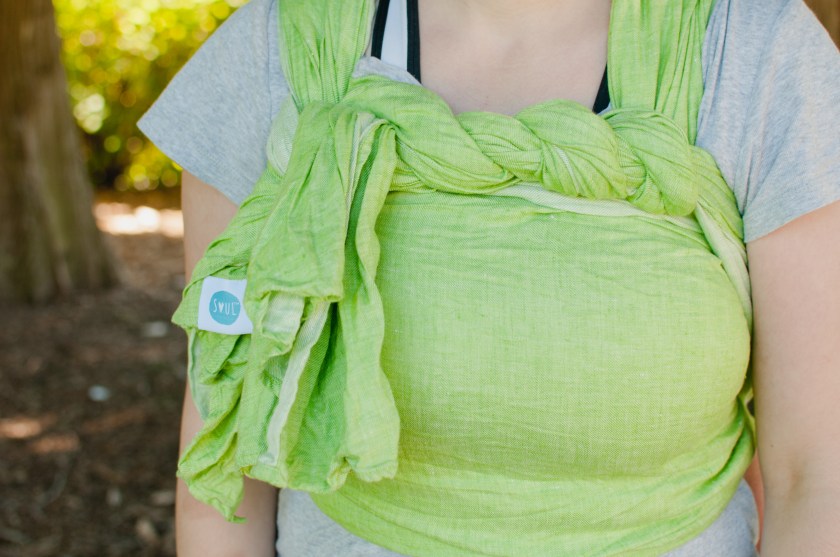


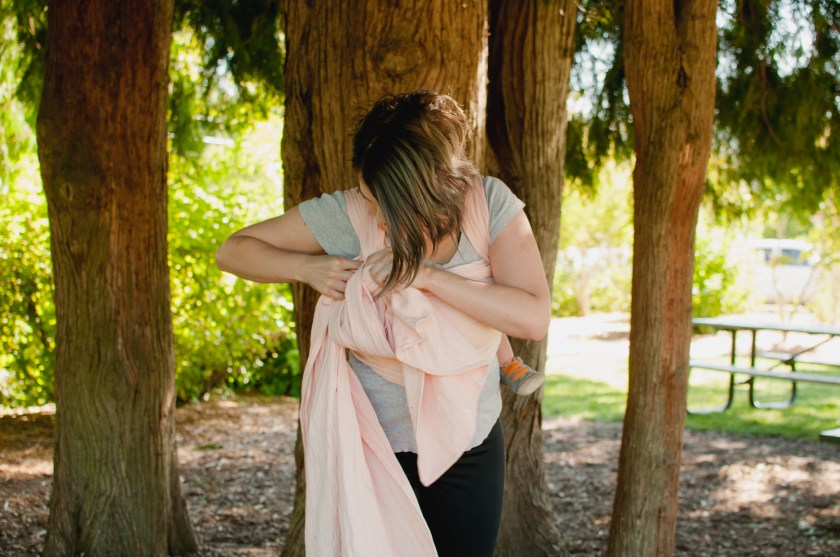
 Now bring the longer tail back over the shorter tail towards your right again. Loop it behind the shorter tail again. Pull it up through the center of the loop on the left side of the shorter tail again. Essentially, you made of the same loops around the shorter tail.
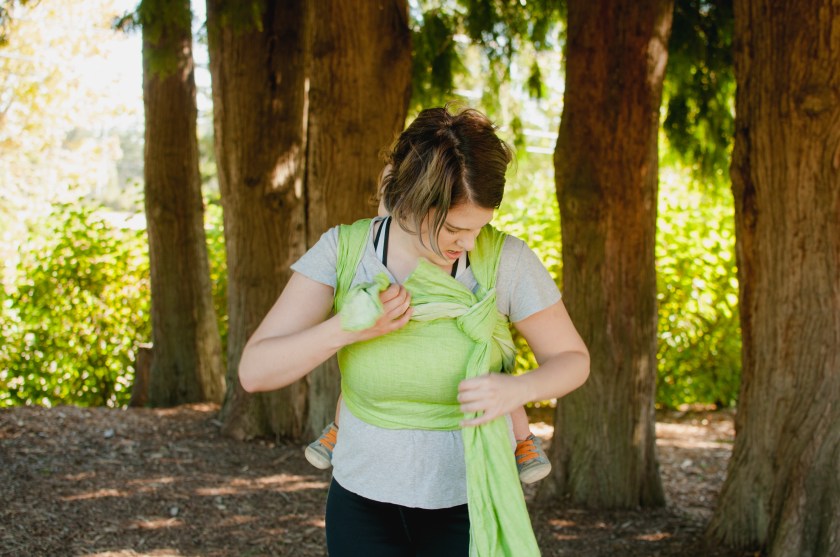 Pull the longer tail to the right to secure the knot.
 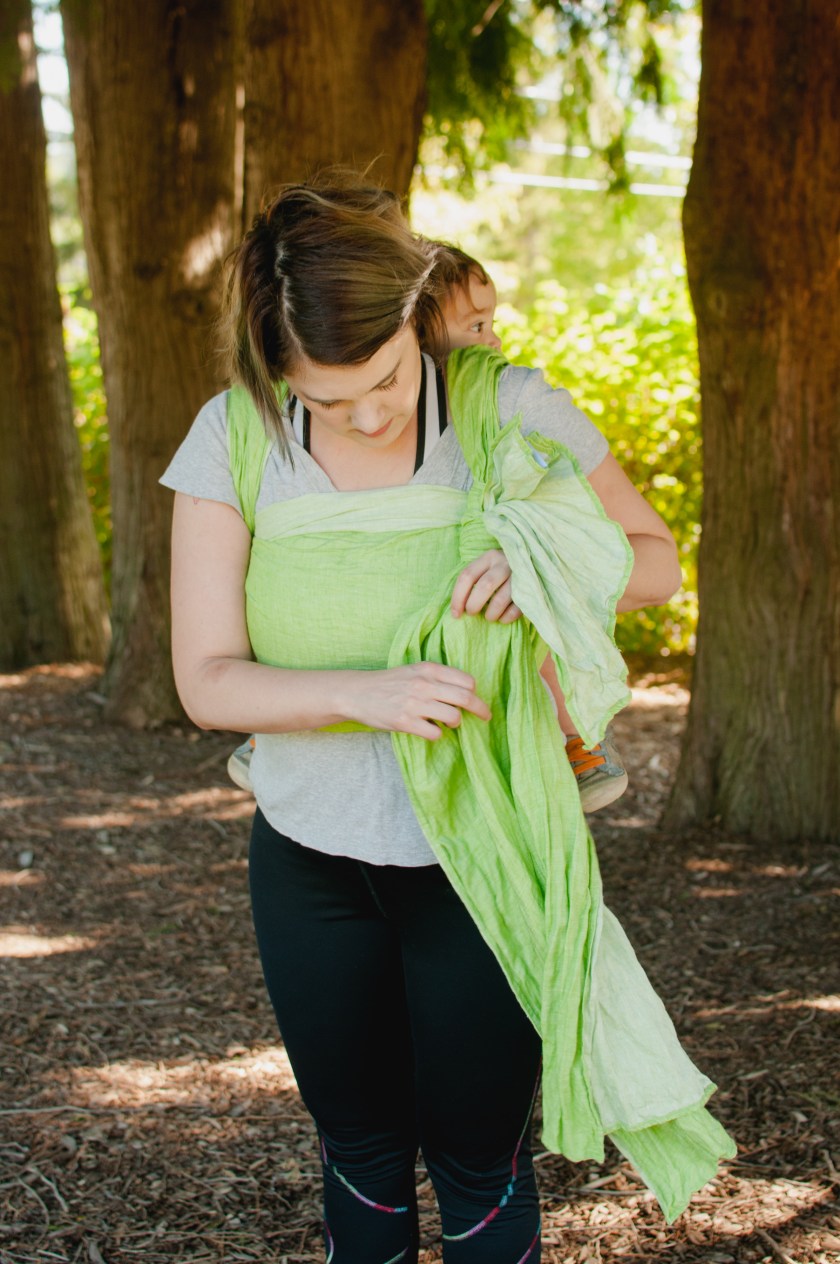 You can tighten the carry by feeding the extra slack towards the knot and out the tail. It’s best to tighten in three sections: the top rail (the one closest to your ear), the middle of the wrap, and the bottom rail (the one closest to you shoulder).
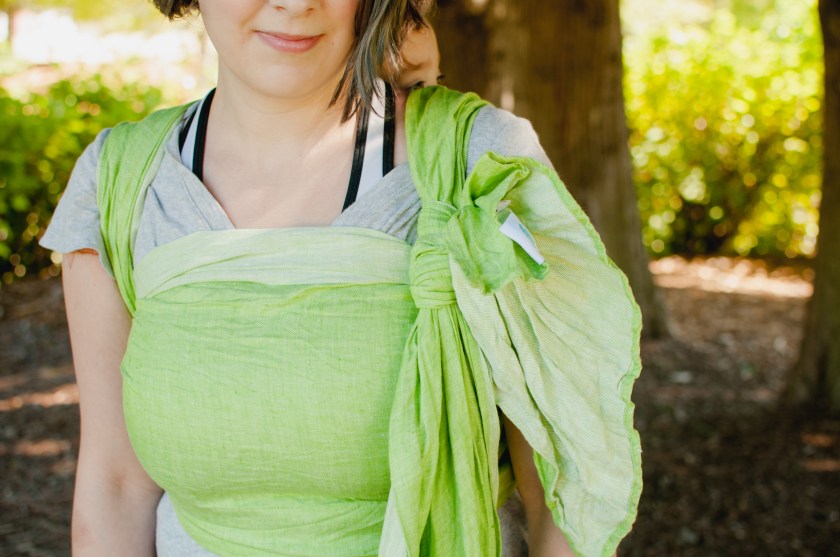


 You can tie it in the front. You can tie it in the back. And guess what, you can tie on the side!


 Once you get the
 What is a contact point? Put simply, it is a place during the wrapping process where you could naturally tie off the tails. The most common place is in front at your waist, like in a basic Double Hammock. However, if your wrap is longer or shorter than your base size, this might not be the best option—or even possible.


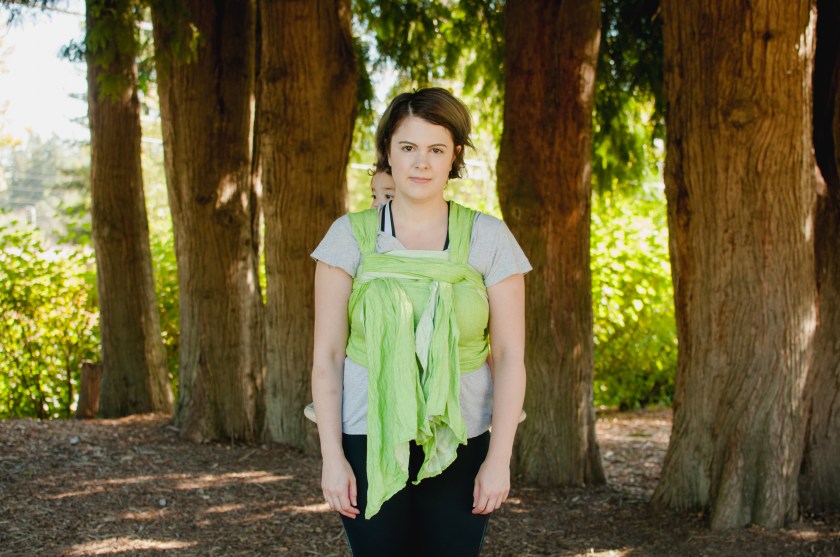
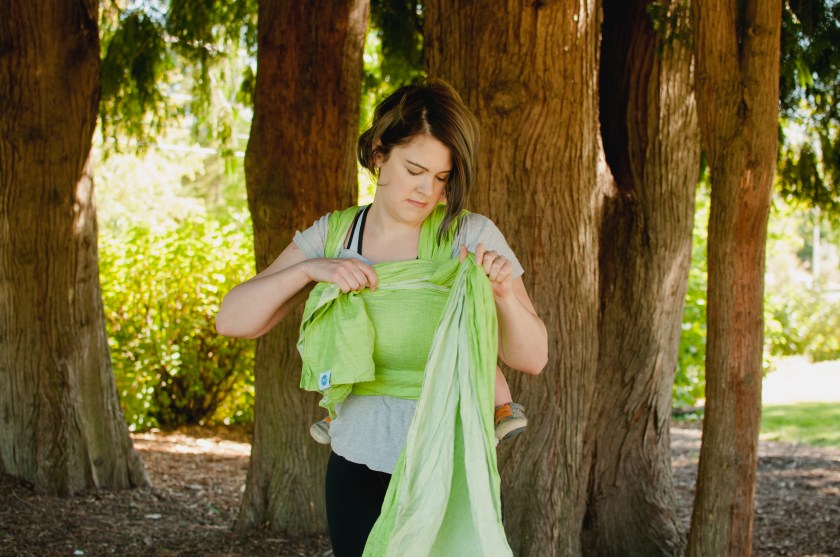
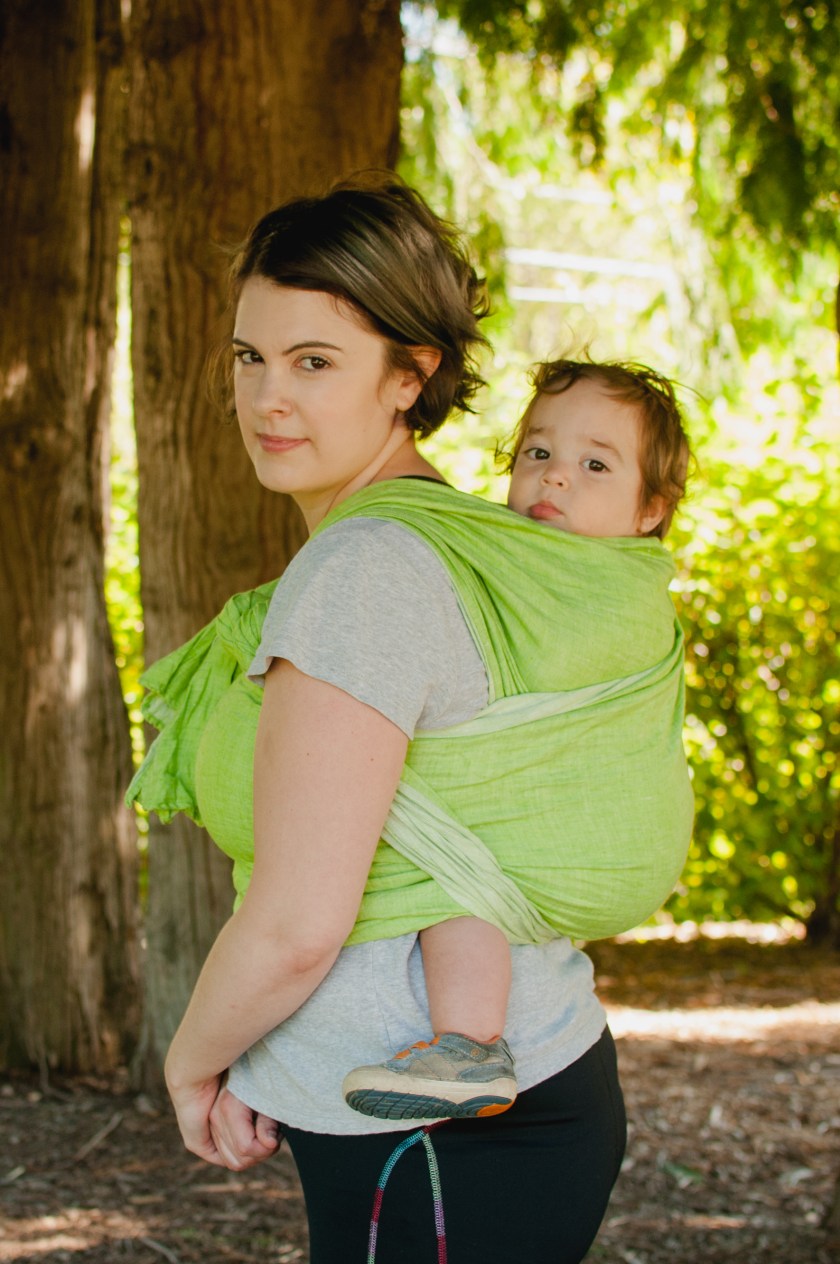
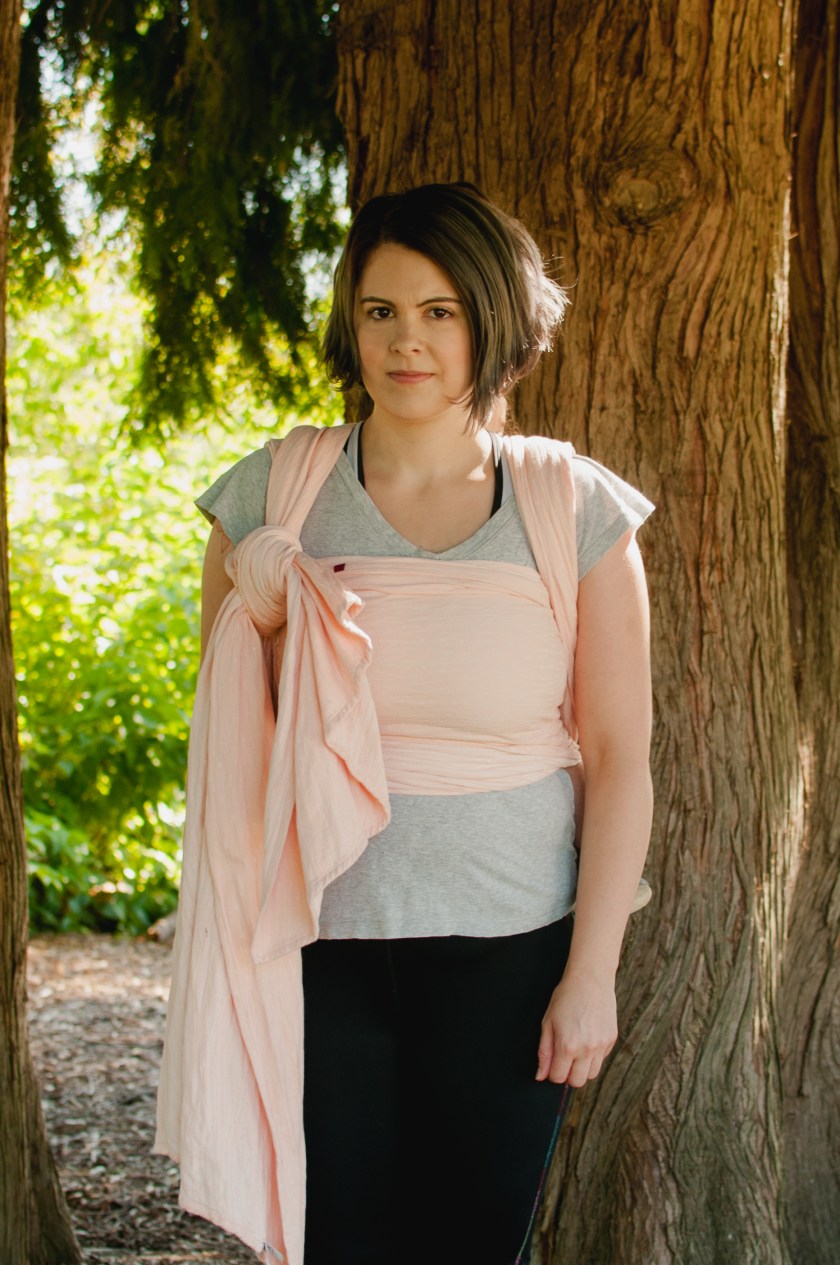
 We can’t explore all the variations without first learning the basic Double Hammock. Why bother learning the “boring” version if there are so many other fun options? Because this version is actually anything but basic!
 Double Hammocks are what are referred to as an “off center” carry”. This simply means the center of the wrap is not over the center of baby’s back.
 The best way to do this is by having the middle of the wrap in the middle of your chest. Realistically, exact center of your chest doesn’t always happen. Some people do this by simply pulling an arm’s length off from center or measuring the exact spot on your back.
 That spot then goes on baby’s back and up baby goes!
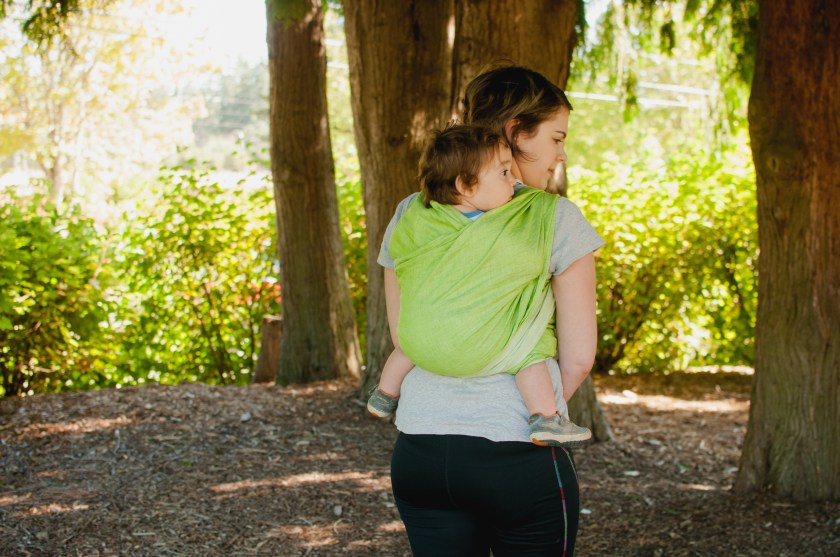
  Make a seat (
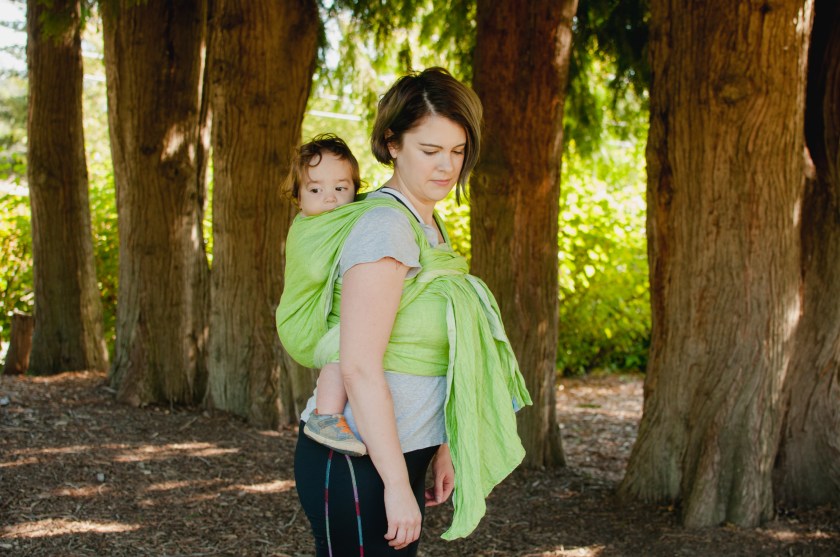
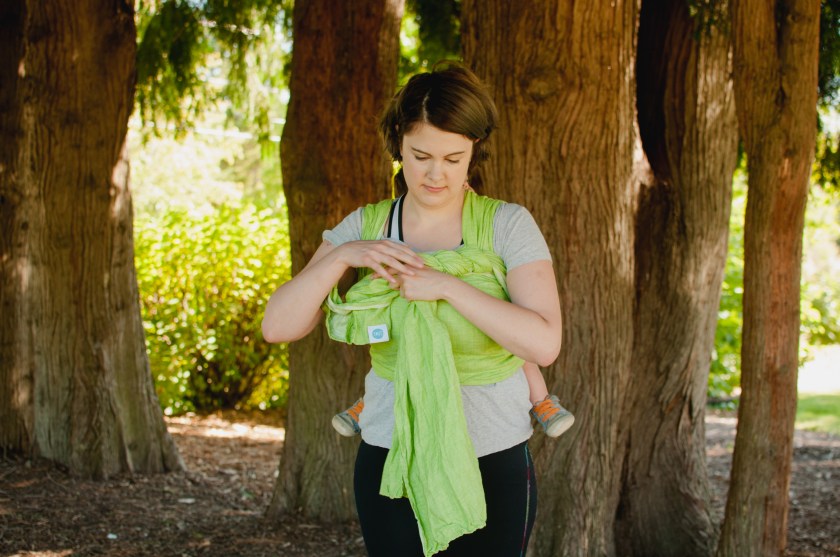
 While holding the tension on both tails, tighten the slack out of both shoulders.
 Bring the longer tail under your arm, to your side.
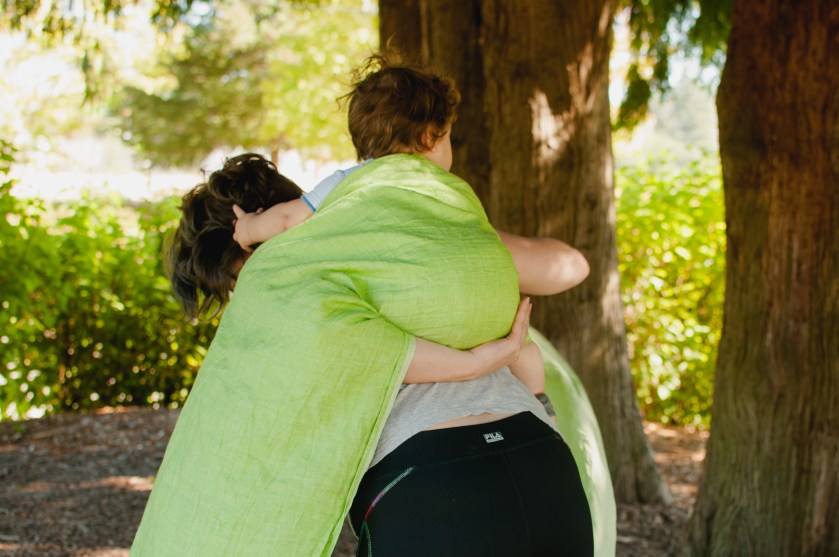
  Bring the long tail across your chest, under the opposite tail. I do this with the pass bunched, then spread it out in later. Other spread it out from the start. It’s just personal preference. I like bunched because it’s one less time I have to let go of the wrap (potentially losing tension) before I get the pass tightened at all.
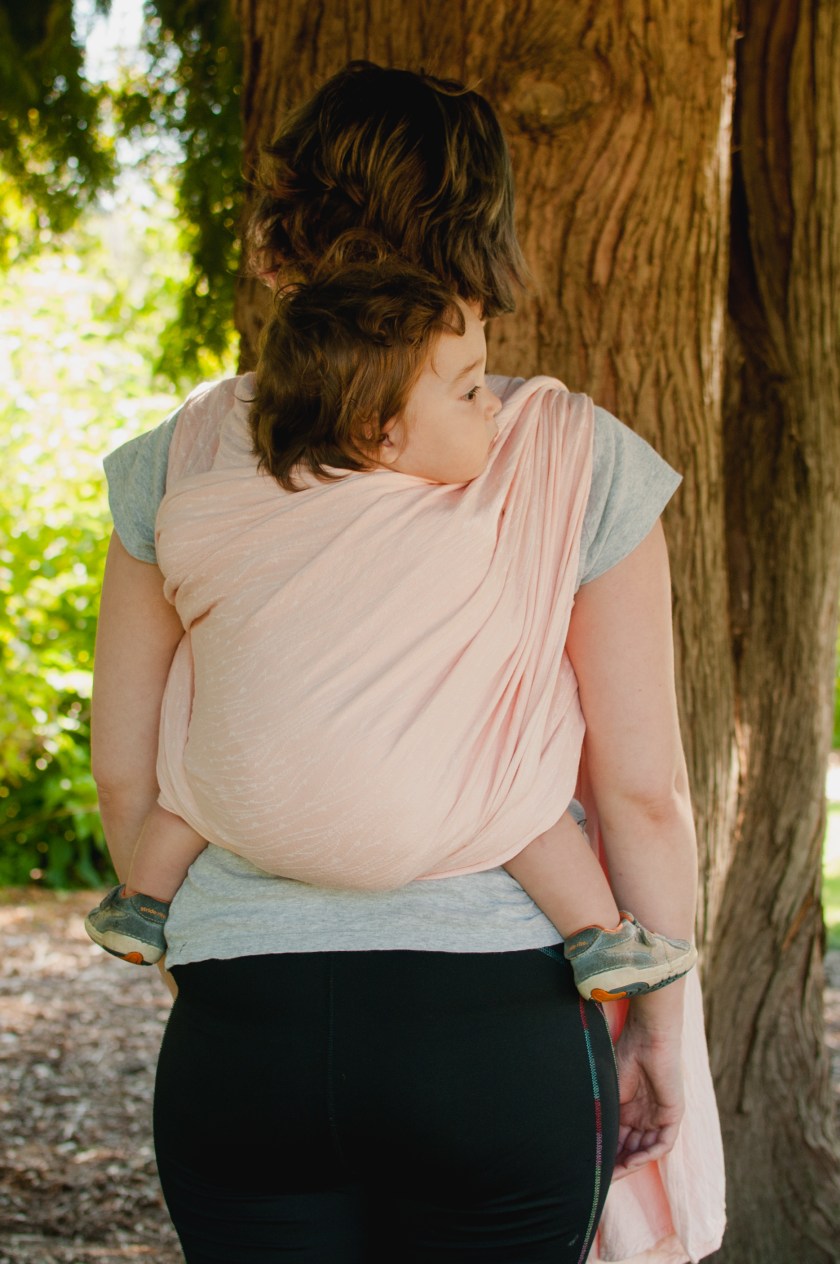
 Bring the wrap under your opposite arm and across baby’s back. Make a second seat as well.
 Take your time to get as much slack as you can. Work section by section.
 Bring then tail over your shoulder now and get out any more slack you can. This is when I spread out my pass and get all final adjustments.
 Then brunch up the tails and bring each one over the leg on the same side, across baby’s baby bottom and under the opposite leg.
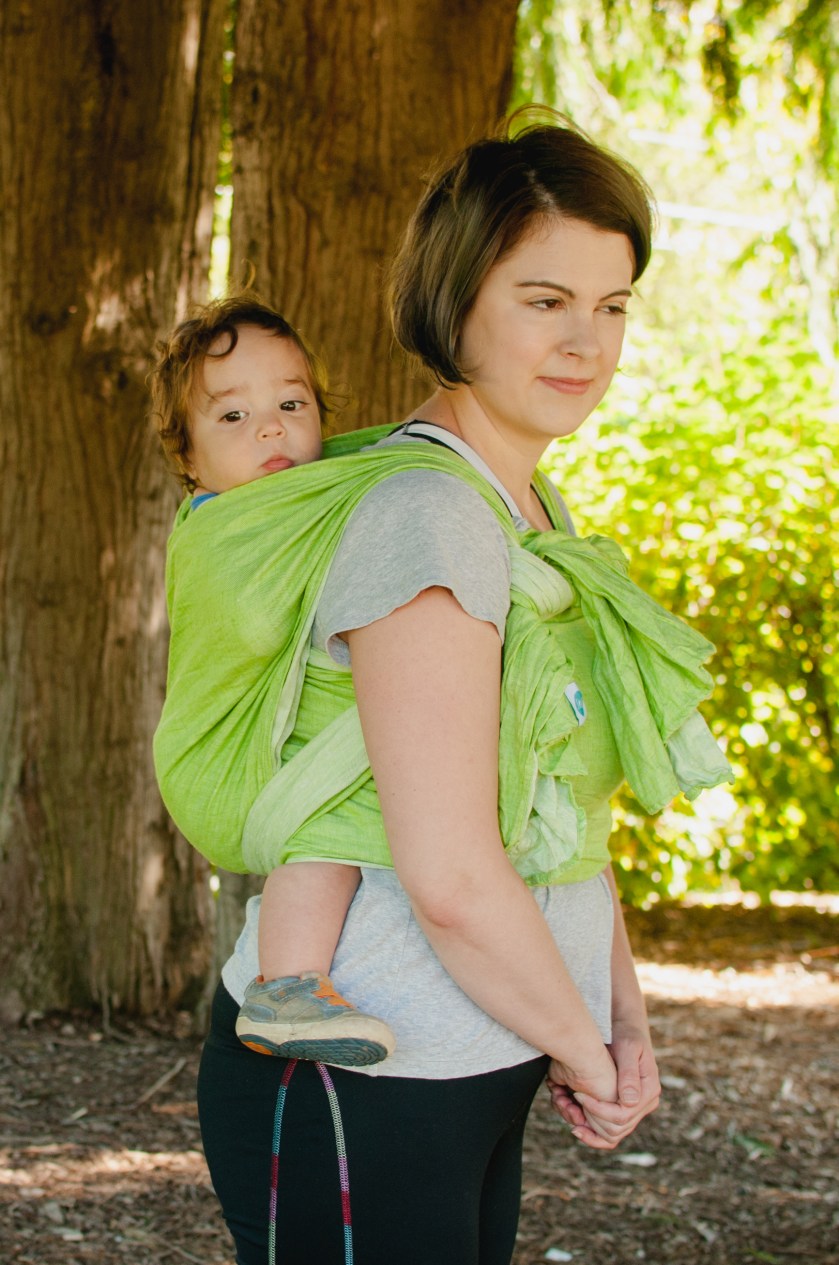
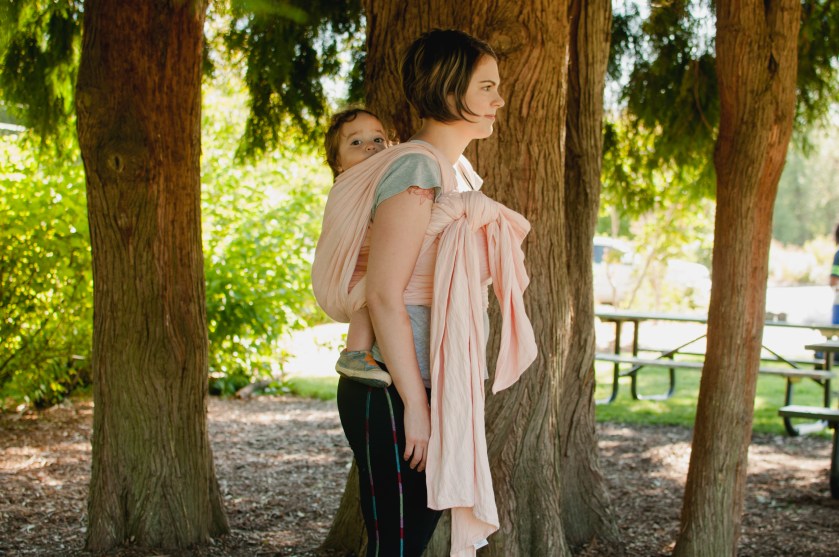
  And there you go, the Double Hammock magic!
  No pressure on the shoulders.
  A reinforced and pinned down seat. What’s not to love?
 Lean forward and keep a hand on baby’s bottom. Untie the knot and undo the bunched passes.
 Bring the wrap around to your from and let the chest pass come undone.
  Slow and controlled, bring baby around to your hip with both hands.
 Then set baby down and let them be free!
 Once you master this basic foundation, you will be ready to start your journey into the fun variations!


 Hammock it. Tie a secure knot around your kitchen table and let your kids lounge in style! I wanted to note, this is best for toddlers and old who know how to get in and our easily. They also have more developed airways and can more easily remove fabric from their face. Also never leave a kid of any age unsupervised in a wrap hammock.