Broccoli and Parsnip Risotto

I don’t really have a cute story to go with this recipe. I had orzo pasta, broccoli, and parsnips. I thought a creamy pasta dish with some crisp vegetables would be nice for lunch. Yeah…that’s about it.

One ladle at a time…

I love risotto, but hate that it’s usually loaded with a ton of cheese, cream, and butter. Too rich and heavy. I like creamy without all that junk. My recipe only has a bit of vegan cheese and some olive oil–just it’s still rich and creamy. Also, I don’t love that it takes an hour to make well. And you can’t rush it, just be patience.

“This is taking forever, I’m hungry!”

Jack didn’t like that either, he had to go up in a back carry to keep him happy. However, he was more than happy to eat it!

Broccoli and Parsnip Risotto 
6 cups vegetable broth (or you can do like I did, 5 cups water with 1 cup of pureed vegetable baby food)
2 tbs olive oil, divided
1/2 large onion, chopped
2 cloves of garlic, minced
2 large parsnips, chopped
1 head of broccoli, chopped
1 cup orzo
1/4 cup nutritional yeast
1/2 cup vegan mozzarella cheese
Salt and pepper, to taste

In a large pot, bring the vegetable to a simmer over medium-low heat.

In a skillet over medium-high heat, heat one tablespoon of olive oil. Add the chopped onion and cook until translucent.

Add the parsnips and cook until tender.

Add the garlic and broccoli,  took until the broccoli is tender.

Heat the remaining olive oil in a another large skillet over medium heat.

Add the orzo and brown the pasta lightly. Stir continuously to prevent burning. It’s okay if some pieces are darker than others.

Once orzo is all lightly browned, reduce heat to medium-low. Then add one ladle of hot broth to the pot, stir continuously until it is all absorbed.

Repeat adding one ladle of broth at a time and stirring until it is all absorbed until the pasta is tender and the broth no longer absorbs easily. This will take around an hour to complete. Don’t rush it by turning up the heat or adding more than one ladleful.

Before you add your last ladle or so, add the broccoli and parsnips to the skillet.

Once the pasta is tender, remove from the heat and stir in the nutritional yeast.

Top with the mozzarella and enjoy!

Creamy, filling, and loaded with veggies. Your patience has been rewarded!

Advertisement

Samosa Casserole with Cilantro Gravy

This recipe is one of the freezer meals I made a few weeks ago. I wanted something filling and flavorful to enjoy after a long, hard day. I thought of freezing one of my Samosa Pizzas, but I didn’t quite know how to store that. Then I though a casserole would be nice, very hearty from all the potatoes and it would freeze very well. And I had just bought a big bag of sweet potatoes, too.  So I essentially made a bigger batch of the potato filling from my pizza recipe, but used sweet potatoes instead. As for the gravy, I wanted something more the usual cilantro chutney. Something creamier, to really stand up to the sweet potatoes.Like how well hash browns go with saw-mill gravy. So I made up a cilantro version.

I made the casserole in disposable pan and covered it in foil. The gravy I made the day of, but you could freezer it as well. Just put it in a freezer bag.

This recipe makes one 8 X 10 pan, and 1 cup of gravy.
Samosa Casserole with Cilantro Gravy
Filling

3 large sweet potatoes, peeled and quartered
2 tbs vegan butter (I used Earth Balance)
1 tsp cumin seeds
1 tsp fennel seeds
2 tsp coriander powder
2 tsp mango powder
3 cloves of garlic, minced
1/2 tbs ginger, peeled and minced

1 medium onion, diced
1/2 tsp garam masala

2 cups frozen peas and carrots (or any other vegetable mixture you like)
Dough 
2 cups baking mix (I used Bisquick)
2/3 cup water
2 tbs tamarind chutney
Gravy 
1 bunch of cilantro
1 cup water
3 tbs olive oil
1/4 tsp fennel seeds
1/4 tsp cumin seeds
1/4 tsp chili powder
1/4 tsp garlic salt
2 tbs flour

Add the peeled sweet potatoes to a pot of cold water. Bring to a boil. Cook until they are soft.

While the potatoes boil, in a small pot add the vegan butter and melt over medium heat.

Add the cumin seeds, fennel seeds, coriander powder, and mango powder. Cook for 1 minute, until fragrant.

Add the garlic, ginger, and onions. Cook until the onions soften a little and it’s very fragrant.

Turn off heat and set aside.

Once the potatoes are soft, drain well and return to the pot.

Add the frozen peas and carrots, and the spice/oil mixture. Mix well. Season with salt and pepper to taste. Then set aside.

In a large bowl, combine the baking mix, water, and tamarind chutney. It should make a wet dough, like for dumplings. Set aside.

Spray a casserole pan with cooking spray.

Spread the potato filling evenly.

Tear off dumpling-size pieces of the dough and evenly distribute over the filling.

Cover with foil.

To make the gravy,  blend the cilantro and water in a blender or food processor until smooth. Set aside.

add the oil to small pot over medium heat.

Once the oil is heated, add the fennel, cumin seeds, chili powder, and garlic salt. Cook for 1 minute, until fragrant.

Add the flour and quickly whisk it into the oil. Cook for 1 minute.

Add the pureed cilantro and whisk in quickly.

Cook for 3-5 minutes, until it begins to thicken slightly.

Remove from the heat and pour into another container to cool

Now you can let it cool, then pop it in the freezer.  Or you can bake at 400 degrees for 10-15 minutes. To bake after being frozen, 400 degrees for 25-30 minutes. To thaw the gravy, place it in warm water and heat in a pot on the stove once it’s liquid again. You may need to add a bit more water on the stove to keep it from thickening too much.

I popped this in the oven after a long road trip to LA and back this weekend. It was totally what my whole family needed. Nutritious, tasty, and filling, Even the baby loved it. I hope your family loves it too!

Curry Vegetable Quinoa


One day I wanted fried rice, but I had no rice. But I had quinoa though. Then I realized I had no soy sauce. But I had a ton of Indian spices. So I looked up what I could make and came across a recipe from Manjula’s Kitchen called Quinoa Vegetable Pilaf. It looked good so I decided to make my own version.

Curry Vegetable Quinoa
1 cup quinoa
2 cups water
Dash of salt
1 tbs coconut oil
1/2 tsp cumin seeds
1/2 tsp fennel seeds
1 tsp curry powder
1 tsp chili powder
1/2 piece of ginger, pealed and minced
1 small white onion
Kernels from 2 ears of corn 
1 red bell pepper, chopped
1 small head of broccoli, chopped into bite-sized pieces 
3/4 cup tomato juice
1 jalapeno, minced
Dash of asafetida
Salt and pepper, to taste
Cilnatro

In a small pot, add the quinoa, water, and salt. Bring to a boil then reduce to a simmer. Cook for about 15 minutes, until the water is absorbed. 

While that cooks, heat the coconut oil in large skillet over medium heat. 

Add the cumin seeds, fennel seeds, curry powder, and chili powder. Cook for a minute, just until it becomes fragrant. 

Add the ginger and onions. Cook until the onions are soft. 

Add the corn kernels, bell pepper, and broccoli. Cook until the veggies are tender. 

Once the quinoa is done, fluffy gently with a fork and let it sit for a minute. 

Add the quinoa to the skillet. 

Add the tomato juice, jalapeno, and asafetida. Stir well.

Season with salt and pepper to taste.

Garnish with cilantro.

A flavorful Indian version of fried rice, with plenty of protein from the quinoa. No need for meat or egg!And don’t be afraid to make a big batch of this, the flavors get even better the longer it sits.

Haluski: Polish Noodles And Cabbage

Today would have been my Grandmother’s 83rd birthday. She passed away in February (see my Polish Barley Soup post) and I miss her everyday.  I am sad that my baby will never get to know what beautiful and loving person his Great Grandma was, but I am happy her bloodline gets to live on through him. I promise to make him (healthier versions of) Pierogi and kapusta while telling him the stories about her life on the farm in upstate New York and how our family came over from Poland. That is the best way I can honor her memory. I will make sure he is proud little Polish boy, just like she taught me be a proud little Polish girl.

I decided to make a healthier version of a traditional Polish dish, Haluski. It is a simple pan-fried noodle and cabbage dish common in most Slavic countries. I do remember my grandma making this for me once, but she never mentioned it was Polish. The dish varies a bit between the Slavic countries, but most call for a lot of butter and a giant glob of sour cream. Not vegan or healthy. So I cut out the sour cream, and used far less vegan butter. Also, I used a cabbage/kale mix and added some carrots for extra nutrition.  To be very traditional, you should make your own noodles, called Kulski. I have tried a few times to make them, but have yet to master a vegan version yet, so look out for that recipe at a later date. If you aren’t making your own noodles, normally you use egg noodles, which are not vegan. So I used normal pasta (well actually broken up lasagna noodles because that is what I had on hand).

This recipe makes 4 servings.

Haluski
3 cups dry noodles or pasta (used a smaller, ribbon pasta)
2 tbs vegan butter (I used Earth Balance)
1 medium onion, chopped
4 cups cabbage/kale mix (I used Costco’s Sweet Kale Mix)
1/2 large carrots, shredded or peeled into ribbons with a peeler
1 teaspoon caraway seeds
Salt and pepper, to taste

Cook the noodles according the directions.  Drain and set aside

In a large skillet over medium heat, melt the butter.

Add the chopped onions and cook until translucent.

Add the cabbage/kale mix and the carrots ribbons. Cook until slightly softened.

Reduce the heat to low.

Add the cooked noodles and caraway seeds.

Stir everything together well. Cook until it is all heated through.

Season with salt and pepper to taste.

You can enjoy this a light main dish, or pair it with some Tofurky Kielbasa to make it complete Polish meal.

I couldn’t help but smile as I ate this, makes me happy to honor my grandma.

Thanksgiving 2013: Thanksgiving Casserole

Happy Thanksgiving! I hope you all had a wonderful day with your loved ones. We had a wonderful time in Tracy, thank you so much Lori and James for having us!

I have a lot to be thankful for this year:
  • I am thankful to have married the man of dreams two months ago. Thank you for taking care of me this past few months, I know I have not been the easiest pregnant lady.
  • I am so thankful for my unborn son (I keep forgetting to make a gender reveal post….). This pregnancy has not been very fun so far, but I know he will be worth it. I can’t wait kiss his sweet little face in April.
  • I am thankful for my amazing parents. Thank you for always supporting me and loving me. We all might be crazy, but at least we can be crazy together!
  • I am thankful for all my amazing in-laws.  Thank you to my wonderful parents-in-law for being so kind and supportive through these crazy few months. And thank you to my wonderful sisters-in-laws for being so open and accepting from moment Michael brought me home.
  • I am thankful for my cats. Penny makes me smile everyday with her antics (Did you know a cat can be condescending?). And, I am grateful for Zoey’s snuggles. I am so happy my kama’aina kitties came to California.
So, as I said in my menu post, I made a layered casserole thing. I wanted baked tofu, stuffing, and mashed potatoes—but I did not want to bring 3 separate dishes. So I just combined them into one. It’s not that complicated to make, but a little time consuming.
Thanksgiving Casserole

Tofu Turkey Layer:
28 oz (2 blocks) of firm tofu, frozen then thawed
7 oz (1/2 block) silken tofu
1/2 cup soy sauce
2 cloves of garlic, minced
1 tbs herb de Provence
1/2 tps pepper
Stuffing Layer:
3 cups vegetable broth
1 cup fresh cranberries
2 tbs celery leaf
1 tbs herb de Provence
1 tbs sugar
4 cups vegan stuffing mix (just check the label, it’s not that hard to find)
1 medium carrot, chopped into 1/4 inch pieces
3 stalks of celery, chopped into 1/4 inch pieces
1 cup onion, chopped finely
Mashed Potato Layer:
5 medium russet potatoes, peeled and quartered
1 tbs vegan butter
2 tbs vegan cream cheese
1 cup vegetable broth
Salt and pepper, to taste
Pre-heat the oven to 400 degrees.
Coat a dutch oven pot or a deep casserole pan lightly with olive oil.
Tofu Turkey Layer:
In a colander, drain the firm tofu very well. I mean get it as dry as you possibly can. Squeeze it out with your hands. Don’t worry about crumbling it.
Drain off the liquid the packaging liquid from the silken tofu, but leave this tofu still moist.
In a food processor, all the tofu, soy sauce, garlic, herb de Provence, and pepper. Blend until smooth.
Pour into the dutch oven and smooth so the top is even. It will only cover an inch or so on the bottom.
Cover with foil and bake for one hour.
In the mean time…
Stuffing layer:
In a small sauce pan, bring the vegetable broth, cranberries, celery leaves, herb de Provence, and sugar to a boil over.
Reduce to a simmer. Cook until the cranberries burst open and soften.
Remove from heat.
In a large bowl, add the chopped stuffing mix, carrots, celery, and onion. Pour the broth/cranberry liquid in slowly, stirring gently.
Once the tofu has cooked for an hour, remove from the oven and spread the stuffing over top (without burning yourself on the hot pan).
Cover with the foil again and bake for 45 minutes.
And while that cooks….
 
Mashed Potato Layer:
Once your potatoes are peeled and quartered, add them to a large pot of cold water.
Cover and bring to boil.
Remove the lid and let them boil until tender (when a fork can be easily inserted).
Drain and return back to the pot.
Add the butter and cream cheese. Mash very well.
Slowly add a little bit of vegetable broth at a time until the potatoes come to a creamy but firm consistency.
Season with salt and pepper to taste.
Once the stuffing layer has cooked for 45 minutes, remove the oven and spread the mashed potatoes on evenly (again, be careful).
Turn up the heat to 425 degrees.
Cover with foil and bake for another 30 minutes.
I served this with some simple gravy. I also had some cranberry sauce and corn. It was so delicious, all the flavors of Thanksgiving all rolled into one. Everyone else tried it too and said it was good! I would totally make this again next year.

Thanksgiving 2013: Slow Cooker Seitan Roast

As I mentioned in my previous post I was going to make a seitan roast in my crockpot for my work’s Thanksgiving potluck. It came out awesome!!! This is my new favorite way to make seitan. So easy, very little mess, and it was so juicy!

Crockpot Seitan Roast
2 cups vital wheat gluten
2 cups vegetable broth
1/2 soy sauce
1 tbs herb de Provence
1 garlic, minced
1 large carrots, cut into 1/2 inch pieces
4 large potatoes, cut into 1/2 inch pieces
3 stalks of celery,  cut into 1/2 inch pieces
1/2 onion, cut into quarters

4 cups vegetable broth
Salt and pepper to taste

In a large blow, mix together the vital wheat gluten, 2 cups vegetable broth, soy sauce, herb de Provence, and garlic. It should form a moist—but not sticky-dough.

Knead the dough gently for a minute or two.

(I made my dough the night before and left it in the fridge overnight. I don’t think this changes the flavor or texture, so this step is optional).

Shape the dough into a loaf.

Place in your slow cooker.

Cover the loaf with the cut carrots, potatoes, celery, and onion.

Cover the loaf and veggies with the remaining vegetable broth.

Turn your cooker on medium-low and let it cook for 4-6 hours (I put mine in at 8 AM and it was ready around 12:45).

It’s ready when the seitan firm (but not hard) and no longer chewy….and obviously when vegetables are soft. There should be a little broth left (which should have tons of flavor by now and will make a great thin gravy).

I found a nice platter in the cabinet at work, so I sliced up the seitan and plated everything nicely. The president of the company—who is a big meat eater—took a sliced and liked it! I had to go back to work so I forgot to see if any was left afterwards….so  I am going to imagine it was all gone 🙂

This is a seriously awesome and easy meal, any time of the year.

Thai Pumpkin Curry

I have professed my love for Fall and pumpkins before (check out my pumpkin carving and Pumpkin Waffles posts).  This past weekend Michael and I went back to the Half Moon Bay area to pick pumpkins. We decided to skip the Pumpkin Festival and all the traffic/chaos this year.

We went Arata’s Pumpkin patch, a cute little place just south of Half Moon Bay on Highway 1. It was pretty busy, but not as crowded as the Pumpkin Festival would have been. We picked our pumpkins and smiled at all the cute babies running in the patch and climbing the hay bails. It got us excited to take our little pumpkin next year.

The bump has started to appear

We each got a pumpkin to carve. Plus, we bought an extra little pumpkin and butternut squash to cook with later. I am not sure what to do with the butternut yet, but I knew the little pumpkin was destined for Thai curry. Roasted pumpkin adds another layer of flavor to a creamy and spicy curry. This is variation of my Yellow Vegetable Curry, trying to make it more authentic tasting.  I decided to make it in the crockpot so it could have plenty of time for all the flavors to mend.

This recipe makes 4 servings.

Thai Pumpkin Curry
1 small pumpkin
1/2 tbs coconut oil
1 small white onion, chopped
1 half inch piece of ginger, peeled and minced
2 cloves of garlic
1 eggplant, chopped
1 yellow bell pepper, chopped
1 bunch of broccolini (normal broccoli is fine), cut into half inch pieces
1 large carrot (or 15 baby carrots), chopped
1/2 cup snap peas
1 can of coconut milk
4 cups water
1 tbs soy sauce
1 tbs curry powder
1 tsp turmeric
1 tbs Sriracha
1/2 tbs tamarind chutney (or paste)
Zest of one lime
Juice of one lime
1 bundle of lemongrass
3 cardamom pods
10 large basil leaves, chopped
6 mint leaves, chopped
Salt and pepper, to taste

Pre-heat the oven to 375 degrees.

Carefully cut the crown off the top of your pumpkin (see my pumpkin carving post for more details).

Now carefully cut the pumpkin in half.

Scoop out all the seeds and membranes.

Lightly spray the insides of the pumpkin halves with cooking spray.

Place skin side down into a baking sheet. Bake for 35-40 minutes, until soft and tender.

Set aside to cool.

Once cool, remove the meat from the skin (I suggest a small knife and just cut away the skin and rind).

Cut it into cubes.

Plug in your crockpot and set to low.

Add the coconut oil.

Once it is melted, add the onions, garlic, ginger. Let is cook for a minute.

Add the chopped eggplant, bell pepper, broccilini, carrots, and snap peas.

Pour in the coconut milk and water. Mix well.

Add all remaining ingredients, except the salt and pepper. Mix well.

Cover and cook until the veggies are soft, about 2 hours. You may need to adjust temperature and time for your crockpot.

Serve over jasmine rice. Garnish with basil, mint, and/or cilantro.

Tons of vitamins and flavor! I lovely fall dish.

Tofu and Broccoli

I need to say a giant apology for not posting for over a month. I promise I have very good excuse. At the beginning of August I found out I am pregnant! And then a few days later Michael proposed! And we are getting married next weekend in Las Vegas! Told you I had a good excuse.

I am so happy and excited to marry the man I love and start a family with him. But this past month has not been easy. I lost my job, which is probably for the best. It was not a good fit for me and I am not sure how much longer I could have worked due to horrible morning sickness. And do you know how much fun planning a wedding is when you are beyond exhausted all the time? Not at all.  I am so grateful for all love and support from my family and friends. Especially my mom, I could not do this all without you!

I will talk more wedding and baby stuff in later posts…

So, remember that morning sickness I mentioned? Yeah, that phrase is a total misnomer. I have felt nauseous all day and night. Not fun.  Even when I am hungry, my stomach magically cannot hold much food at once. And foods I once loved, I cannot even stand the thought of now. So, as you can imagine I have not done too much cooking lately. However, yesterday I was actually hungry for lunch. So I made up this tasty dish.

I used broccolini, but feel free to us broccoli if you cannot find it. Broccolini is hybrid of broccoli and Chinese broccoli, giving it longer stalks and slightly sweeter flavor. It is high in vitamin C, vitamin A, calcium, folate and iron. I love broccolini because the stalks get tender and have an almost asparagus-like flavor.

This recipe makes two servings.

Tofu and Broccoli 
1 block of extra firm tofu, frozen and drained, then cubed
1 tbs soy sauce
1 tbs rice wine vinegar
1 tps red pepper flakes
1 tps grated ginger
Olive oil
1/2 small white onion, cut into thin strips
1 clove of garlic
1 small head of broccolini (broccoli is fine too), cut into bit-sized pieces
Teriyaki sauce

Check out my previous post about how to freeze and drain tofu.

Cube the tofu and add to small bowl.

Add the soy sauce, vinegar, red pepper flakes, and ginger. Toss together to coat the tofu and let it marinade for at least one hour.

Once the tofu is ready,  heat some olive oil in a skillet over medium heat.

Add the chopped onions and cook until soften.

Add the garlic, broccolini pieces, and the tofu with the marinade. Cook until the broccolini is softened and the tofu is slightly golden.

Top with some teriyaki sauce before serving.

I had this over brown rice, but noodles would be delicious too. Simple and high in vitamin C, folate, and iron—all the things a growing baby (and mommy) need.

Tamale Pie

I have no real story or reason behind the recipe. I had dry pinto beans, I had masa, and I had fresh organic veggies. So I made a tamale pie. I decided to make it more like dumplings on top instead of a solid crust, just trying something different.

Tamale Pie
2 cups dry pinto beans
6 cups water
1 tbs chili powder
2 tsp Mexican oregano
1 tsp cumin
Salt and pepper
2 zucchini, cubed
1 medium onion, diced
2 green bell peppers, diced
2 sweet gypsy peppers, diced
2 cups masa harina
Salt
About 3 cups water

Rinse the dry pinto beans.

In a large pot, add the beans, 6 cups water, chili powder, oregano, and cumin. Bring to a boil then reduce to a simmer. Cook for one and a half hours, or until the beans are almost soft and most of the water is absorbed. Add more water if needed. Season with salt and pepper to taste.

Next add the zucchini, onion, bell peppers, and sweet peppers. Stir well and let if cook covered 30 minutes. Now the beans and the veggies should be all soft.

Pre-heat the oven to 375 degrees and spray a baking pan with cooking spray.

In a small bowl, mix together the masa and salt. Add a little water at a time until the dough reaches a moist play-dough-like consistency.

Pour the bean and veggie mixture into the baking pan.

Tear off small chunks of the dough and cover the top of the bean and veggie mixture. It’s okay if not every spot is covered.

Bake for 30 minutes, until the masa is slightly golden.

I topped mine with homemade guacamole, try one of my Guacamole 3 Ways recipes. And all the veggies (but the onion) were organic from the box delivery I mentioned in Roasted Beet and Carrot Salad post.

Organic Roasted Beet and Carrot Salad with Lemon Quinoa

I decided that Michael and I need to eat more organic vegetables. I wish we could afford to buy all organic, especially from a farmers’ market so we could support the local agriculture. Unfortunately, for a young couple just starting out, that is out of our budget. Then I randomly thought of farm delivery service. Most of them allow you to select a package within your price range and it comes right to your door. So I simply Googled “organic produce delivery Bay Area” and a bunch came up. I decided to go with Farm Fresh to You. I like how professional the website is (I hate when business have website’s that look like 1995) and thought the farm’s story was nice. I also thought the prices were reasonable and I liked that you could chose the frequency of delivery. And you can customize your deliveries by adding produce to your exclude list. For  example, I am not a fan of peaches, so I added peaches to my exclusion list. Now I will open the box and go “Ick, peaches!”

I selected the Veggies Only box every other week. Friday morning when I stepped out the door to go work, there was the box. When I came home from work I checked out all the lovely produce. Sweet peppers, tomatoes, zucchini, avocados, eggplant, nectarines (I modified my order because I did not want something), baby beets, and carrots. It all looked good, but the minute I saw the beets and carrots, I thought only one thing: roasted salad. I LOVE roasted beets. So good and so easy to make. And, roasted carrots are so sweet. Nothing not to love.

Now I would just eat the salad for dinner, but Michael would not be happy. “I know all you eat is vegetables, but I need more food!” Our lemon tree had a brunch of ripe lemons, so made him lemon chicken. Since I had so many, I thought I would make lemon quinoa as well.

Another side note, I also decided Michael and I are going to eat only healthy fats. So only olive oil and coconut oil from now on. Obviously Michael still eats meat so he has animal fat too. That is his life choice and I respect that.

Roasted Beet and Carrot Salad:
4 beets (I had one large and 3 medium)
1 bunch of carrots (I had Nantes specifically)
1 tbs olive oil, divided
Salt and Pepper
1 tsp Italian seasoning
1 squirt of fresh lemon juice

Pre-heat the oven to 450 degrees. Alternately, you can do this on the grill. But you REALLY need to watch them and turn them regularly. They tend to go from uncooked to burned-beyond-all-recognition in an instant.

Cut the tops and bottoms off the beets. Wash well. Cut a small silt in the top of the each beet. Place each beet in it’s own piece of foil. Sprinkle each with salt and pepper.Wrap each beet up with the foil so it is covered completely. *Side note: I do not put olive oil on them before roasting. You are going to be peeling the skin off later, so I feel it is just a waste and add excess calories.

Cut the greens off the top and the root strings off the bottom of the carrots. Wash well. Cut into 1/4 of inch sized pieces. In a small pan or baking sheet, toss together will 1/2 tbs of olive oil. Then season with salt and pepper. *I do add olive oil to the carrots for roasting since they will not be peeled and loosing the flavor.

Place beets in the oven right-side-up. Cook for 30-40 minutes. They will be ready when a knife can be inserted in the middle with no resistance.

When the beets have 20 minutes left, add the carrots to the oven. When the timer goes the carrots should be   golden (it is okay if they are a little black) and soften,  and the beets will black on the outside but soft on the inside.

Set both the beets and the carrots aside to cool. This salad is served chilled or room temperature.

Once the beets are completely cooled (unless you like burning your hands on hot beet juice), take a spoon or a peeler (or your hands if you do not mind pink fingers) and peel off the charred skin.

Cut the beets into bite-sized cubes.

In a small serving bowl, add the beets, carrots, remaining olive oil, Italian seasoning, and a squirt of lemon juice. Mix together well. Season with salt and pepper as needed.
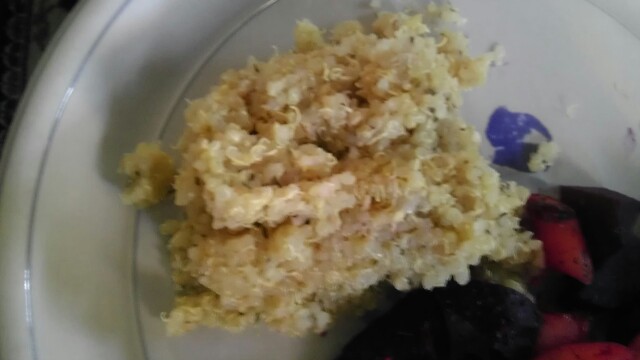
Lemon Quinoa:
1 cup quinoa
2 cups water
Pinch of salt
1/4 cup fresh lemon juice
1/2 tbs olive oil
2 tsp Italian Seasoning
Salt and pepper

In a small pot, add the quinoa, water and a pinch of salt. Bring to a boil.

Reduce to simmer and cook for 10 minutes.

Remove from the heat and let sit covered for 5 minutes.

Then add the remaining ingredients and mix well.

I let mine cool for a bit, that way the flavors could set in more. Plus, it was hot and I did not want to eat a lot of hot food.

A lovely summer dinner. The beets and carrots were so good. Organic really does make all the difference. I really encourage everyone to not only eat more vegetables, but eat organic ones. Good for you, supports the local economy, and support sustainable agriculture. Another cool thing about Farm Fresh to You, you can adjust your delivery dates. We are going to a wedding in Tahoe in two weeks, when the next box delivery will come. I do not want my veggies to spoil, so I adjusted the delivery to this week instead. So look out for some more organic recipes soon!