Thanksgiving 2013: Thanksgiving Casserole

Happy Thanksgiving! I hope you all had a wonderful day with your loved ones. We had a wonderful time in Tracy, thank you so much Lori and James for having us!

I have a lot to be thankful for this year:
  • I am thankful to have married the man of dreams two months ago. Thank you for taking care of me this past few months, I know I have not been the easiest pregnant lady.
  • I am so thankful for my unborn son (I keep forgetting to make a gender reveal post….). This pregnancy has not been very fun so far, but I know he will be worth it. I can’t wait kiss his sweet little face in April.
  • I am thankful for my amazing parents. Thank you for always supporting me and loving me. We all might be crazy, but at least we can be crazy together!
  • I am thankful for all my amazing in-laws.  Thank you to my wonderful parents-in-law for being so kind and supportive through these crazy few months. And thank you to my wonderful sisters-in-laws for being so open and accepting from moment Michael brought me home.
  • I am thankful for my cats. Penny makes me smile everyday with her antics (Did you know a cat can be condescending?). And, I am grateful for Zoey’s snuggles. I am so happy my kama’aina kitties came to California.
So, as I said in my menu post, I made a layered casserole thing. I wanted baked tofu, stuffing, and mashed potatoes—but I did not want to bring 3 separate dishes. So I just combined them into one. It’s not that complicated to make, but a little time consuming.
Thanksgiving Casserole

Tofu Turkey Layer:
28 oz (2 blocks) of firm tofu, frozen then thawed
7 oz (1/2 block) silken tofu
1/2 cup soy sauce
2 cloves of garlic, minced
1 tbs herb de Provence
1/2 tps pepper
Stuffing Layer:
3 cups vegetable broth
1 cup fresh cranberries
2 tbs celery leaf
1 tbs herb de Provence
1 tbs sugar
4 cups vegan stuffing mix (just check the label, it’s not that hard to find)
1 medium carrot, chopped into 1/4 inch pieces
3 stalks of celery, chopped into 1/4 inch pieces
1 cup onion, chopped finely
Mashed Potato Layer:
5 medium russet potatoes, peeled and quartered
1 tbs vegan butter
2 tbs vegan cream cheese
1 cup vegetable broth
Salt and pepper, to taste
Pre-heat the oven to 400 degrees.
Coat a dutch oven pot or a deep casserole pan lightly with olive oil.
Tofu Turkey Layer:
In a colander, drain the firm tofu very well. I mean get it as dry as you possibly can. Squeeze it out with your hands. Don’t worry about crumbling it.
Drain off the liquid the packaging liquid from the silken tofu, but leave this tofu still moist.
In a food processor, all the tofu, soy sauce, garlic, herb de Provence, and pepper. Blend until smooth.
Pour into the dutch oven and smooth so the top is even. It will only cover an inch or so on the bottom.
Cover with foil and bake for one hour.
In the mean time…
Stuffing layer:
In a small sauce pan, bring the vegetable broth, cranberries, celery leaves, herb de Provence, and sugar to a boil over.
Reduce to a simmer. Cook until the cranberries burst open and soften.
Remove from heat.
In a large bowl, add the chopped stuffing mix, carrots, celery, and onion. Pour the broth/cranberry liquid in slowly, stirring gently.
Once the tofu has cooked for an hour, remove from the oven and spread the stuffing over top (without burning yourself on the hot pan).
Cover with the foil again and bake for 45 minutes.
And while that cooks….
 
Mashed Potato Layer:
Once your potatoes are peeled and quartered, add them to a large pot of cold water.
Cover and bring to boil.
Remove the lid and let them boil until tender (when a fork can be easily inserted).
Drain and return back to the pot.
Add the butter and cream cheese. Mash very well.
Slowly add a little bit of vegetable broth at a time until the potatoes come to a creamy but firm consistency.
Season with salt and pepper to taste.
Once the stuffing layer has cooked for 45 minutes, remove the oven and spread the mashed potatoes on evenly (again, be careful).
Turn up the heat to 425 degrees.
Cover with foil and bake for another 30 minutes.
I served this with some simple gravy. I also had some cranberry sauce and corn. It was so delicious, all the flavors of Thanksgiving all rolled into one. Everyone else tried it too and said it was good! I would totally make this again next year.

Rosemary Focaccia

Photo from here

My friend suggested I try making a video blog, so I decided to give it a try. Let me know what you think, I may do more in the future.

Here is the recipe for my video blog, it’s based on one from called Focaccia Bread from AllRecipes.com. I used rice flour (because I accidentally bought it instead of wheat flour) so this version is gluten free, but wheat flour is ideal.

Rosemary Focaccia:
1 cup luke warm water
1 packet of active yeast
1 tsp sugar
2 and 3/4 cup flour (I used rice but wheat flour is fine too)
1 tsp Italian seasoning
1 tsp garlic salt
1 tsp salt
2 springs of fresh rosemary, removed from stem
1 tbs olive oil
3-4 springs of fresh rosemary, removed from stem
Sprinkle of salt

This is one of my favorite breads my mom made growing up, I hope you love it too!

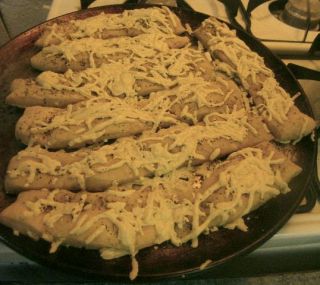
"Cheesy" Breadsticks and Mushroom Sauce

I had pizza night last night because I have plans for tonight (Bad Geology Movie Night for the geology club, geeky I know) but I still wanted my pizza night. When I was about what kind of pizza to make, I thought of Pizza Hut, which made me think of its breadsticks. So I decided to make some. But, a big pile of cheesy bread is not a healthy dinner, so I decided to add some more veggies to sauce to add some more nutrients. There was sale on mushrooms at the store (99 cents a pound!) so I went with a mushroom sauce with some fresh basil from patio garden.

Mushroom Sauce
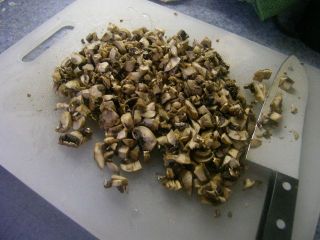
1 cup button or white mushrooms, de-stemed and diced
1/2 cup onion, chopped
1 clove of garlic, chopped
1/4 cup red wine (I used Pinot Noir)
1 can tomato sauce
Handful fresh basil, chopped
Red pepper flakes
Salt and pepper

Wash, de-stem, and dice the mushrooms. Chop the onion and garlic too.

Heat some olive oil in a pot over medium heat.

Add the mushrooms and cook until they release most of their water.

Add the onions and garlic. Cook until the onions begin soften and the mushroom water evaporates.

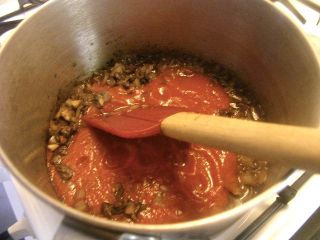
Add the wine to deglaze the pan. Scrape up the stuff up from the bottom.

Add the tomato sauce and stir well.

Add the red pepper flakes, salt, and pepper to taste.

Cook for a minutes so all the flavors come together.

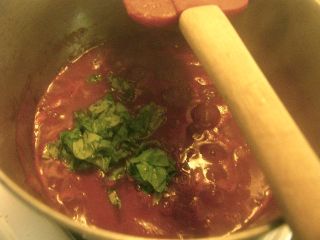
Take it off the heat and add the chopped basil.

This would be lovely over pasta, but it’s an even better dipping sauce for breadsticks…

“Cheesy” Breadsticks
1 pre-made pizza dough (try mine)
Italian Seasoning
Garlic salt
Vegan mozzarella cheese (I used Daiya)

Pre-heat the oven to as high as it will go and spray a pizza pan with cooking spray.

Roll your pizza dough into a rectangle. This dough I made last week and froze.


Cut into about 1 inch strips.

Arrange the strips on the pizza pan.

Sprinkle with desired amounts of Italian seasoning and garlic salt.

Top with desired amount of mozzarella.

If you want some extra flavor and crunch, you could brush on some olive oil before you put the toppings on.

Bake for about 10 minutes, until the dough is slightly golden. I like mine on the softer side but you can bake them longer if you want more crunch.


I had my breadsticks and mushroom sauce with a side of olives for bit more salt. And of course the rest of my Pinot Noir.

Warning, this dinner may attract your new 9-month old kitty.

Meet Penny, got her from an animal sanctuary on Tuesday. 

Polish Rye Bread

The Polish side of is calling out again. I am heading back to Hawaii in a few days and won’t have my lovely parents to cook for. So I decided to make Polish food for dinner tonight, embrace our heritage once again. Like I said on my pierogi post, a lot of polish food is not vegan so I need to change the recipes a bit. But despite the lack of eggs or pork here and there, they are pretty authentic.

I have never had barszcz, Polish variant of borscht, so I thought give it a try. I love beets so why not try a beet soup? While I was looking for recipes online, a bunch more Polish recipes came up too. I asked my mom what kluski is and when she explained they are delicious little homemade noodles, I knew I had to make them. Then I thought well, what would a Polish dinner be without kapusta? Kapusta is pretty much just plain sauerkraut and it is delicious….makes the house stink though. 
Then I thought a nice home-baked rye would go lovely with the barszcz so I added that to the list too.  I love its dry but savory taste. Plus, my dad was practically drooling over some we saw on TV last night so I figured he would be happy. 
Rye bread is not that complicated to make, just like with any bread you just need to be patience and not overwork it. And it’s already vegan! I found a recipe for a simple breadmaker version called Polish Rye Bread on Group Recipes, but adapted it for normal baking methods. 

Polish Rye Bread

1 cup warm water
1 packet dry yeast
1 and 1/2 tbs molasses  
3/4 cup rye flour
2 cups bread flour
2 tps caraway seeds
1 tps salt 
1 tbs vegetable oil 

Dissolve the packet of yeast into the warm water. I suggest doing this in a measuring cup. Add the molasses. Stir lightly if needed. Set aside until it all bubbly and frothy. 

I did my mixing and kneading in a stand mixer. I wish I had one of these in Hawaii. Can’t wait to not be a broke college kid and have a real kitchen. In the mixer bowl, add both flours, caraway seeds, and salt. Mix together well by hand. 

Turn on the mixer to the lowest setting and slowly add the yeast mixture. Use bread hook attachment. Then add the oil. Continue mixing until smooth and slightly elastic. 

Remove the bowl from the stand, cover with plastic wrap (I suggest putting a rubber band around it too) and cover with a dish towel (ścierka in Polish, I’ve been taught a few random words). Put in a warm place like the laundry room to proof. If you live in humid place, that’s really not an issue so just set aside anywhere really. My bread proofs so quickly in Hawaii. 

Momma rolled it out for me.

Once it’s risen, punch it down again. Sprinkle some flour on the counter and roll the dough out on it a bit. Shape into the size of pan.

Spray a bread pan with cooking spray and place in the dough.
Cover with plastic wrap and a clothe again, then set aside to proof a second time. 
Pre-heat the oven to 350 degrees.  
Once it’s risen the second time, pop it in the over for 20 minutes. My mom made the suggestion of putting some hot water in a pot in with the bread to help crisp up the crust. 

Next, remove the pot of water and remove the bread from the pan. Put the freed bread back in the oven and bake for 10 more minutes. 

Your baking times may vary based on your oven. 

My bread skills need some work…my bread came out kinda dense. But  it was still pretty good. Like I said, if you are patience and take your time, your bread should come out lovely.  I would suggest more salt, my mom thinks more molasses. 

It smells so good. 
I’ll post the rest of the Polish recipes later. Still in the process of cooking all of them! 

Alicia Silverstone’s Rustic Bread and Eggplant Lasagna

If you want a good introduction to veganism, read Alicia Silverstone’s book The Kind Diet. In it she explains her vegan story as well as outlines the health benefits of an all-plant based diet— plus it has killer recipes. This recipe for Rustic Bread and Eggplant Lasagna I got from her website The Kind Life and have been dying to make it. I made my own bread for it this morning, which I posted in my last entry. I made a few changes to adapt to what I have on hand. I have posted my version, which isn’t too different from the original. Her recipe includes instructions to make your own tomato sauce, but I did not have enough tomatoes so I used jarred Prego. It’s always best to use local produce, so I used Japanese eggplant that I bought from the Hilo Farmers Market. I also did not have breadcrumbs so I made my own from toasted oatmeal.

The picture from website

Rustic Bread and Eggplant Lasagna 
6 Japanese eggplants
1 tbs olive oil
3 cloves of garlic
3 cups tomato sauce
1 tbs Italian seasoning
1/8 tps ground black pepper
1/4 tps red pepper flakes
8 thick slices of a rustic-style bread (try my Italian Herb Oat Bread)
1 cup breadcrumbs
1 large ripe tomato, cut into thick slices
Basil to garnish

Pre-heat oven to 400 degree F.
 

Japanese eggplant is less bitter than normal eggplant

Slice eggplant length wise into 1/2 inch slices. Arrange in one layer on a baking sheet, drizzle olive oil and salt on both sides. Bake for 30-40 minutes, turning over half way through, until soft and slightly golden.  Leave the oven at the same temperature for baking the assembled lasagna.

Although great as is, jazz up pre-made sauces to your tastes

While the eggplant is cooking, heat olive oil over low heat, add garlic and cook till slightly golden. Add tomato sauce, Italian seasoning, black pepper, and red pepper flakes. Heat until warm.

Extra slices make a good snack while you wait

Spray both sides of the bread slices with cooking spray and heat in a skillet over medium heat until toasted, flip and repeat for the other side. Do this in 2 to 3 batches, since all 8 slices can’t fit in at once….unless you have a very large skillet.

I almost forgot the tomato slices!

 In a large baking dish, spread 1/2 cup tomato sauce. Line the dish with half the bread without overlapping the slices. Layer half the eggplant on top of the bread, then top with 1 cup tomato sauce. Repeat another bread and eggplant layer then top with remaining tomato sauce. Sprinkle on breadcrumbs and put tomato slices on top.

Bake for 40 minutes. Let it rest for a few minutes before cutting in to it.

The eggplant has a creamy texture that totally makes the dish.

Alicia suggests garnishing it with fresh basil and balsamic vinegar, which sounds great, but I do not have either at the moment so I sprinkled it with red pepper flakes and paired with a nice green salad.

Italian Herb Oat Bread

Italian Herb Oat Bread

My mom was a baker for several years, so I grew up eating delicious homemade breads. I loved coming home from school to the smell of fresh baked sourdough or banana bread. Since I  inherited most of my cooking skills from her, I am giving baking a shot too. I found a recipe from Alicia Silverstone’s website  The Kind Life for Rustic Bread and Eggplant Lasagna (which I will be making tonight and will post later) and thought it would be a good opportunity to make the bread for it. Her recipe calls for sourdough, which is beyond my skill level at the moment so I decided to make something using the ingredients I have on hand.  I made up this recipe based on my current knowledge and some web research.  Since it is for a lasagna, I thought an Italian bread would be lovely. I also love the texture of oat bread so I decided to attempt a Italian-ish, oat-ish bread.  I drew inspiration from two recipies, both from Veg Web. The first is for Outrageously Easy BIG Bread, which I have made before, and is exactly what the title promises.  The second is for Garlic & Basil Bread, which I thought would fulfill the Italian part of desired outcome. I consulted my mom on the oats. I have instant oatmeal and old fashion oats in the cupboard, she told me that instant oats were a bad choice so I went with the old fashioned. I live in sunny and humid Hawaii, so my dough rises pretty quick and usually has the perfect texture without adding extra water or flour. You will need to adjust according to your climate. My mom told me that baking is done best by feel, so do what you feel is right.

Italian Herb Oat Bread
1 packet active yeast
1 cup warm water
1 tps brown sugar
3 cups white flour
1 tbs olive oil
1/2 tbs dried Italian seasoning
1/2 tps garlic salt
1/2 cup old fashion oats

Proof the yeast by add the packet of yeast to the warm water. I usually do this all in a measuring cup. The water should be warm to touch but not hot (about 105 degrees F if you want to measure it). My mom told me the water should be a bit cooler than you think it should be. Once it is fairly dissolved, add the sugar. It’s ready when it gets all bubbly and frothy. If nothing happens, your water was either too hot (my problem when I first started making dough) or too cold. Or, your yeast could be bad too. You will have to throw it out and try again.

In a large bowl, mix together the flour, oats, basil, and garlic salt then add the oil on the top. Once your yeast is ready, add it to the dry mixture and carefully mix. Work until it all comes together into a doughy ball. The dough should be moist and pliable. If it’s too gooey, add a bit more flour until it reaches the right consistency.

Cover the bowl with a moist towel and set aside to rise for about 45 minutes.

Risen twice and kneaded

Once the dough has puffed up, put it on to a well-floured countertop and knead gently.  Try not to overwork the dough, otherwise it gets tough and chewy. Just work it until it’s smooth and soft, but not overly wet. Add additional flour as needed.

Shape into a loaf or whatever shape you desire, cover with a cloth and let it rise again for another 30 to 45 minutes.

Pre-heat oven to 375 degrees F.

I checked mine after 45 minutes since my oven isn’t the greatest.
After it’s done rising the second time, place on a baking sheet or baking pan. Cut a few shallow slits in the top. Brush on a little olive oil or an egg substitute so it gets golden and crunchy. Sprinkle some oats on top for decoration if you desire.

Bake for about 45 minutes, adjusting the time for your oven (I have a crappy dorm room oven so mine takes 5-10 minutes longer some times). It should have a nice golden crust on the top.

Let it cool for an hour before slicing.


It smells soooo good. It’s hard to resist, but let it cool a bit, it’s easier to cut.