Aloo Mattar

Sorry I haven’t posted in so long, I’ve just been lazy. But I am going to make up for it with a totally awesome meal. The other day I couldn’t decide what I want to make for dinner, so I asked my boyfriend. He usually says “I don’t know”, but this time he actually had a request! He wanted this gravy peas and potato dish his mom used to make. After some research on the internet, I found what he was talking about. This recipe is based on the one from Manjula’s Kitchen called Aloo Mattar (Potatoes and Green Peas). And, he’s family eats roti, which I’d never heard of before. I am used to naan bread, but I thought I would try making it. And, since I had cilantro in the fridge, I decided to make a chutney too. I will post the other two recipes later, but here is the aloo mattar for now. 


A few of the spices might take a bit of work to find, but if I can find them on the Big Island, I am sure you can too. 

Aloo Mattar

3 medium boiled potatoes

2 tablespoons oil
1 small onion, chopped
1 1/2 inch piece of ginger, minced
2 cloves of garlic, minced

3/4 cup frozen green peas

1 minced green chili, minced

1 teaspoon cumin
1/8 teaspoon asafetida
2 tablespoons coriander 
1/4 teaspoon turmeric
1 teaspoon paprika 
2 teaspoon garam masala
2 medium tomatoes, chopped
Salt and pepper to taste
Cilantro 


Peal and cut the potatoes into bite-sized pieces.  
Add them to a pot of cold water and bring to boil on the stove. Cook until soft. Drain and set aside.
Heat the oil in a large skillet over medium heat. 
Add the onions and cook until translucent. 
Add the garlic and ginger and cook until fragrant. 
Add the frozen peas and cook until warmed. 
Add the potatoes. 
Add the minced green chili, cumin, asafetida, coriander, turmeric, paprika, turmeric, and gram masala.  Mix together well and cook until for about 10 minutes, covered, and stirring occasionally. 
Add the chopped tomatoes and cook until they are soft. 
Season with salt and pepper to taste, and garnish with some cilantro. 
It is good on it’s own, but it is amazing with the cilantro chutney, which I will post tomorrow. Michael’s only complaint was it is more like “white people Indian food”….my answer was “well, a white girl made it!” hahahaha.  I really suggest this dish, it’s easy and so freaking good. 

Beefless Gyoza

When I was grocery shopping a few weeks ago, I had forgot my list so I was just browsing aisles trying to remember what I needed. I saw gyoza wrappers, and even though they were so not on my list, I wanted them. Fried little dumplings dipped in salty soy sauce, yum!

Gyoza are Japanese pot stickers. What sets them apart from the Chinese version is they tend to be more garlicky and satly. Since those are pretty much two food groups in my diet, so I like them better.

I had also bought  Gardein Beefless Tips and thought they would be a lovely filling for half the batch, the other half were filled with frozen veggies.  I highly suggest all of Gardein’s products. My omnivore boyfriend even likes their stuff.

This recipes makes 16 dumplings, a nice entree for one or a side to share for two or three.

Vegetable and Beefless Gyoza
16 gyoza wrappers
Gardein Beefless Tips, thawed
1/2 cup frozen veggies (the standard carrots, peas and green beans works fine)
1 clove garlic, minced
soy sauce for dipping

In a small bowl, microwave the frozen veggies. Afterwards, add half the minced garlic and mix together.

In another bowl, add the thawed beefless tips and mix in the garlic.

Get a small bowl of water, which will be used to seal the dumplings.

Time to assemble…

Generously oil a skillet.

Take one gyoza wrapper and place it on a clean flat surface.

Either place one tablespoon of the veggie filling or one beefless tip in the middle. You might need to reshape the tip to fit properly, which is why I suggest you thaw them first so they are more pliable.

Then dip you finger in the water and make wet the edges of the wrapper throughly.

Now, there is a specific way to fold the gyoza, but if you are unfamiliar with the method, just close it up any way you can. Fold it half and seal or crimp the edges to make a half circle.

Now place it seal side up in the in oiled pan.

Repeat till all the gyoza are filled.

Now place the skillet on the stove and turn it to medium-high heat. Cook until the gyoza are golden brown on the bottom. Do not stir or move them.

Next pour in about 1/4 a cup of water and cover with a lid for the dumplings to steam all the wary through. They should be ready when all the water as evaporated.

To remove them, take the lid off and place a plate over the skillet. Flip it over and gently tap the bottom till they all pop out. 
Get yourself a little bowl of soy sauce to dip and enjoy! 

Beer Floats

Michael and I have been dating for one month now, and for a girl whose been single for awhile I was very excited about it. So, I thought we should celebrate a little. He took me out to sushi (because he was one of the people involved in my sushi post story and we still laugh about it) and I made him a desert that is sure to please any man: beer floats. It’s just like a root beer float, but with beer! Get your favorite ice cream and pour in your favorite dark beer, it’s that simple. We kept them simple, but you can top with anything you like—whip cream, chocolate sauce, nuts, cherries & etc.

Michael had real dairy chocolate ice cream and Rogue’s Morimoto Hazelnut Signature Ale. I had So Delicious Coconut Milk ice cream and Rogue’s Chocolate Stout. I didn’t try Michael’s obviously, but mine was sooooooo good. I am so making these again soon.

I could post an exact recipe for this, but I am pretty sure you can figure it out 🙂

Spinach Tofu Quiche

I am so sorry I have not posted in awhile. Life got busy all the sudden. But let me update you! I am doing much better after my car accident. My back is sprained and my neck is still stiff, but I am up and about so it’s okay. I also got a new kitty, kind of a long story so I will spare you. Her name is Zoey and she is a stray who is still in the process of being tamed. She and Penny are getting along like sisters now. Love my little ohana 🙂  And, I also have a boyfriend now! Which brings me to my recipe for this post….

Zoey ‘Uala

Michael, my boyfriend, has been really sweet and helping me figure out what is wrong with the power steering on my car so I thought I’d make him something nice. He is a meat eater, but what guy would turned down any home-cooked meal from a girl? I was bored in class so I was searching recipes on VegWeb and came across The Best Spinach Quiche Ever, and thought it sounded amazing. And, like I said, I figured Michael would eat it anyways. I did some variations from the recipe, mainly using red pepper instead of zucchini and added some turmeric. I used silken tofu because I think it has a more egg-like texture, but it didn’t quite set-up right like extra firm tofu would have. It made it harder to take out of the pan while hot, but overall no big deal. It was delicious, had the nice fluffy egg texture, and Michael enjoyed it too.

Spinach Tofu Quiche
Olive oil
1 pie crust (I used a pre-made Pilsbury one)
1 red bell pepper
1/2 of an onion
1 carton of sliced mushrooms
1/2 cup white wine
3 cloves of garlic
2 cups fresh spinach
crushed red pepper flakes
Salt and pepper
1 and 1/2 block silken tofu
Turmeric

Pre-heat the oven to 350 degrees

Roll out the pie crust into the pan,  here is a video if you don’t know how to do so.

Chop the bell pepper, onion, and any really big mushroom slices into bite size pieces.

Heat some olive oil in a large skillet over medium-high heat. Add the veggies and saute until the begin to caramelize.

Pour the wine in to deglaze the pan. Once all the liquid is absorbed, remove from the heat.

In another skillet, heat more olive oil over medium heat. Add the garlic, spinach, and red pepper flakes. Cook until the spinach is wilted. Remove from the heat.

In a blender, add the tofu and the spinach mixture and blend together until smooth. Season with salt and pepper to taste.

In a large bowl, add the tofu mixture and the red pepper mixture. Mix together well.

Now pour the the filling into the pie crust and smooth out the top.

Bake in the oven for 45-50 minutes. The center will be a little jiggly but firms as it cools.

Michael’s only complaint was it needed more salt, which as I’ve mentioned before I am a salt queen so I held back on the salt while making it so he would not be overwhelmed.

But I loved it, so making this again sometime.

I promise I will post blog more regularly again now that my life is back together!

Breakfast Juice

Like I said in my last post, I got a juicer for christmas. I have wanted one for over a year because I saw the interesting documentary called The Gerson Miracle. It’s about Dr. Charlotte Gerson, whose father,  Dr. Max Gerson, developed a holistic approach to curing cancer and diseases. It involved an all vegan, all raw diet. This treatment has claimed to cured hundreds of people, and some with very very severe illness. This even includes herself— her dad cured her asthma when she was a teenager. And, if you stay on the diet, it claims to keep most major and minor illness away for good. Needless to say, I was intrigued. I have tried an all raw diet before, and while I have nothing against it, it was not for me. I am not sure I believe in staying on a raw diet for the long run, but if I ever have cancer, I would seriously consider her treatment.

Juicing is a big part of the diet. Apple and carrot juice is the main one. I have decided to have one fresh glass of juice every morning at least, and I started off the first few days with apple carrots. But I decided my juice needed to be a bit more green. So, I added some kale and orange. Now, if you don’t like the taste of kale, don’t worry, you can’t taste it at all. It does turn it green though. 
This makes one serving. Because the vegetables and fruits will start oxidizing quickly, only make the juice to order and drink it within 10 minutes.

Breakfast Juice

1 small apple
1 small orange 
A handful of kale
1 small carrot

Cut all the apples and carrots into pieces that can fit into your juicer. No need to core or peal.

Peal the orange and cut into pieces that can fit into your juicer. 

Make sure the kale is washed. If the stalks are too big, you can remove them. 

Turn on your juicer, and start adding the fruits and veggies slowly so you do not over load the machine.

The juice comes out kind of frothy, my mom called it “Orange Julius-like.”

Give the juice a stir and enjoy! You get half your daily fruits and vegetables in one delicious drink. You can even add any supplements or powders to make taking them easy too.

What a great way to start off every morning for the new year?

I hope you all have a fun and safe New Years Eve. I hope 2012 brings you all nothing but happiness and good health. Maybe make more fresh raw juice in your diet one of your resolutions?

Fresh Rolls

Merry Christmas! I hope you all were very nice this year :-)

For my holidays and special events, my family loves to go to this Thai restaurant in Beaverton, Oregon called Typhoon. I decided to keep the Thai food tradition alive this year and planned on making fresh rolls and pad thai for Christmas Eve. But, working till 11:15 PM the night before and opening at 6:45 AM on Christmas Eve, plus having to come home and clean my whole apartment on top of cooking…. yeah, didn’t work out. I invited a friend from work over for dinner and after making the fresh rolls decided that was all the cooking I could do for one night. But they came out pretty good. I based this recipe off one from Alton Brown on his show Good Eats. Here’s the video of his version (skip ahead to 5:00):

I forgot to cut the noodles before cooking like he did, but I didn’t notice a real difference. I also cooked my noodle a bit too long so they were softer than I would have liked, but no big deal. Also, I obviously did not use shrimp, but tofu instead. Overall, I really liked this. Next time I will try wrapping them in lettuce like he did.

This makes 8 decent sized rolls.

Fresh Rolls
8 rice paper wrappers
1/4 of a block of extra firm tofu, drained and chopped into bit sized cubes
2 tbs soy sauce
The juice of half a lime
1 tps chili sauce
3 bundles of vermicelli mung bean noodles
1/4 cup of cucumbers, sliced into strips like Alton does in the video (I forgot these actually but I could tell how they would have rounded out the flavor)
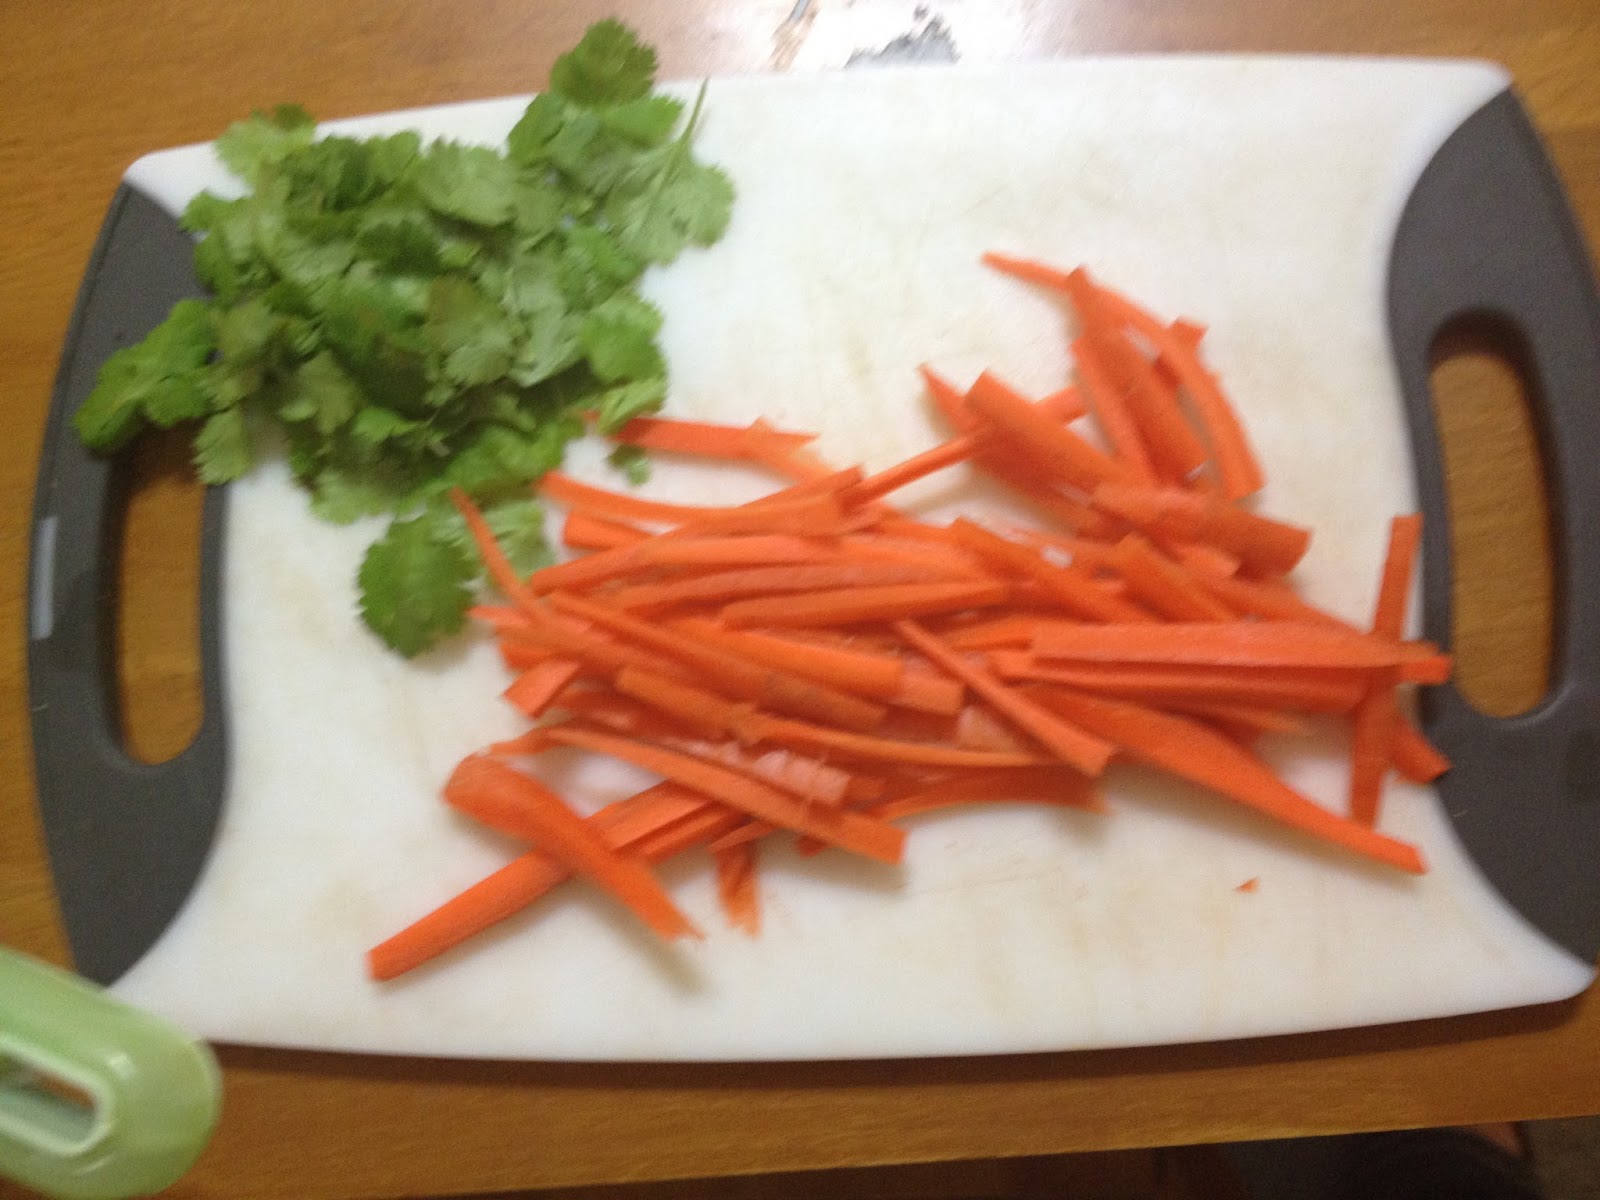
1 medium carrot, cut into thin strips
Bean Sprouts
Cilantro, removed from stem
Thai basil, removed from stem (I forgot this too but once again, I see how it would have made the rolls even better)

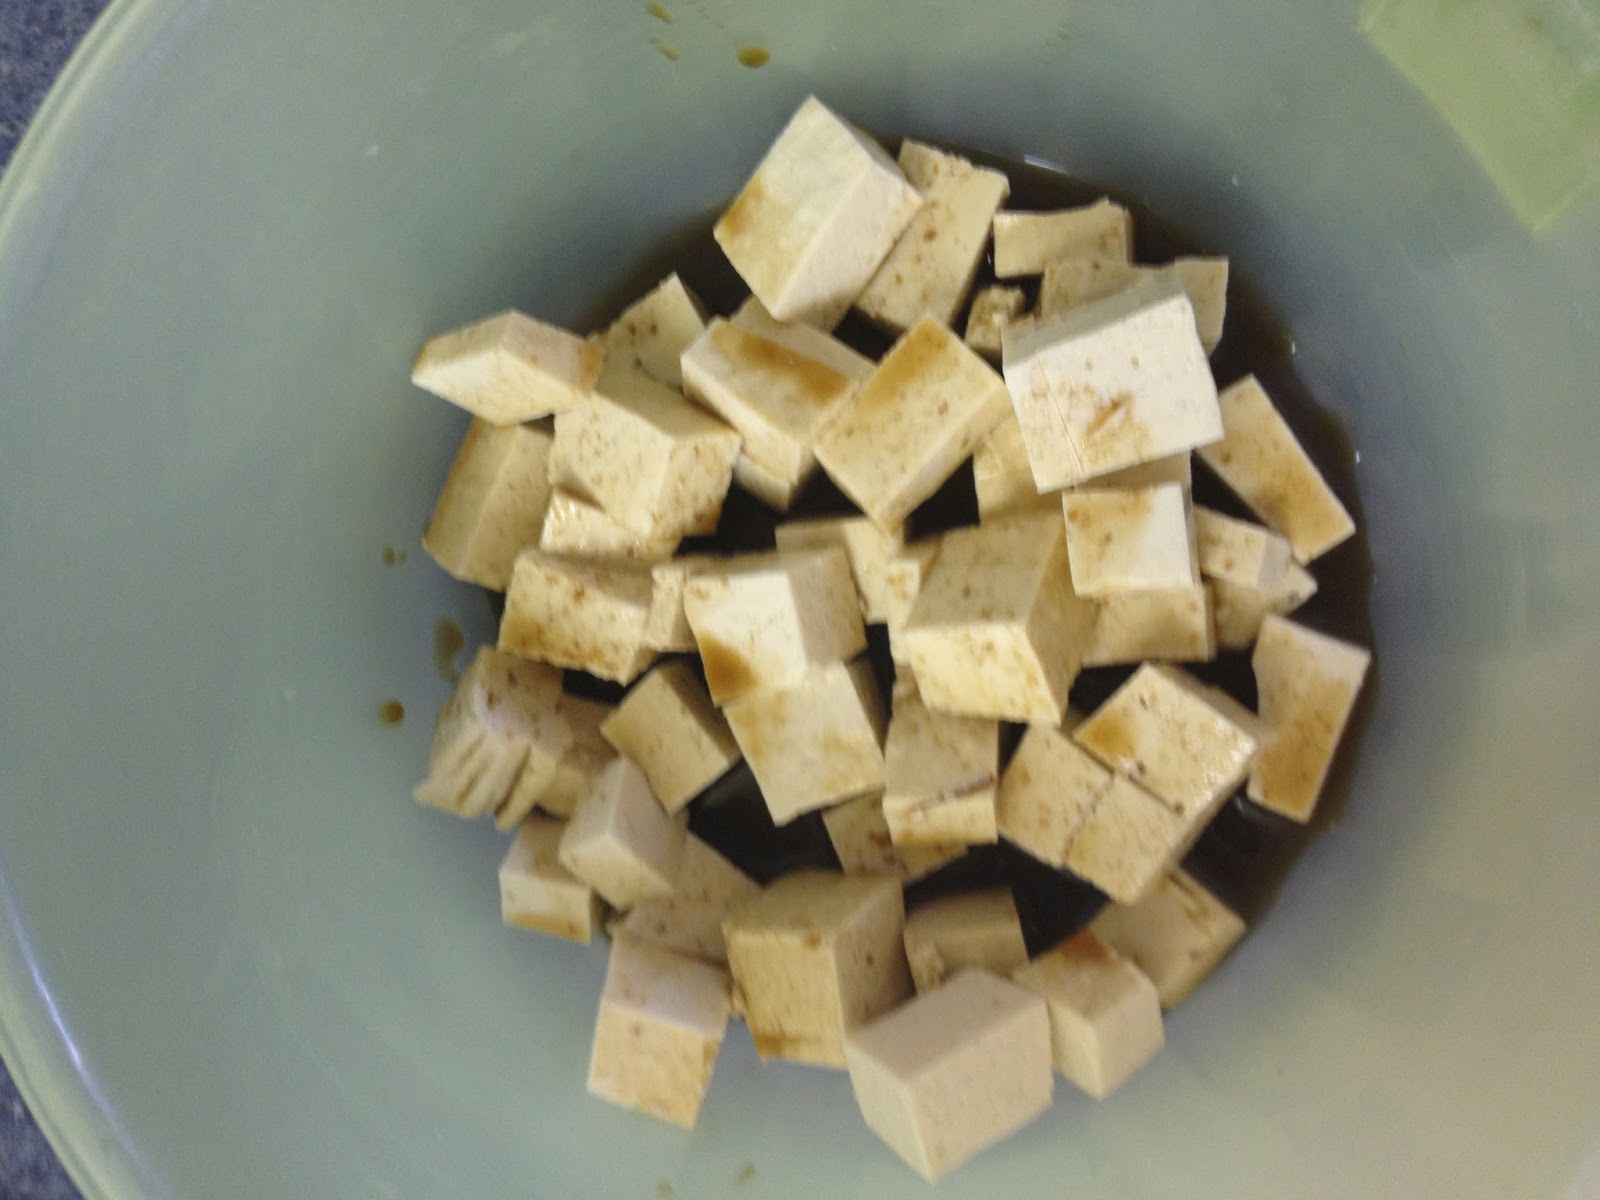
Drain and cube the tofu.

Put it to a large bowl and add the soy sauce, lime juice, and chili paste. Mix together well and set aside.

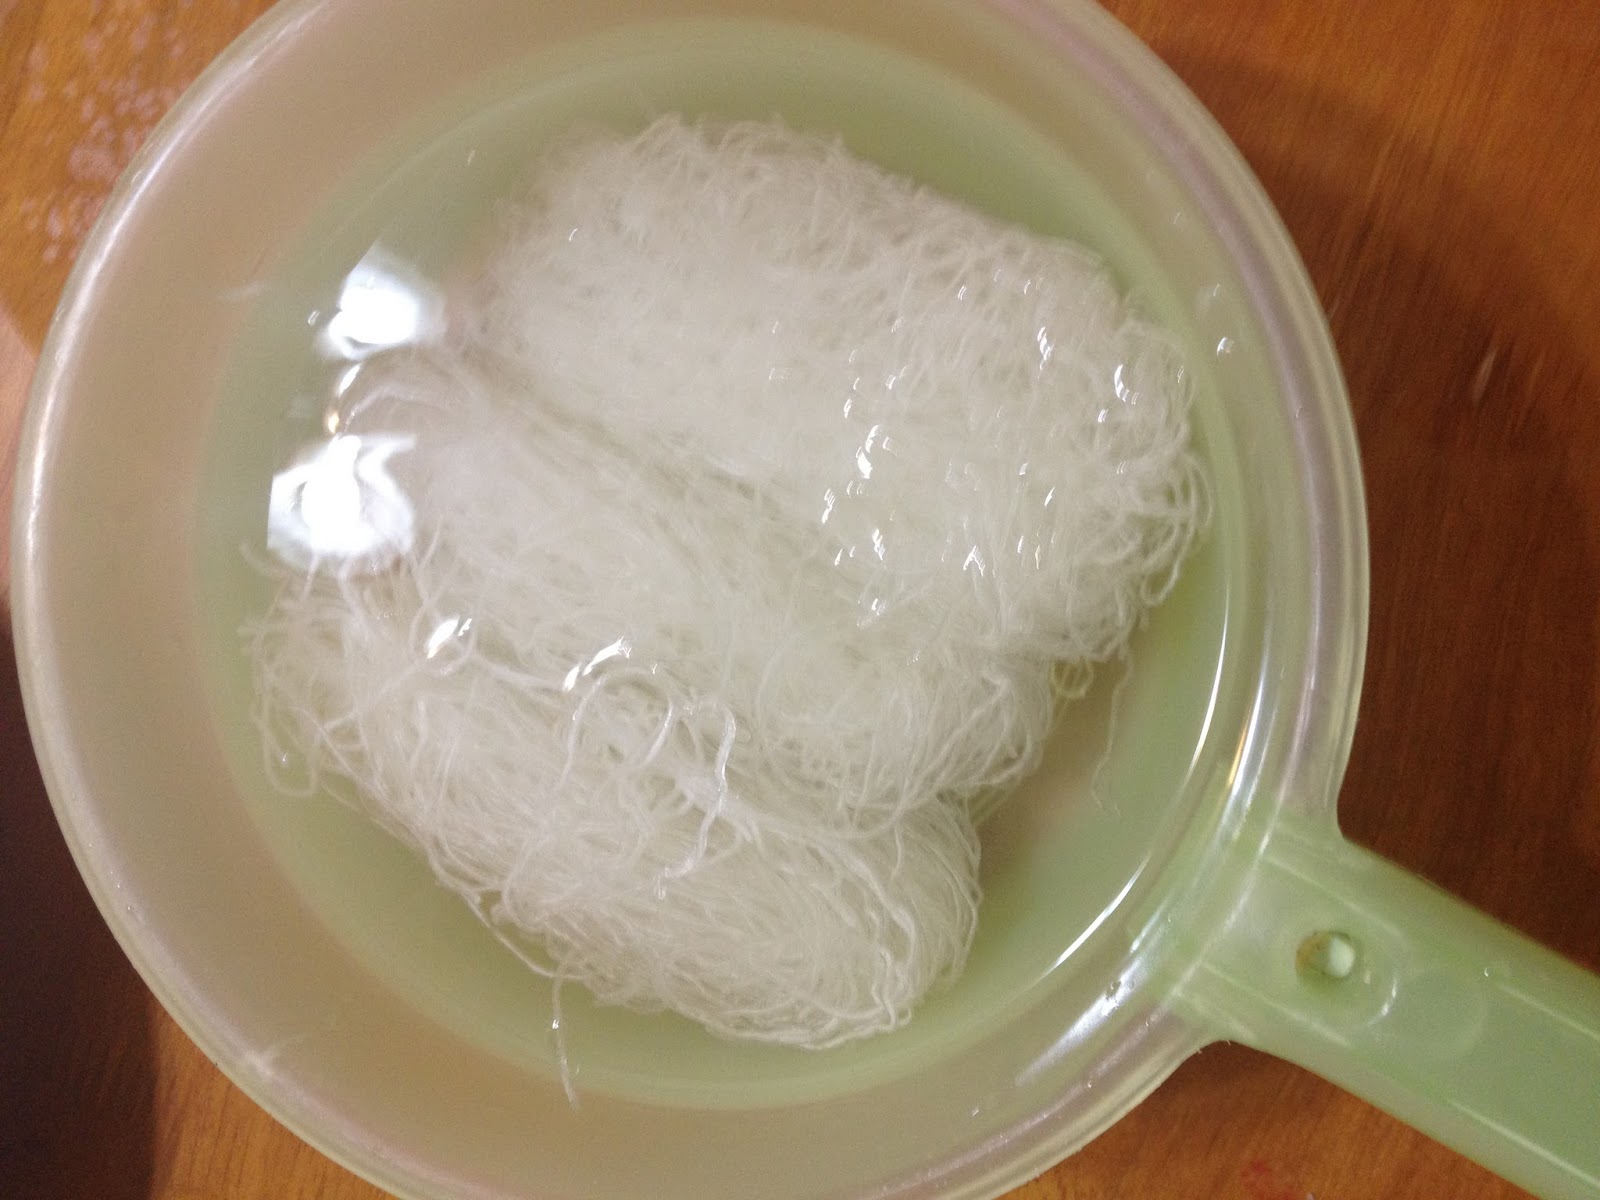
Soak the noodles in water for 15 minutes. You can cut the noodles first like Alton did in the video but I didn’t.

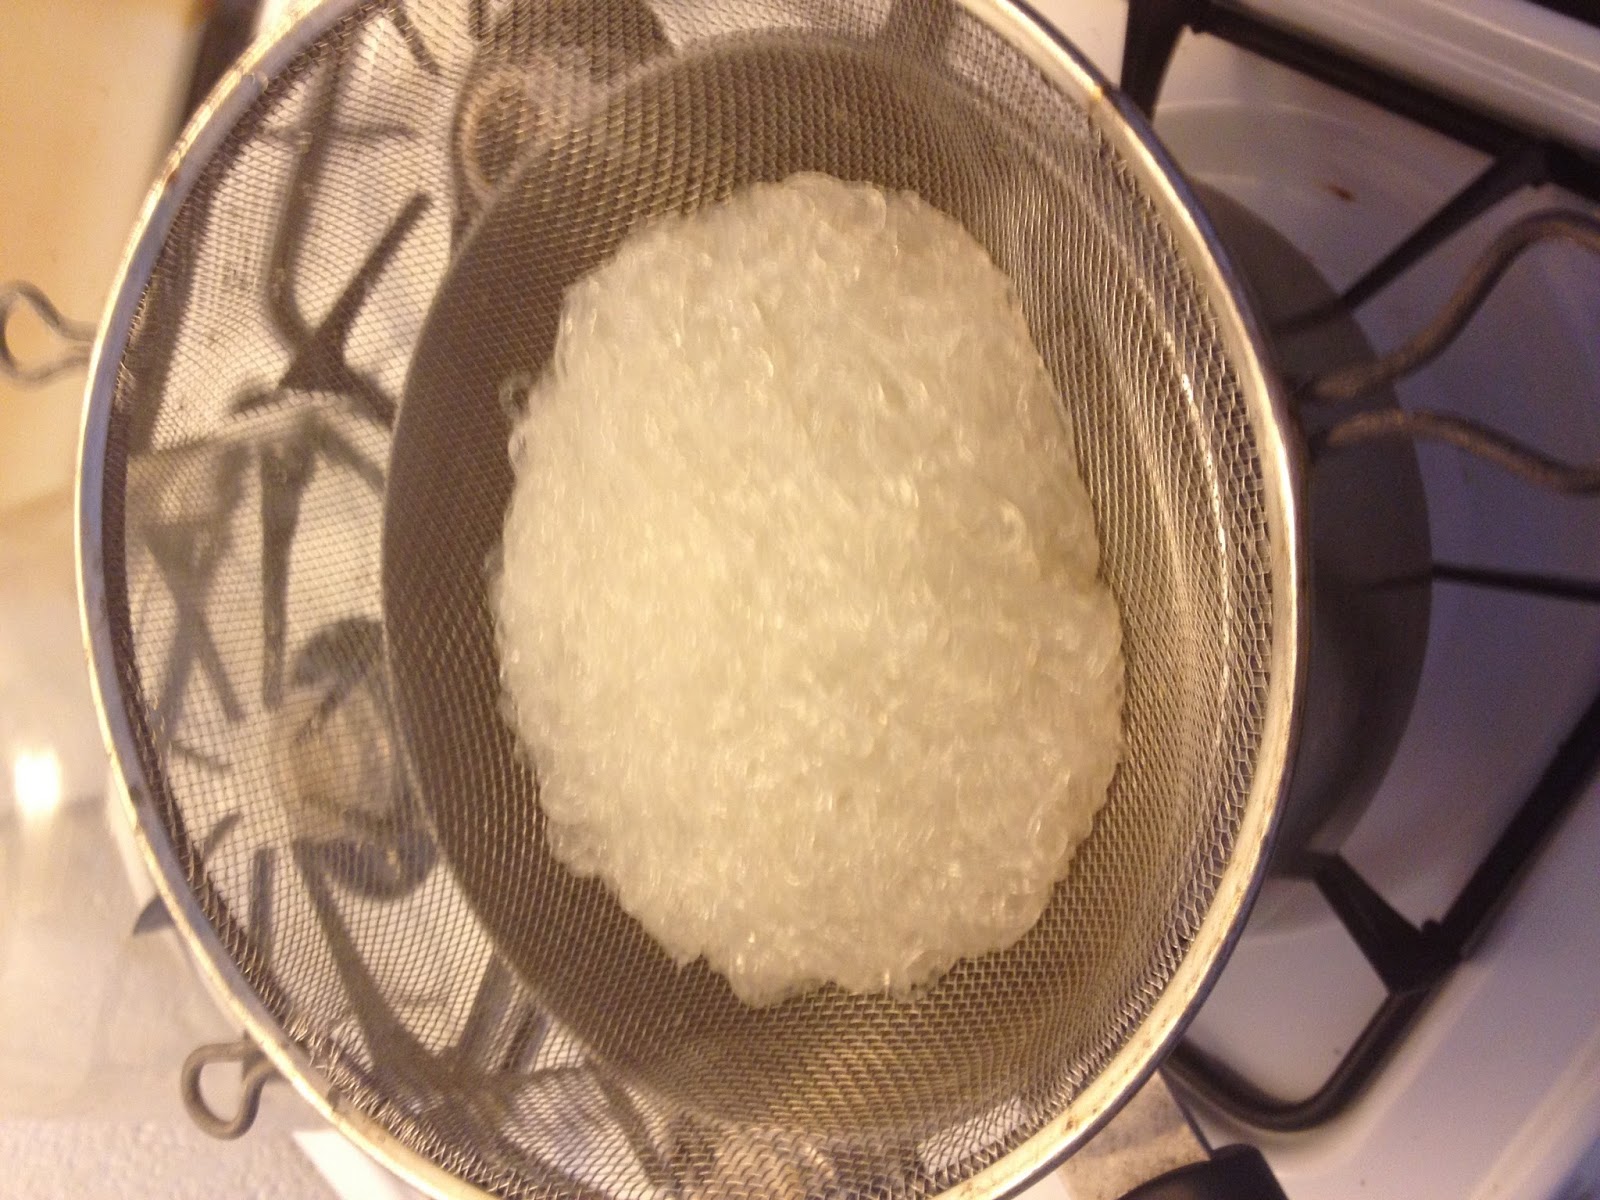
Bring a pot of water to boil on the stove. Once the water boils, cook according to the directions on the package.

Once cooked, drain and let them cool. Then add to the tofu mixture and coat well with the sauce.

Cut the cucumber and carrots into thin strip. Remove the cilantro and basil from the stems.

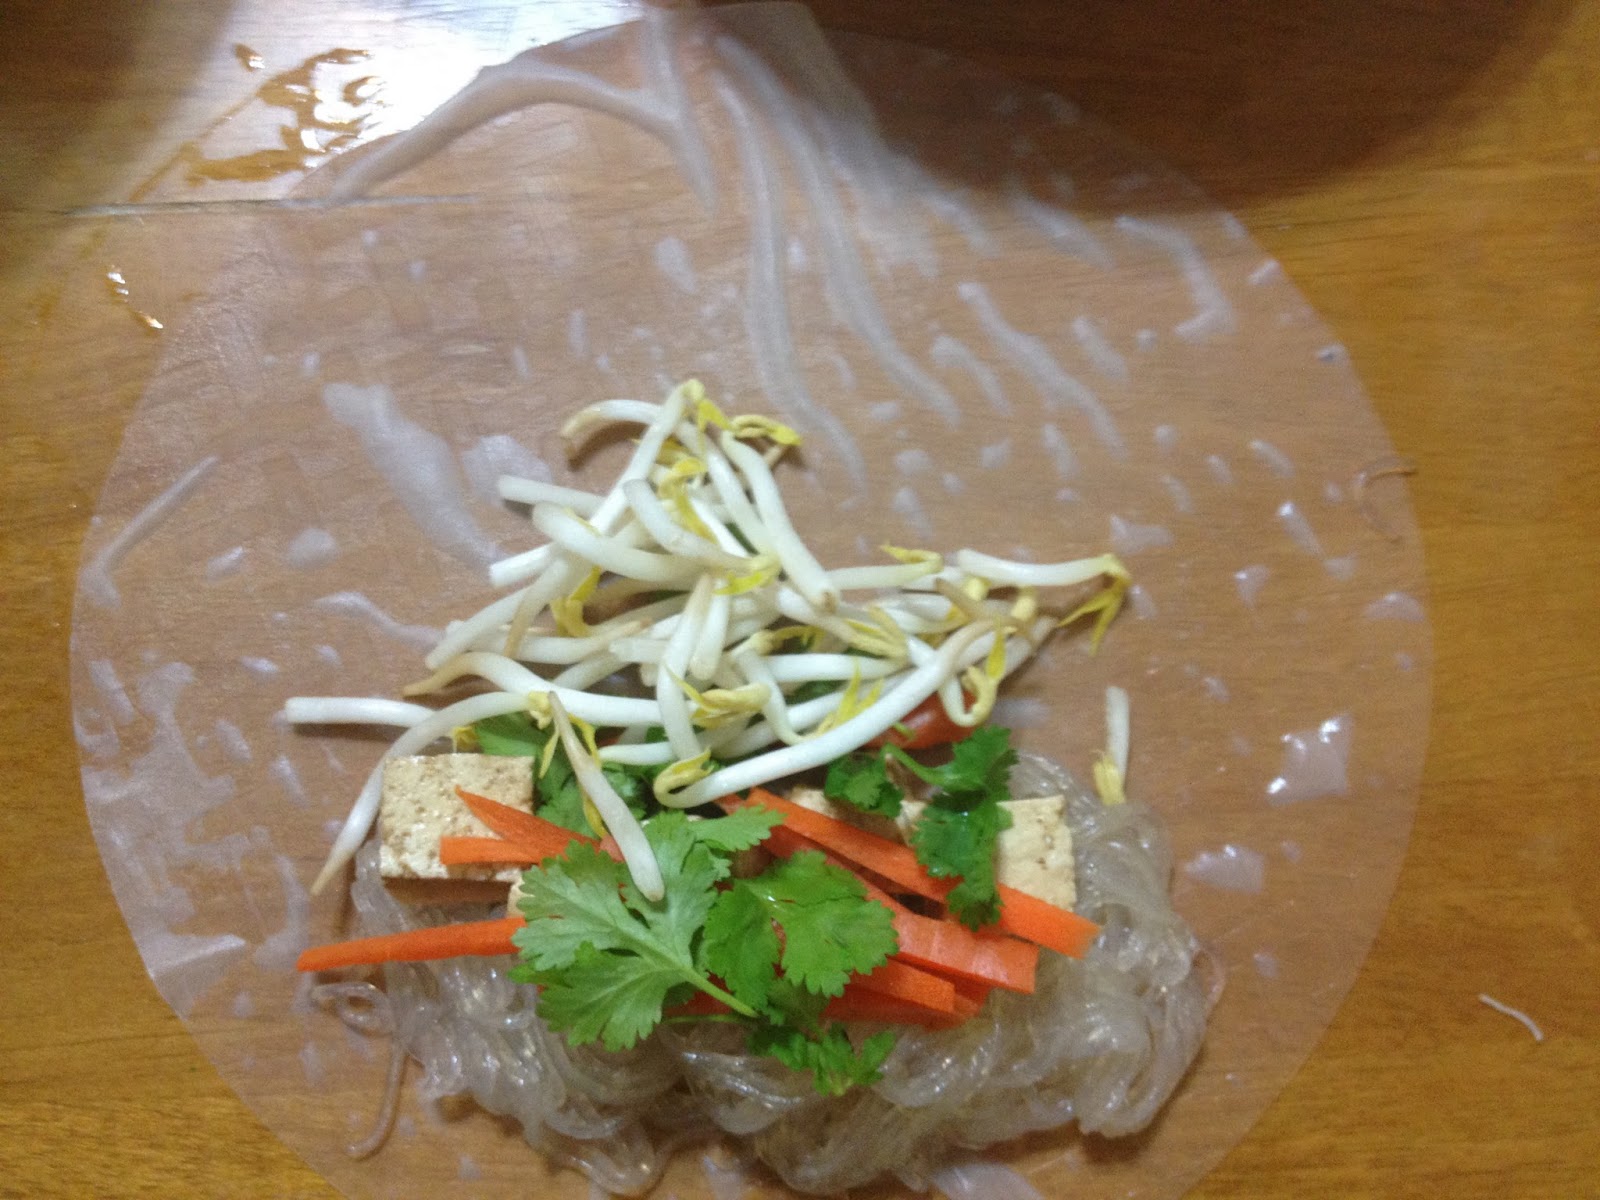
Now time to assemble, I didn’t take many photos during assembly because it was hard to rolls and shoot at the same time.

First soak the rice paper wrap in warm water for 10 seconds.

Remove and drain from the water, then lay on flat surface.

Along the bottom edge of the side closest too you, put down about 2 tablespoons of the noodle and tofu mixture. Make sure to leave a little bit of the edge free.

Next add put on a few cucumber and carrots sticks.

Now add a few bean spouts.

Lastly put on some cilantro and basil.

Now, like Alton says in the video, roll it up like a burrito. Start by rolling the top around first, then bring the sides in and then continue to roll over until closed.

Set a on a tray and cover with a damp cloth while you prepare the rest of the rolls.

I made a dipping sauce of soy sauce, lime juice, and chili sauce. And we had them with some sparkling wine.  A very lovely and light dish. I have more wrappers so I will making this again soon.

Merry Christmas and Happy Holidays!  I hope you had a lovely and festive day surrounded by those you love. And I hope santa brought you everything you asked for!

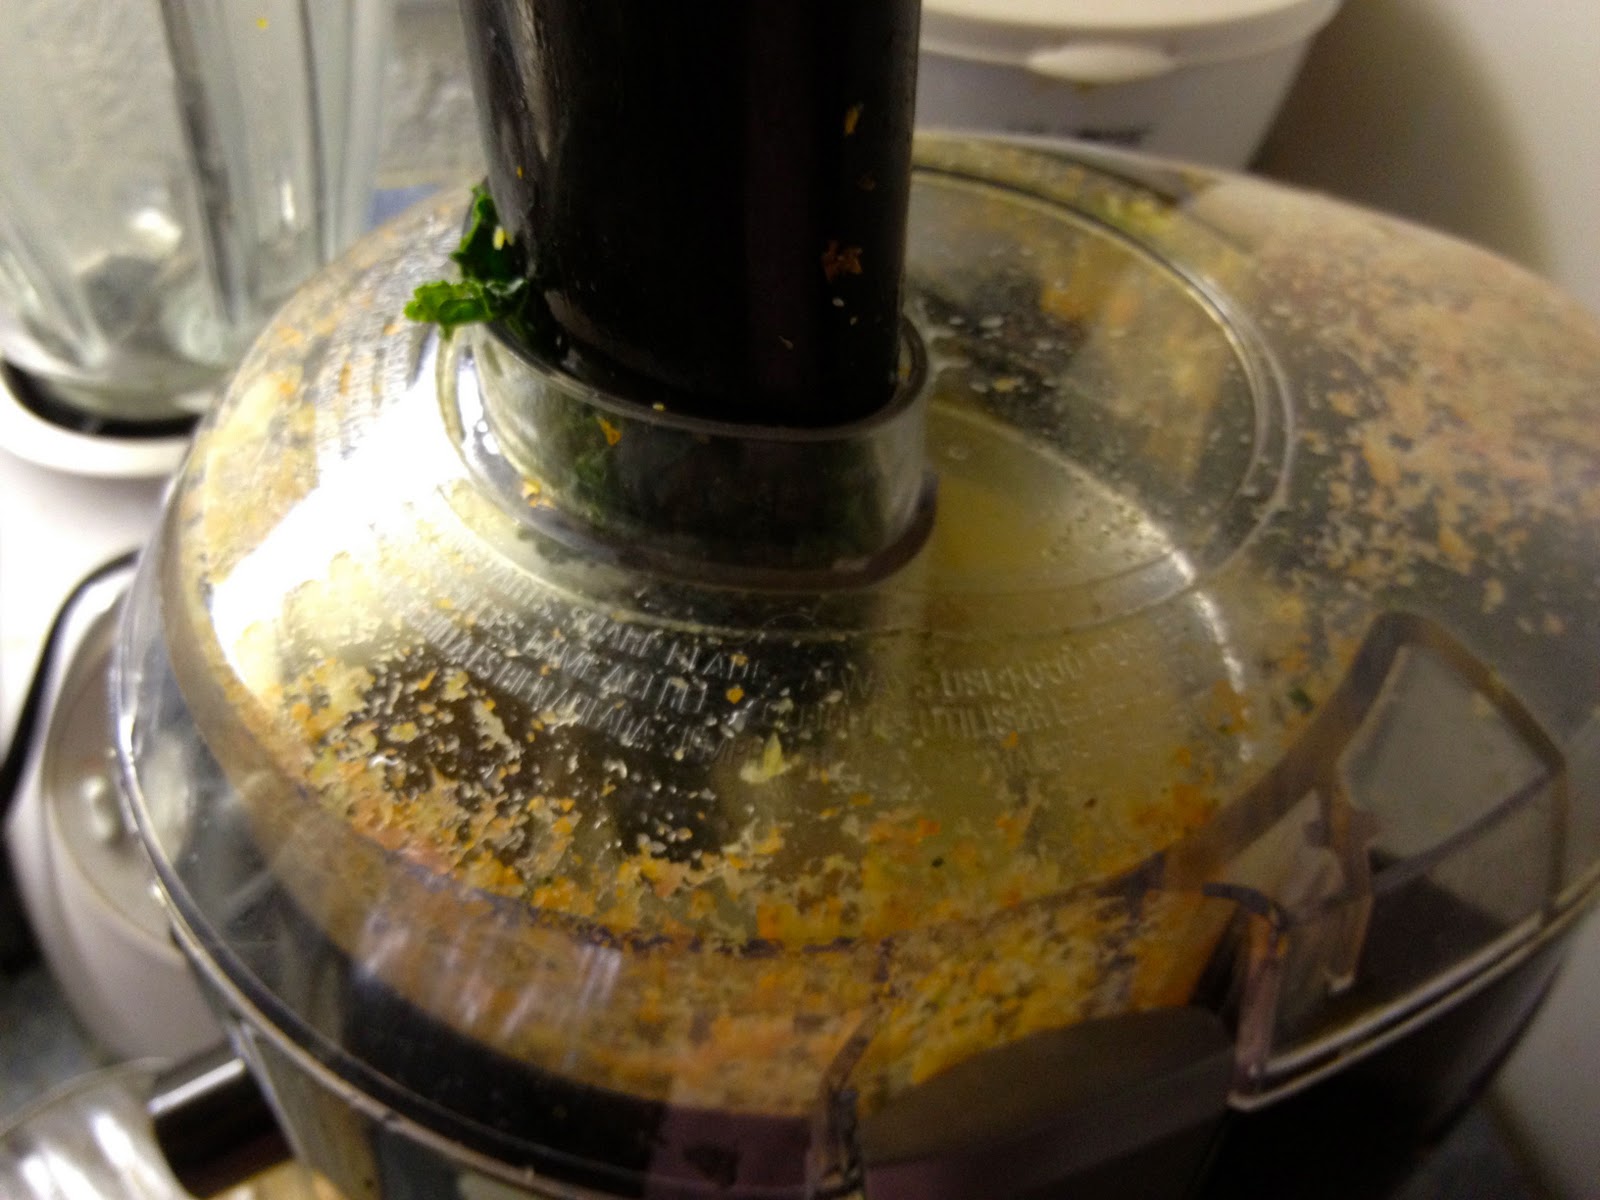
P.S. Speaking of Santa, I got a juicer so look out for some juice recipes soon.

My juicer with Penny fascinated by the bubbles in the wine.

Sugar Cookies

I am sorry I haven’t posted in awhile. If you follow me on twitter, you know that I was in a car accident. I am fine, just a concussion and whiplash, but sadly my car was totaled. What pisses me off the most was I was not doing anything bad—not speeding, playing with my phone, or goofing around at all. The car just started spinning out of control and I crashed. That aside, it could have been a lot worse so I am glad that I only have minor injuries. But, crashing your car the weekend before finals does not leave a lot of time to cook yummy food, so please forgive my absence.

Baking with a neck brace, so sexy. Thanks to my
 wonderful friend Joely for the apron, I smiled for the
 first time all week when I opened my package.
I wanna help mama.

Anyways, it’s only a few days before Christmas so it’s cookie time! I love decorating cookies with my family, I’ve done it since I was a little girl and plan on doing it every christmas to come. I decided to decorate cookies anyways this year even though I am by myself, it would not be christmas without them! Plus I was not totally alone, Penny tried to jump on the table 3 times while I was decorating them.

I planned on making cookies from scratch, but after spending 4 days in muscle relaxer coma on the couch,  I did not feel like doing all that work. So, I decided to go with a package mix. Like I said before, proceeded foods should be eaten in moderation and very rarely. A few cookies for the holidays is fine. I am keeping a couple for myself and taking the rest to work for everyone to share.

I used the Betty Crocker Sugar Cookie Mix. I substituted vegan shortening for the butter and soy milk for the egg. Although it does not say to do so on the package, I refrigerated the dough over night like normal sugar cookie dough. This really makes rolling out and cutting the dough easier. However, I needed a lot of flour to prevent the dough from sticking. This is a common complaint I found on the reviews for this mix. The cookies tasted good in the end, but the dough puff up more than I would have liked. Overall, if you want cheap and easy sugar cookies, this mix is just fine. But it’s nothing special, homemade from scratch are better.

I made a double batch so I used two packages. Half this recipe for a single batch.

Sorry I did not take pictures of the whole process, I made the dough last night when I got off work and was I too tired.

Sugar Cookies
2 packages of Betty Crocker Sugar Cookie Mix
2 stick of vegan shortening (I used Earth Balance), softened
1/2 cup soy milk

In a large bowl,  mix together all the ingredients until. Make sure all the shortening is worked in and there are no lumps.

Spray some plastic wrap with cooking spray. Form the dough into a ball and cover with the plastic wrap. Chill in the fridge for at least 2 hours or overnight.

Pre-heat the oven to 350 degrees and spray a baking sheet with cooking spray.

On a clean, well floured surface, divided the chill dough into quarters. Work with one quarter at a time and put the rest back in the fridge.

Roll the dough to desired thickness and cut out your cookies with festive cookies cutters.

Bake for 7 to 9 minutes. The edges will be slightly golden and the inside still white.

Let them cool on the baking sheet for a minute then remove and let them cool completely.

Then decorate them as desired. I used sparkle gel icing and basic Christmas sprinkles.

Every year I make a Shaun White sugar cookie because he is my favorite snowboarder.

Shaun White cookie!

I also made a bloody car crash victim person, because that’s just the kind of girl I am 🙂

Car crash cookie. There was no blood in my
 accident but that is not as fun to decorate.

I am feeling better so I should be back to my normal blogging soon. Look out for my Thai feast Christmas Eve dinner….

Rosemary Focaccia

Photo from here

My friend suggested I try making a video blog, so I decided to give it a try. Let me know what you think, I may do more in the future.

Here is the recipe for my video blog, it’s based on one from called Focaccia Bread from AllRecipes.com. I used rice flour (because I accidentally bought it instead of wheat flour) so this version is gluten free, but wheat flour is ideal.

Rosemary Focaccia:
1 cup luke warm water
1 packet of active yeast
1 tsp sugar
2 and 3/4 cup flour (I used rice but wheat flour is fine too)
1 tsp Italian seasoning
1 tsp garlic salt
1 tsp salt
2 springs of fresh rosemary, removed from stem
1 tbs olive oil
3-4 springs of fresh rosemary, removed from stem
Sprinkle of salt

This is one of my favorite breads my mom made growing up, I hope you love it too!

Tofu Scramble

One of the best breakfast for a vegan is a tofu scramble. It’s like scramble eggs and omelette combined, but no hens had to suffer through horrid conditions to produce the main ingredient. What I love the most about a tofu scramble is that you get yummy veggies for breakfast. This is basic way to prepare a tofu scramble, but you can throw in anything you like. Try some tofurky sausage, spinach, carrots, zucchini—whatever you like! What gives the tofu the egg-like color is turmeric. Everyone should eat turmeric. It’s believed to prevent tumors, several types of cancer, Alzheimer’s, and has been used as an anti-funal for centuries. Plus, it has a lovely mild flavor and makes everything that lovely shade of yellow.

This makes one serving (if your kitty doesn’t decide to eat half your peppers when you aren’t looking), but can be easily multiplied.

Tofu Scramble
1/4 cup of onion, chopped
1/4 of a block of extra firm tofu, drained and chopped
1 clove of garlic
Red pepper flakes
1/2 a green pepper, chopped
1/2 a red pepper, chopped
1 small cob of corn, kernels removed
Salt and Pepper to taste
1 tsp turmeric
1/2 tsp cumin

Heat some butter or olive oil in a skillet over medium heat.

Add the onions and cook until they begin to soften.

Add the tofu, garlic and red pepper flakes. Cook until the tofu begins to lightly brown.

Add the peppers and cook until they start to soften.

Add the corn kernels ten season with salt and pepper to taste.

Add the turmeric and cumin.

Cook until the tofu starts to really brown and the veggies are soften enough to your liking.

I topped mine with some homemade pesto and sliced tomato. I hope you love this protein-packed breakfast as much as I do!

Thanksgiving 2011: Garlic Mashed Potatoes

I saved my favorite Thanksgiving dish for last. I LOVE mashed potatoes. When I was a teenager I used to eat a bowl of instant mashed potatoes for lunch most days. I am happy to say I have grown out of those unhealthy days and I don’t eat mash potatoes that often anymore. But, they are still one of my favorite foods. Creamy, buttery, and fluffy—what’s not to love? And, I thought garlic would make them special for holiday.

Garlic Mashed Potatoes
4 Russet potatoes
1 tbs vegan butter (I used Earth Balance)
4 cloves of garlic, minced
1/2 tbs more vegan butter
1/2 cup rice milk (soy milk works fine too) 
Salt and pepper, to taste
Wash, peal, and quartered the potatoes. 
Place the potatoes in the pot you plan the boiling them in. Covered the potatoes with cold water. Let them soak for at least 15 minutes. This allows the starch to leach out so they mash better. 

Place a lid on the pot, place it on the burner, and bring it to a boil. 
While that comes to a boiling, the 1 tbs of butter in a skillet over medium heat. Once it melts, add the minced garlic. Cook until golden, but careful not to burn it. 
Once it’s ready, remove from heat and set aside. 
Check the potatoes once they have boiled for a few minutes, they will be ready when a fork can be easily inserted all the through a quarter with no resistance. Once they are ready, remove from heat and drain. 
Return the potatoes back to the pot, add the garlic, the other 1/2 tbs of butter, and rice milk. Mash the potatoes until smooth and all the ingredients are incorporated. 
Now you have a big bowl of potato heaven! I hope you love this as much as I did.