Feliz Cinco de Mayo: Tostadas and Margaritas!


On May 5, 1862 the Mexican Army had a surprise victory over the French at the Battle of Puebla during their occupation after the Mexican-American War. Cinco de Mayo is not Mexico’s Independence Day like most Americans think. The holiday has minor significance in Mexico, mainly celebrated in the state of Puebla. It was first celebrated in the United States by Mexican immigrants in southern California as a way to celebrate their heritage.

The holiday is mostly celebrated by Americans because it’s an excuse to party during the week. I can hear the phrase “Cinco de Drinko” echoing all over college campuses now. The victory actually had great significance for America as well. France had been giving supplies to the Confederacy at the start of the Civil War. The loss stopped France from continuing aide to the South, who already was being crippled by lack of goods and supplies.  So, might as well toast to Mexico for helping end slavery if you going to get totally wasted on Thursday.

Sadly, this college kid has very tough finals all next week and will be shutting herself up in the library studying for the week, so I will not be partaking in the festivities tomorrow. But today was the last day of class, so I thought I’d throw my self a little fiesta to celebrate surviving my first year in Hawaii.

As a West Coast girl, I grew up eating killer Mexican Food. I loved going to my Mexican friends’ houses, nothing like a homemade tortilla. And there is no shortage of awesome Mexican restaurants. Two of my favorites in the Portland area are Maztalan and Lupe’s Escape. And if you are in Eugene, you have to try Daniel’s or The Mission, spent some good May 5th’s in those places as an undergrad at University of Oregon. As for Hilo, there is only one Mexican place, Ruben’s. It’s good, but nothing special to be honest.

Mexican is my second favorite cuisine after Thai, so I had a hard time deciding what dish I wanted to make. After probably more thought than necessary, I decided on tostadas because I had not had one in awhile. This also works out well because they are gluten free and May is Celiac Disease Awareness Month. But, I knew there would be margaritas. I love tequila, and there is nothing like a sweet and tangy margarita to refresh you after a long day. I will forever think of my friend Joely every time I have one. During my senior year at U of O, she and I would often go share a pitcher (or two) at The Mission and gossip for hours. I miss you terribly girl, please come visit me soon!

This recipe should feed 4 people, 2 tostadas each.

Pinto Bean Tostadas
2 cans pinto beans, drained
4 cloves garlic
1 cup water
1 tbs chili powder
2 tsp smoked paprika
Salt to taste
1 large red bell pepper
1 large green bell pepper
1/2 medium white onion
salt and pepper to taste
1-2 Anaheim pepper
8 Corn tortillas
Salsa
Vegan sour cream

Margaritas
Sweet and Sour Mix
Gold Tequila
Salt
Fresh lime
Ice

The smoked paprika makes all the difference.

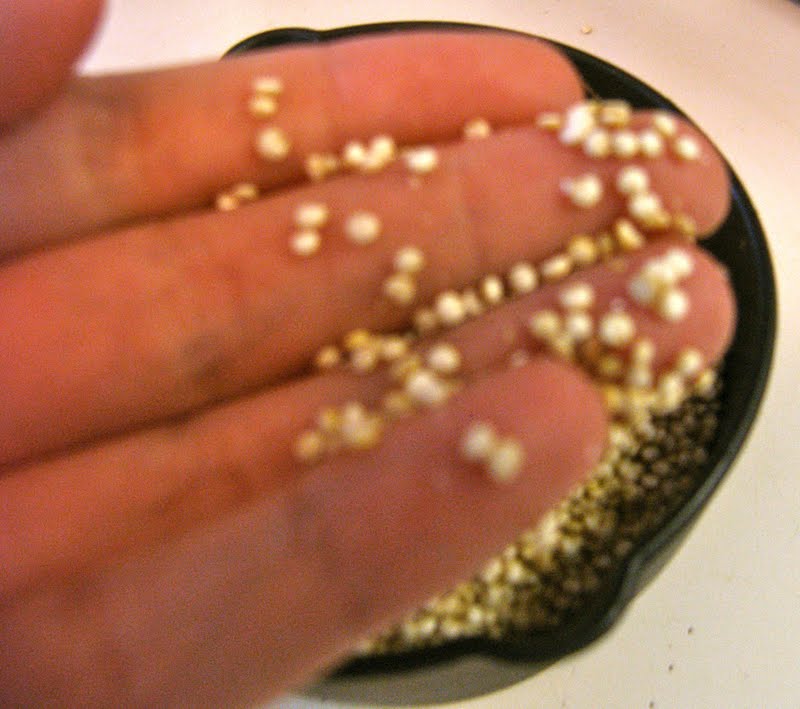
Drain and rinse the pinto beans. I picked pinto because it is very common in Mexican cooking and I like the mild flavor. Mince the garlic cloves, and add along with the pinto beans to a sauce pan. Add the water, chili powder, smoked paprika and salt. I really suggest you used smoked paprika, it can be found in most stores and really gives the beans a great flavor.

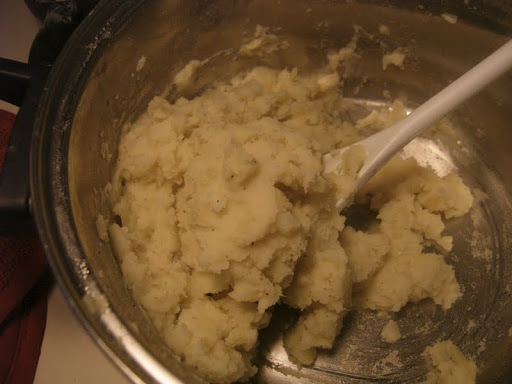
Similar to refried, but way less fat and sodium.

Bring to a boil, then reduce to a simmer. Coook until the liquid is absorbed, about 15 minutes. Stir occasionally.

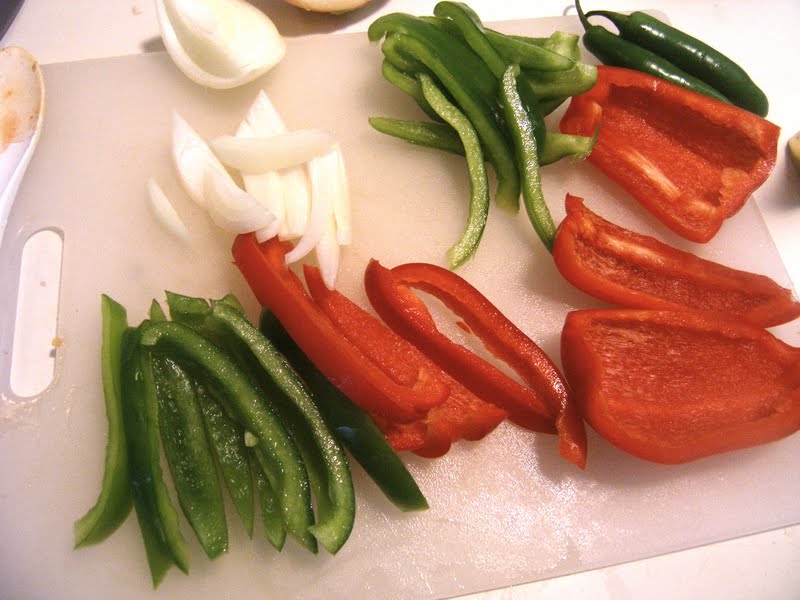
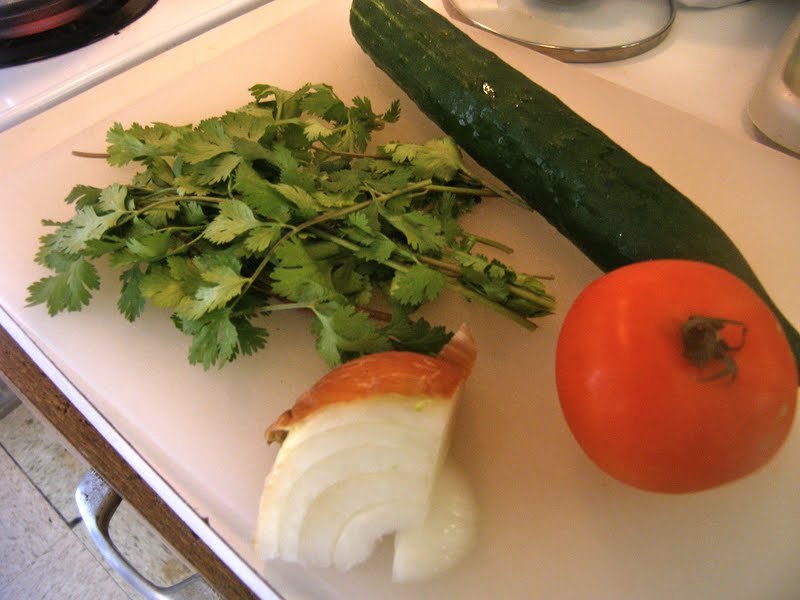
All organic, of course.

While the beans cook, cut the bell peppers and onions into thin strips. I picked red and green for the colors of the Mexican flag.


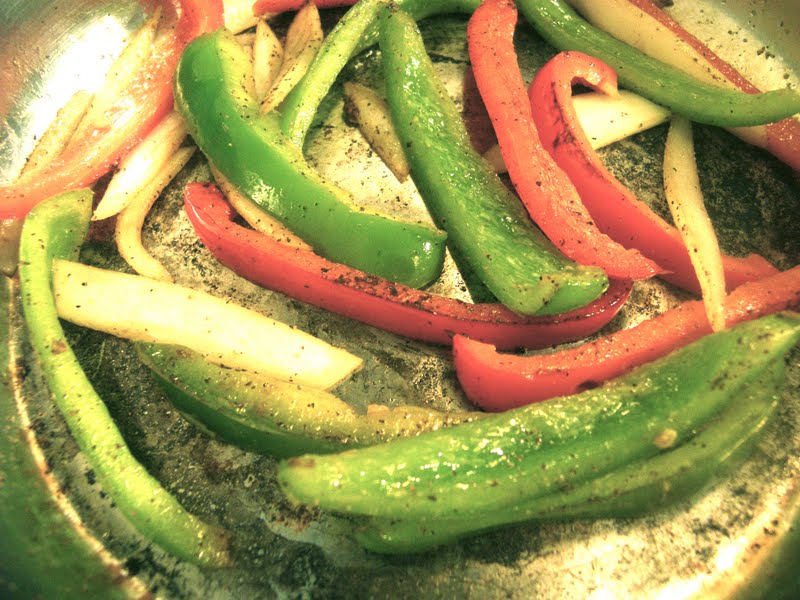
Love the smell of cooked bell peppers.

Spray a skillet with cooking spray and heat over medium heat. Add the veggies to the skillet and season with salt and pepper. Cook until the onions are slightly golden and the peppers start to blacken a bit.


All organic corn tortilla.

Remove the peppers from the skillet and cover to keep warm. Spray the skillet again with cooking spray and keep it on medium heat. Depending on the size of the skillet, put 1 to 2 tortillas in at a time and heat until they crisp up and start to blacken slightly. Watch carefully, they tend to burn quickly.


I leave a few seeds because I like it hot.

Lastly, chop up the Anaheim peppers. You can use any hot pepper you like. I strongly suggest doing this last so you don’t contaminate everything and make your food insanely hot. Cut the pepper down the middle. If you want less heat, clean out the membrane and seeds with a spoon. Chop into small pieces. WASH YOUR HANDS afterward, the juice will soak into your fingers and can get into your eyes.


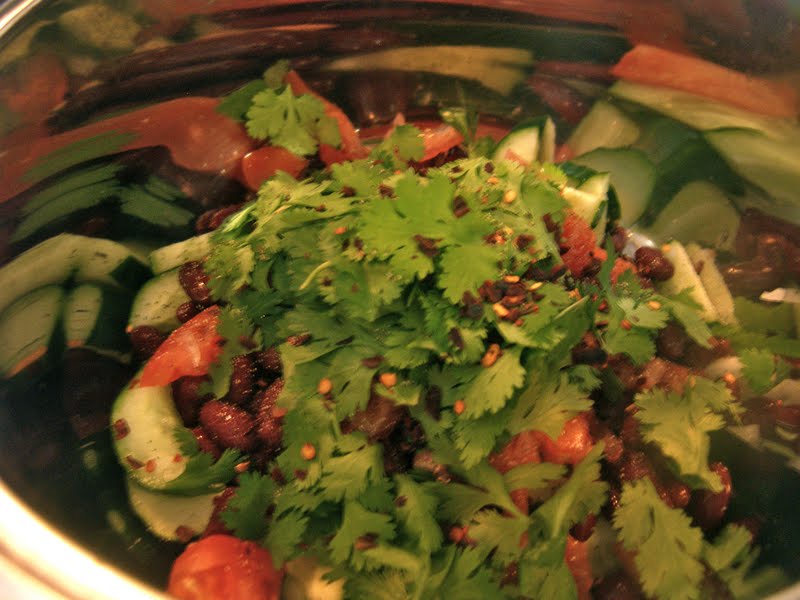
Green, white, and red like the Mexican flag.

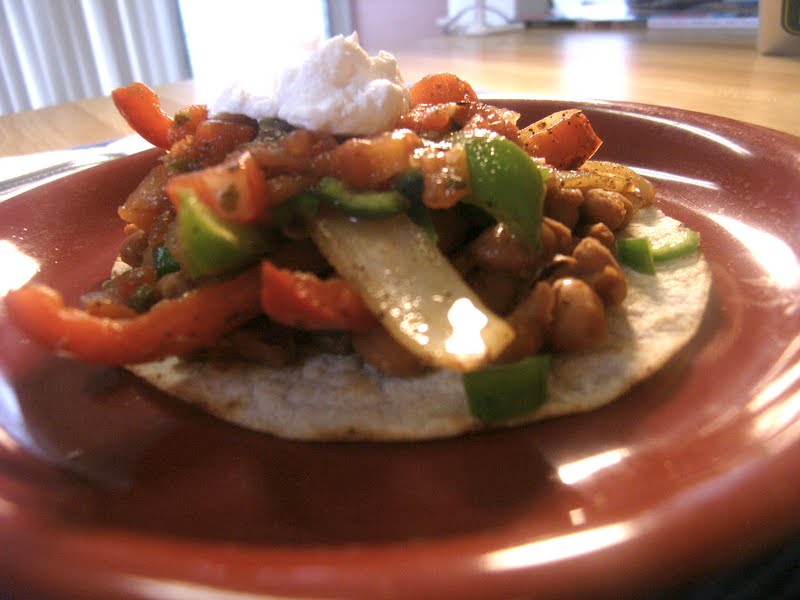
Now time to assemble. Plate one crisped tortilla and evenly spread about 1 to 2 tbs of beans on top. Next put on about 1/4 cup of veggies.

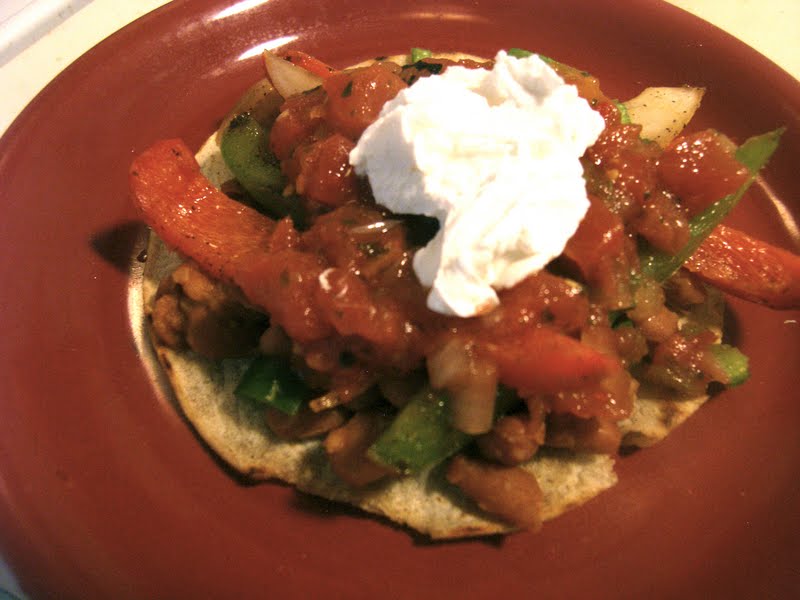
Tofutti sour cream is so good.

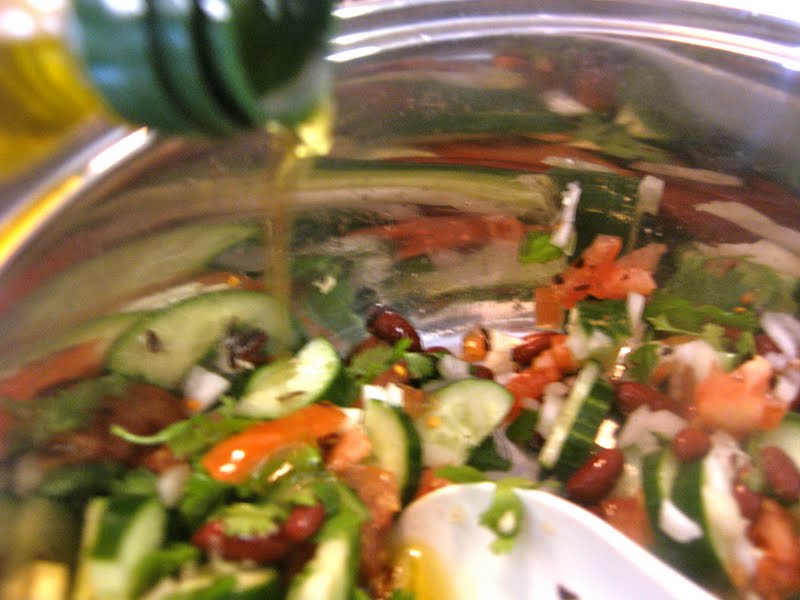
Then top with as much fresh salsa and sour cream as you like. Then sprinkle on some of the Anaheim peppers and squirt some lime juice for kick. A little cilantro is wonderful too.


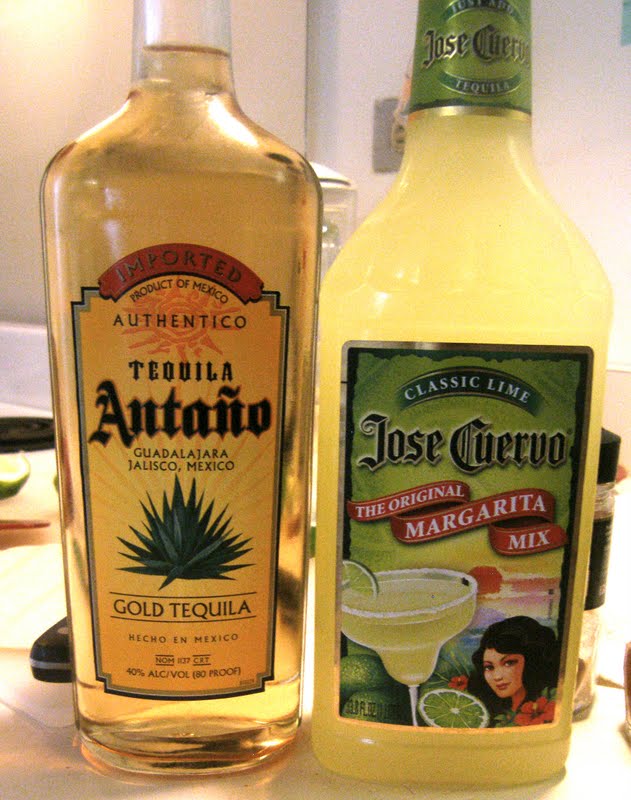
Both on sale, score.

Now, for the margaritas.  I like mine on the rocks instead of blended. I am not the best bartender so I used sweet and sour mix. I don’t like triple sec  and I don’t notice a different without it, so I don’t use it.


The salt is red because it’s Hawaiian sea salt, tainted from algae

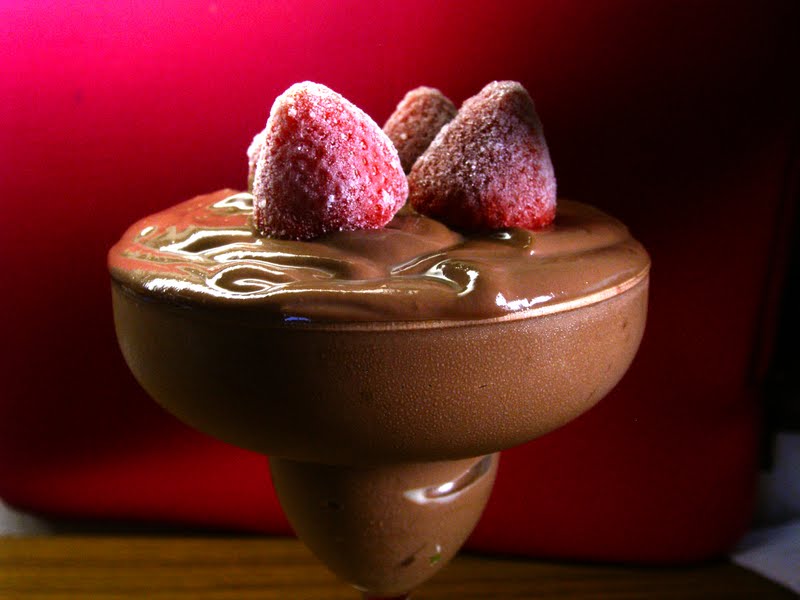
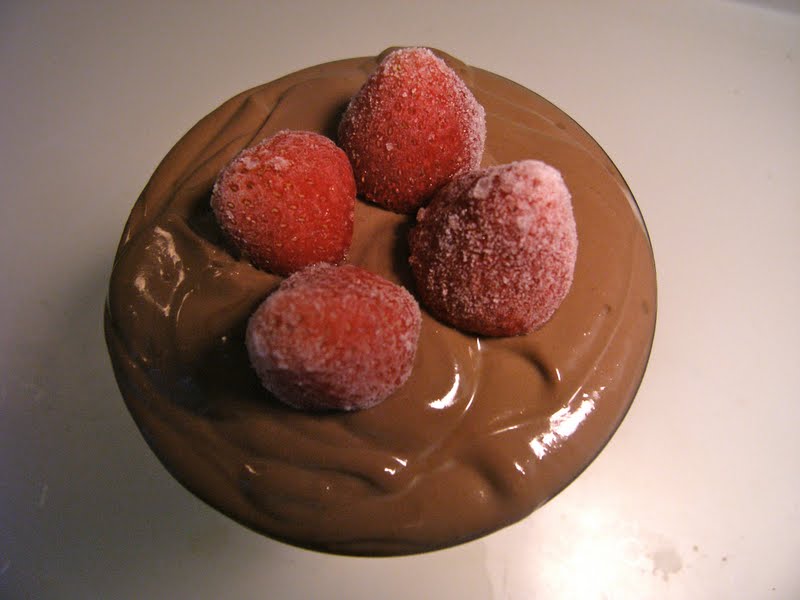
I used a regular drinking glass since I used my margarita glasses for my Chocolate Chili Mousse yesterday. Wet the rim of your glass with lime juice. Pour some salt on a plate and roll the rim in the salt.


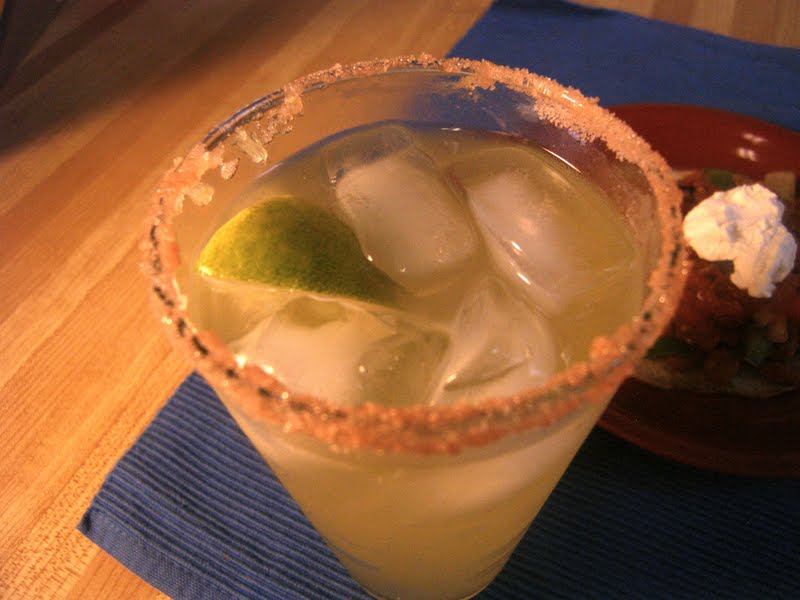
Here’s to the end of my first year as a geology undergrad!

Add a handful of ice cubes to the glass. The best ratio is 3 parts mix to 1 part tequila. Pour the liquids over the ice and stir gently. Squirt in a little lime juice and garnish with a wedge.

Yeah for Mexico’s victory over France that prevented aide to the Confederacy! Feliz Cinco de Mayo!

I am one happy gringa.

Chocolate Chili Pepper Mousse

May is Celiac Disease Awareness Month. Celiac Disease is an autoimmune disorder that effects the small intestine’s ability to process gluten protein. Common side effects are fatigue, severe digestive problems, and even growth problems in children.

Although I do not have a gluten allergy, I have several friends who do and I am always more than happy to post recipes they can eat too. If you do not have Celiac Disease or another type of gluten allergy, than there is no reason for you to cut all gluten out of your diet. But, that doesn’t mean you can’t enjoy a gluten-free meal every once and awhile, give your body a break from processing the same gluten-heavy stuff over and over again. Like corn, it’s pretty much in every processed food today.

Gluten is a protein that comes from the wheat family, which include rye, barley, and oat. It is a great binder and leavener, which is wheat-flour breads are so common. It’s also used as a thickener, so it is used in a wide array of processed foods.  Because of it’s chewy texture, it is also used in many meat alternatives so gluten-free vegans and vegetarians need to read labels carefully.

My gluten-free friend Michelle asked for a chocolaty dessert, and I instantly thought of this Chocolate Chili Pepper Mousse recipe my mom found on VegWeb awhile ago. Remember in the movie Chocolat when Vianne said that chili enhances the flavor of chocolate? She wasn’t kidding. It doesn’t overpower the dish at all, just gives it that perfect little kick. Try chocolate with other spices too, like a cup of Mexican Hot Coco with a dash of cinnamon. Chocolate and spices are loaded with antioxidants.

The only change I made to the recipe was I used grade B maple syrup instead of agave because that is what I have on hand. In the American  maple syrup grading system, grade B just means it is darker and less sweet than grade A.

Chocolate Chili Pepper Mousse
1 package of silk tofu, drained
1/3 cup cocoa powder
1/3 cup maple syrup
2 tsp vanilla extract
2 tps peanut butter
1/4 tps chili pepper flakes
Berries, fresh or frozen

Throw everything into a blender, except the berries and blend until smooth. I was going to take photos, but this dessert is so simple there really is no need for visual aide. You may want to mix with a spoon after blending to make sure everything is incorporated.

Pour into bowls or decorative glasses. I used martini glasses.

Refrigerate for at least two hours. The flavors develop more the longer it sits.

Top with the berries or any desired fruit. Also good with vegan whip cream or some crushed nuts. Sprinkle a bit more chili flakes if you like an extra kick.

Topped with sugar-covered frozen strawberries.

The texture is so smooth and creamy, it’s hard to believe it’s not dairy—or gluten. It also makes a great pie filling and comes out kinda torte-like if you freeze it. Hope this is chocolaty enough for you Michelle!

P.S. My next two posts will also be gluten-free. Check out the Cinco de Mayo one tomorrow.

Red Velvet Cupcakes

I have a friend coming over tonight so I thought I would be a good hostess and bake something yummy. My favorite cake is red velvet cake. So moist and sweet, it really does melt in your mouth like velvet. I haven’t had any since I went vegan, so I thought it was time to pull out my cupcake tin again and make some.

I Googled “vegan red velvet cupcakes” and the first link to come up was from a blog called Mac & Cheese.  These Red Velvet Cupcakes have no complicated ingredients and stay pretty true to the original recipe, which is what I wanted since I love it so much. The author adapted the recipe from Vegan Cupcakes Take Over The World, a book I am dying to get.

I halved the recipe and made a few changes. I used mirin instead of apple cider vinegar because it is what I have on hand. The vinegar is for leavening mainly, and you use so little that it does not alter the taste really. I also used hemp milk instead of soy because I like it better. I used melted dark chocolate instead of coco powder and butter instead of vegetable oil.

Nice deep red color.

The biggest change was the coloring. I used beet juice instead of food coloring. I did this for two reasons: it’s cheaper (one stupid little tube of red dye was $4.99!) and it’s healthier. Food coloring is pretty much all chemicals—and sometimes isn’t even vegetarian because it contains carmine (beetle scales). I thought of using a natural dye after I saw my friend Eva posted a blog where she used bright foods to dye her Easter eggs (check it out here).  I Googled it and it turns out I am not the only one who doesn’t want a “red beetle cake.” I wasn’t sure how much to use at first so I added a little at a time till the color was right without thinning the batter too much. You cannot taste the beets at all. But, to be safe and keep Marquis happy, I added a bit more sugar just in case. They did not come out BRIGHT red, but that’s fine with me. I’d rather have lighter cupcakes than ones full of toxic dye.

Make your own if you can

And I have to admit, I used store-bought frosting from a can. I suck at making frosting and since these are for a guest, I wanted them to be perfect. At home my mom usually ends up fixing my pathetic attempts. I never can get the consistency right. Most can frostings are actually vegan. They are made with soy, which doesn’t spoil quickly like dairy does. I found the one with the fewest scary chemical ingredients and punch it up a bit with vegan cream cheese.

Red Velvet Cupcakes
Cake:
1 cup hemp milk (or whatever non-dairy milk you prefer)
1 tsp mirin (or whatever vinegar you like)
1 and 1/2 cups all-purpose flour
1 and 1/4 cup sugar
1/2 tps baking soda
1/2 tps baking powder
1/2 tps salt
14 g dark chocolate, melted
1 tbs vegan butter, melted
2 tps vanilla extract
The juice from 1 can of beets
Frosting
1 can vanilla frosting 
1/4 cup vegan cream cheese (try Tofutti)

Pre-heat the oven to 350 degrees F and spray a cupcake tin with cooking spray. I don’t use cupcake liners, they are just extra waste.

In a small bowl, add the mirin to the hemp milk and set aside to curdle. This is to replicate buttermilk.

In a large bowl, sift together the flour, sugar, baking soda, baking powder, and salt.

Next add the milk mixture, melted chocolate, melted butter, and vanilla extract. Mix well.

Mix well so you don’t have any streaks.

Add as much beet juice as necessary to reach the desired color without thinning the batter too much. This is the main reason I didn’t use oil, cut down on the liquids to keep the right consistency. It should be slightly runny like a typical cake batter.

So happy my mom bought me a cupcake tin.

Fill the cupcake cups 3/4 the way full and bake for about 20 minutes.

They smell so good!

They are done when no longer jiggly and a toothpick inserted comes out fairly clean.

Let them cool in the pan for a bit so they are easier to remove. Then let them cool completely before frosting. I made mine the day before and refrigerated them over night.

To make the cream cheese frosting, put the frosting and the cream cheese into a bowl. Mix together well, whip it up a bit to make it fluffier. You can add some powdered sugar to thicken it up if needed.

Mix well so you don’t have cream cheese lumps.

Not only am I bad at making frosting, but I am bad at the actual frosting step as well. So, I use a piping bag instead—well actually I use a ziplock bag with the one tip cut off.

Since I added more liquid, I added some powder sugar to thicken it.

Swirl

 
I got a little fancy and made a swirl frosting. I put some beet juice in half of the frosting to make it pink. To make the swirl pattern, put half the white on one side of the bag and the pink on the other then squeeze together (I forgot to take a picture of this, sorry).

When you pipe it on to the cupcakes, the colors swirl together. Because I live in a humid place, I stuck mine in the fridge to set.

Sweet, moist, and velvety. Just as good as dairy red velvet cake. Sure to please any guest—that is if you want to share. 

Quinoa with Cucumber and Clilantro Salad

Quinoa is one of my favorite foods. It’s been a staple of most South American cultures for centuries. My Bolivian friend Leslie has asked me several times to post a recipe with it.  It is eaten like a grain, but actually is a seed. It’s related to spinach and beets. It’s a very strong little bugger, capable of surviving in poor soil and high altitudes. 

It’s a complete protein, and is high in calcium, iron, and fiber. And it’s gluten free, so it’s great for people with gluten allergies. Don’t listen to the rumors it tastes like mud. Unwashed quinoa is a bit muddy tasting, but majority of the quinoa sold in stores is washed so don’t worry about it. I think it tastes like any other grain, like rice or wheat. I like it because it has a soft texture.

I came up with this recipe by myself. Every time I Skype with Leslie, she asks me for a simple quinoa dish and this is what kept coming to mind. Once again, all my veggies came from the Hilo Farmers Market and were very cheap. The veggies, including the garlic and onion, are raw in this dish. Raw veggies hold more of their nutrients and although I am not really into the whole raw food diet, it is still important to eat raw veggies often. Raw garlic is amazing for your digestion, just eat it in small dozes so it isn’t overwhelming. I use canned beans because even I think soaking dried beans is a pain.

Funny story how I got my quinoa. I drove to Kona last weekend to have some nice beach time before finals and met some nice tourists. They rented a timeshare so they cooked some of their meals. They were leaving that day and offered to give me their unopened stuff. Score for a broke college kid! Thanks Jason and Rick! 
 

Quinoa with Cucumber and Cilantro Salad
1 cup quinoa
2 cups water
1 large cucumber
1 large tomato
1 can of red kidney beans, drained and rinsed
1/2 medium onion
1 clove of garlic
1/2 cup fresh cilantro
1 tbs lime juice
1 tbs olive oil
Red pepper flakes, to taste
Salt and pepper, to taste

Add the quinoa and water to a pot, and bring to a boil. Then cover and reduce to a simmer.

They must be Duck fans, they yell “O,” ha!

Cook for 10-15 minutes, until all the water is absorbed and the grains are translucent with the little inner ring is visible. Set aside to cool while you make the salad. Hot quinoa will warm your salad and wilt the cilantro. 

I add a lot of red pepper because I like it hot.

Chop the cucumber and tomato into bit-sized pieces. Finely chop the onion and garlic. Remove the cilantro leafs from the steam and chop if you desire (I left mine whole, they aren’t that big). Drain and rinse the kidney beans. Add everything to a large bowl and mix.

Although it’s good fat, it’s still fat so don’t over do it with the oil.

Next add the lime juice, olive, oil, red pepper, and salt and pepper. Mix well to coat everything evenly. I suggest under red-peppering  and salting at first, it takes a little for them to reach full potency.  I chilled mine for a half an hour before serving to let the flavors really set in.

You can mix the quinoa in with the veggies or just serve the salad on top. I just topped mine. I am so glad I finally made this, I’ve been thinking about it for awhile.

Clean, crispy, but very filling.

Happy Easter! Would You Like Some Green "Eggs" from Sam?

Happy Easter and happy spring! I thought I would make myself a little brunch today. I had some left over pierogi filling from last night, so I thought something egg-like with potatoes would be nice. Of course vegans do not eat eggs, but we make awesome things with tofu. Tofu scrambles are a great breakfast staple, but I wanted something a little fancier for Easter.

I found a recipe for Tofu Quiche with Spinach and Broccoli on VegWeb, and thought it would be tasty.  Instead of making a crust, I used my pierogi filling as a base and made little mini quiches. You can use just plain mashed potatoes or even instant too.

So creamy!

I used hemp milk in this recipe because it is my favorite non-dairy milk. It’s creamier and a little sweeter than soy milk. I haven’t been able to find it in Hilo, but to my delight I saw some in the health food store yesterday. You can use whatever milk you prefer.

I also decided to puree my tofu filling to make it all green in honor of my favorite childhood book, Green Eggs and Ham. Purees are a good way to get more vegetables into your meals, especially for picky little kids.

 
Green Mini Quiches
1 cup prepared pierogi filling or mashed potatoes
1 tub of extra firm tofu, drained
1/2 cub hemp milk
1/4 cup spinach, frozen or fresh
1 cup broccoli
1 clove garlic
1/4 of an onion
1/4 cup nutritional yeast
1 tbs turmeric
pinch of salt

Pre-heat the oven to 400 degrees F. 

I saved my stems for a stir-fry later this week.

Chop the broccoli into smaller pieces. They are going into a blender so don’t worry about size too much. Make sure to save the stem, it’s really the best part. Just peel off the outer tough layer. The inside is sweet and tender.

If you use fresh spinach, just tear it up a little first. If you use frozen, thaw it first.

Chop the onion and garlic a little too.

So easy, no hard chopping or mixing.

Drain your tofu and place into a blender or food processor. Add the broccoli, spinach, onion, and garlic. Pour in the hemp milk. Blend until smooth.

Lovely green color

 Next add the nutritional yeast, turmeric, and salt. Turmeric turns whatever you cook bright yellow so it’s normally used in tofu scrambles to make it look like eggs. But the pureed spinach and broccoli overpower the color, so the turmeric is more for flavor and it’s amazing health benefits.

Make sure the bases are even so the filling doesn’t leak.

Now spray a muffin or cupcake tin well with cooking spray. Evenly line the bottom of each cup with your potato mixture.

Fill to the top.

Pour the tofu filling on top of each potato base. Tofu does not rise like eggs, so don’t be shy about filling to the top.

They smell so good.

Bake for about 20 to 25 minutes until the quiches no longer jiggle in the middle.

Let them rest for 5 minutes before serving. I have to confess they can be hard to remove so just be careful.

I topped mine with fresh tomatoes and a little vegan sour cream. It went nicely with a cup a green tea.

All the taste of eggs, and no cholesterol and loads of fiber.

Even as a vegan, I am Sam, Sam I am!

Potato Pierogi

Although I am trying to counter-act my terrible family health history, that doesn’t mean I am still not proud of my heritage. I am 3/4 Polish, third generation born in America on both sides of my family. Although my great-grandparents passed away before I was born, I grew up hearing stories about their lives back in Poland and their journeys to America. My mom told me I would have loved my great-grandmother, she was a very sweet and funny woman. I think about her and my own wonderful grandma every time I make something Polish.

Pierogi are pretty much Polish dumplings. They are a basic flour dough filled with either farmers cheese, potatoes, beef or cabbage. They are usually boiled then lightly fried. They are traditionally topped with a little butter, and sour cream. I’ve seen them topped with all sorts of things. My mom saw them topped with tomato sauce once and said her grandmother would have cringed at such a horror, so I stay traditional to honor my Polish blood. I remember the first time I had them, it was pure heaven. My mom made some for my grandparents when the came to visit when I was about 8 or so. She served them with kapusta (similar to sauerkraut), and we were very happy Poles after that dinner.

I researched some vegan recipes, but most of them called for a lot of oil in place of the eggs, which isn’t really good for a family riddled with heart attacks. So I decided I would use Egg Replacer by Ener-G instead. It is made from starch and is wonderful for baking. I based this on a recipe I found on About.com, but veganized it and cut it in half.

You can make a fine pierogi dough without the sour cream, but I like it better. It makes it richer than other simple dumpling doughs. Try Tofutti brand, it’s not as moist as dairy sour cream but tastes just as good (plus has no cholesterol!)

Potato Pierogi
1 cup all purpose flour
1/4 tps salt
1 and 1/2 tps Egg Replacer
4 tbs water, divided
1/4 vegan sour cream
1 tbs vegan butter
1/8 tps salt
1 large potato, peeled, washed, and quartered
1/2 large white onion
1 tbs soy milk
4 tbs nutritional yeast

In a large bowl, mix together the flour and salt.

In a small bowl, whisk together the Egg Replacer with two tablespoon of water. Add to the dry ingredients and mix.

Next add the sour cream, butter, and remaining 2 tablespoons of water. Mix until it forms a soft but not sticky dough. I all the sudden had this flashback of my grandmother scolding me for overworking the dough, so be gentle.

Wrap the dough and refrigerate for at least a half an hour.

Everything would have been organic in Poland back then.

In the meantime, peel, wash and quarter your potato. Place in a pot of water and bring to boil on the stove. Cook until the potatoes are soft enough that a fork can easily pierce through.

Organic onion from the Farmers Market.

While those are boiling, fine chop the onion and place it in a skillet with some cooking spray over medium-low heat. Normally they are sauteed in butter, but those are just extra calories that in my opinion do not add much to the flavor in the end. Cook until just translucent.

The filling should cohere but not be overly moist.

Once the potatoes are done, drain and add them back to the pot. Add the onions, soy milk, and nutritional yeast and mash well. “No one likes lumpy pierogi,” my mom told me. You can add some salt and pepper if you like too. Either my mom or grandma, can’t remember which, told me it is a lot easier to work with cooled filling. I let mine cool for about 15 minutes before I filling my dough.

I used a ramekin as a cutter.

Roll out the chilled dough on a well-flour surface to about 1/8 of an inch thickness. My family is from the Polish countryside, and my grandma told me they make them big in country. So I find the biggest cup or small bowl I have and use it as a cutter.

Overstuffed pierogi will break open while boiling.

Fill each circle with about 1 tablespoon of the cooled potato filling. Don’t over-stuff them or they will break open while cooking.

Make sure to do both sides.

Fold the circle in half to make a semi-circle. Go around the edges with a fork to seal properly. Flip over and repeat on the other side. You can use a little water too if you have a hard time getting them to close all the way.

Careful not to smash them when removing.

Bring a pot of water to boil on the stove. Add the pierogi. Just like ravioli, they will float to the top when ready.

I like mine just barely golden.

Remove from the pot, but don’t use a strainer, they will just break apart. Scoop them out with a spoon or ladle. Next saute in a pan with some butter until slightly golden brown.

Top with some vegan sour cream and a little salt and pepper. I served mine with some steamed carrots. I am one very happy and proud vegan Polish girl 🙂

I just sent a picture to my mom, she said her grandma would be very proud. And, she said as good as hers all stuffed cheese and slathered in butter were, great-grandma never wore a bikini like I do! Made me laugh.

Orange Pineapple Smoothie

I got free bananas from a fruit stand in Kona yesterday for Earth Day, so I made another great smoothie for breakfast this morning. I wanted something light since tonight I am making one of the most delicious things in the world, pierogi! Orange and pineapple blend together nicely so it has a clean, fruity taste. I used coconut water instead of soy milk. Coconut water is packed with vitamins, especially potassium. All my fruits are fresh since I live in Hawaii, but frozen is still better than no fruits at all. But always get fresh if you can, the cooking/flash freezing process strips it of some nutrients.

Orange Pineapple Smoothie
1 cup fresh pineapple
1 orange, pealed and membrane removed
1 medium banana
1 cup coconut water
Handful of ice cubes

Put everything into a blender and blend until combined and smooth.

Mandarin Orange Cupcakes

My mom bought me a cupcake tin last week, and although I used it to make Yorkshire Pudding, I thought it was time to make some cupcakes. When I was looking for a can of black beans yesterday, I found a random can of mandarin oranges and suddenly imagined orange cupcakes with chocolate icing. The battery was dead on my laptop so I decided to make a recipe up rather than try to look for one my phone.

Thanks mom!

Mandarin Orange Cupcakes
1 tbs flax seeds
1/2 cup HOT water
1 cup all purpose flour
1/2 tps baking soda
1/2 tps baking powder
1/4 tps salt
1/2 tps ground ginger
1 cup sugar
1/2 cup applesauce
2 tbs soy milk
1/2 tps vanilla extract
1 can sliced mandarin oranges, drained but reserve 1/4 of the juice
1/2 vegan dark chocolate bar

Pre-heat the oven to 375 degrees F and spray a cupcake tin with cooking spray.

Add the flax seeds to the hot water, stir lightly and set aside for at least 10 minutes. It should make a syrupy liquid.

In a small bowl, sift together the flour, baking soda, baking powder, salt, and ground ginger.

In a large bowl, whisk together the sugar, applesauce, flax seed mixture, soy milk, and vanilla extract until slightly frothy.

Pieces of oranges and flax seed for color and texture.

Next add the dry ingredients to the wet mixture. Then add the oranges and the reserved juice. If mixing by hand, whisk everything very thoroughly. If you are using a mixer, mix on high for 3-5 minutes. This will break-up the orange pieces and brings air into the batter so the cupcakes are light and fluffy. 

3/4 of the way filled is perfect.

Pour the batter into the cupcake tin, filling each cup 3/4 of the way full.

Bake for 15-20 minutes until slightly golden. You can insert a toothpick into the middle of one, if it comes out fairly clean, they are done.

All cooled. You can smell the oranges.

Let them rest in the tin for a few minutes, then remove them carefully and allow them to cool completely before you ice them. The chocolate will just melt off if they are still warm.

If it’s too runny, it won’t stay on the cupcakes

Once cooled, break-up the dark chocolate a bit and place it in a microwave-safe bowl. Microwave for 30 seconds to 1 minute. It will vary based on the amount and type of chocolate you use. I did 3 squares for 30 seconds. You don’t want it to be totally liquid, but it should be very loose. Stir a bit with a fork to break up any remaining solid pieces.

The fun part! I let mine sit in the chocolate for a second.

Next dip the tops of each cupcake in the chocolate, coating it to your liking (I slathered mine pretty good). Let them sit afterward for a bit for the chocolate to set.


A nice twist on normal white cupcakes. The ginger gives it a little bite. And chocolate and orange is always a good combination. They went great with a glass of iced citrus green tea.

They came out just as I imagined!

Here Comes Summer: Brats, Fries and Coleslaw

The semester is almost over, which means soon it will be summer. I am staying for summer classes so I will miss the lovely summer back home in Oregon.  So I decided to bring a little of an Oregon summer to me with a Tofurkey brat, sweet potato fries and an light coleslaw.

Tofurkey is made by the Hood River, Oregon-based company Turtle Island Foods Inc, —and one of the best vegan brands out there. Not only is their name-sake product, Tofurkey amazing (even my carnivorous dad and brother look forward to some every Thanksgiving), they also make delicious brats and sausages too. Their Beer Brats are my favorite. They make me think of home because they are made with Full Sail Ale (another fine Oregon product). The texture and taste are perfect, and they are even juicy and sizzle on the grill. I put mine in a whole wheat bun, and topped it with ketchup and mustard. Doesn’t get much more summer-y than a big juicy brat. And you will live to enjoy more summers since this brat has zero cholesterol.

Sweet potatoes are not only sweet, but super as well. They are a superfood, which means they have a lot of vital vitamins and minerals. Sweet potatoes are packed with fiber, antioxidants, and anti-inflammatory properties. I love them in curries and stews, but they make great fries. I have always liked them better than regular fries, especially when seasoned with herbs. They are easy to make, but I had a few Alexia Sweet Potato Julienne Fries in the freezer that needed to be eaten.

I had some cabbage and apple that needed to be eaten as well, so I made a simple light coleslaw. I hated coleslaw as a kid because they were the traditional “more-mayo-than-anything-else” style. I like mayonnaise, just in moderation. Veganaise is hands down the best mayonnaise ever, vegan or otherwise. Please try it, it’s soooooo creamy. I sadly don’t have any Veganaise so I used Annie’s Goddess Dressing. I also suggest adding raisins, nuts, and carrots to the coleslaw for some sweetness and crunch.

Not only is this meal delicious and healthy, it is also easy. The only hard part is waiting for the coleslaw to chill. This is proof that healthy food can be fast food.

Here Comes Summer Dinner:
Light Coleslaw:
2 cups cabbage, shredded (any kind is fine, I used Chinese)
1 large red apple, chopped (I used golden delicious)
1/2 to 1 cup, depending on taste, Annie’s Goddess Dressing
1 tbs sesame seeds
1/2 tbs mirin
salt and pepper to taste

Brats and Fries:
Frozen Sweet Potato Fries
Garlic salt
Tofurkey Beer Brats
Whole wheat hoagie rolls (the brats are too big for a simple hot dog bun)
Plenty of ketchup, mustard or other condiments

Sweet, crispy, and a little tangy.

To make the coleslaw, combine all the ingredients in a large bowl and mix until the cabbage is thoroughly coated. Refrigerate for at least 2 hours before serving. I made mine the night before. Makes about 4 servings.

 Actual serving size. Don’t let your eyes fool you, it was plenty.

Cook your fries according to the directions on the package. Or, you can always make your own. To cut down on fat, use cooking spray instead of oil to grease your cooking tray. Sprinkle with garlic salt for a nice contrasting flavor to the sweetness.

I fed one of these to an ex once and he had no idea it was tofu.

I microwaved my brat for one minute, but they do come out better on the grill. See the package for proper cooking instructions.

Pop the brat into the bun and top with as much ketchup, mustard or any other condiments you like.

Plate up your brat, a serving of fries, and generous scoop of slaw and enjoy a little taste of summer (and Oregon!)

Glass of Reed’s Cherry Ginger Brew and Animal House
to re-live my UO days, can’t believe it’s almost been a
year since I graduated!

After I left the store, I realized this would have been a perfect Oregon summer dinner if I made a marion berry pie for dessert, but I didn’t feel like going back to the store. I will make it for another post soon.

Spinach and Mushroom Pizza

I wanted something different for my Friday night pizza this week, and thought sauce-less might be nice. I saw an amazing spinach pizza recipe when I was looking at other vegan blogs last night…but I can’t remember which one I saw it on. There are great vegan sites out there and one of them has a fantastic spinach pizza recipe that I based this on.

Thrawed on the counter for 5 hours

My pizza dough recipe makes 2 to 3 pizzas easily, so I freeze some for the next few weeks. It should freeze nicely, and I heard on some cooking show before that it can last for up to 3 months (though I usually eat mine within a month so I don’t know). Again, I suggest pre-baking the crust since the veggies do not take long to cook.


Spinach and Mushroom Pizza

1 pre-baked pizza crust (try mine)
1 tbs olive oil
1 clove of garlic, fine chopped
1 cup spinach, chopped (frozen or fresh)
1/8 cup red onion, sliced
1/2 mushroom, sliced
1/8 cup kalamata olives, chopped.  
Pinch of salt and pepper

Evenly spread the olive oil and chopped garlic on the pre-baked pizza crust.

If you use frozen spinach like I did, thaw and thoroughly drain it, or else your pizza will be soggy.  If you are using fresh, wash it well and coarsely chop.

Evenly spread the spinach over the crust, then spread on the onions on top.

If you use fresh mushrooms like I did, wash and dry them well before slicing. If you use canned, drain them thoroughly like the spinach to keep your pizza from getting soggy. Evenly spread on top of the spinach and onions.

Top with the olives, then sprinkle on a pinch or two of salt and pepper. If you like a kick, add some red pepper flakes too.

Bake for 7-10 minutes, until spinach and mushrooms are wilted.

It’s a nice change from the same old tomato sauce pizza, plus it will make you strong like Popeye 😛