Follow Your Heart VeganEgg 

I was never a big egg fan, but it was nice to be able to scramble up a quick breakfast on occasion. Especially for my son is screaming because he’s straving. But me being vegan and his egg allergy, not gonna happen anymore. 

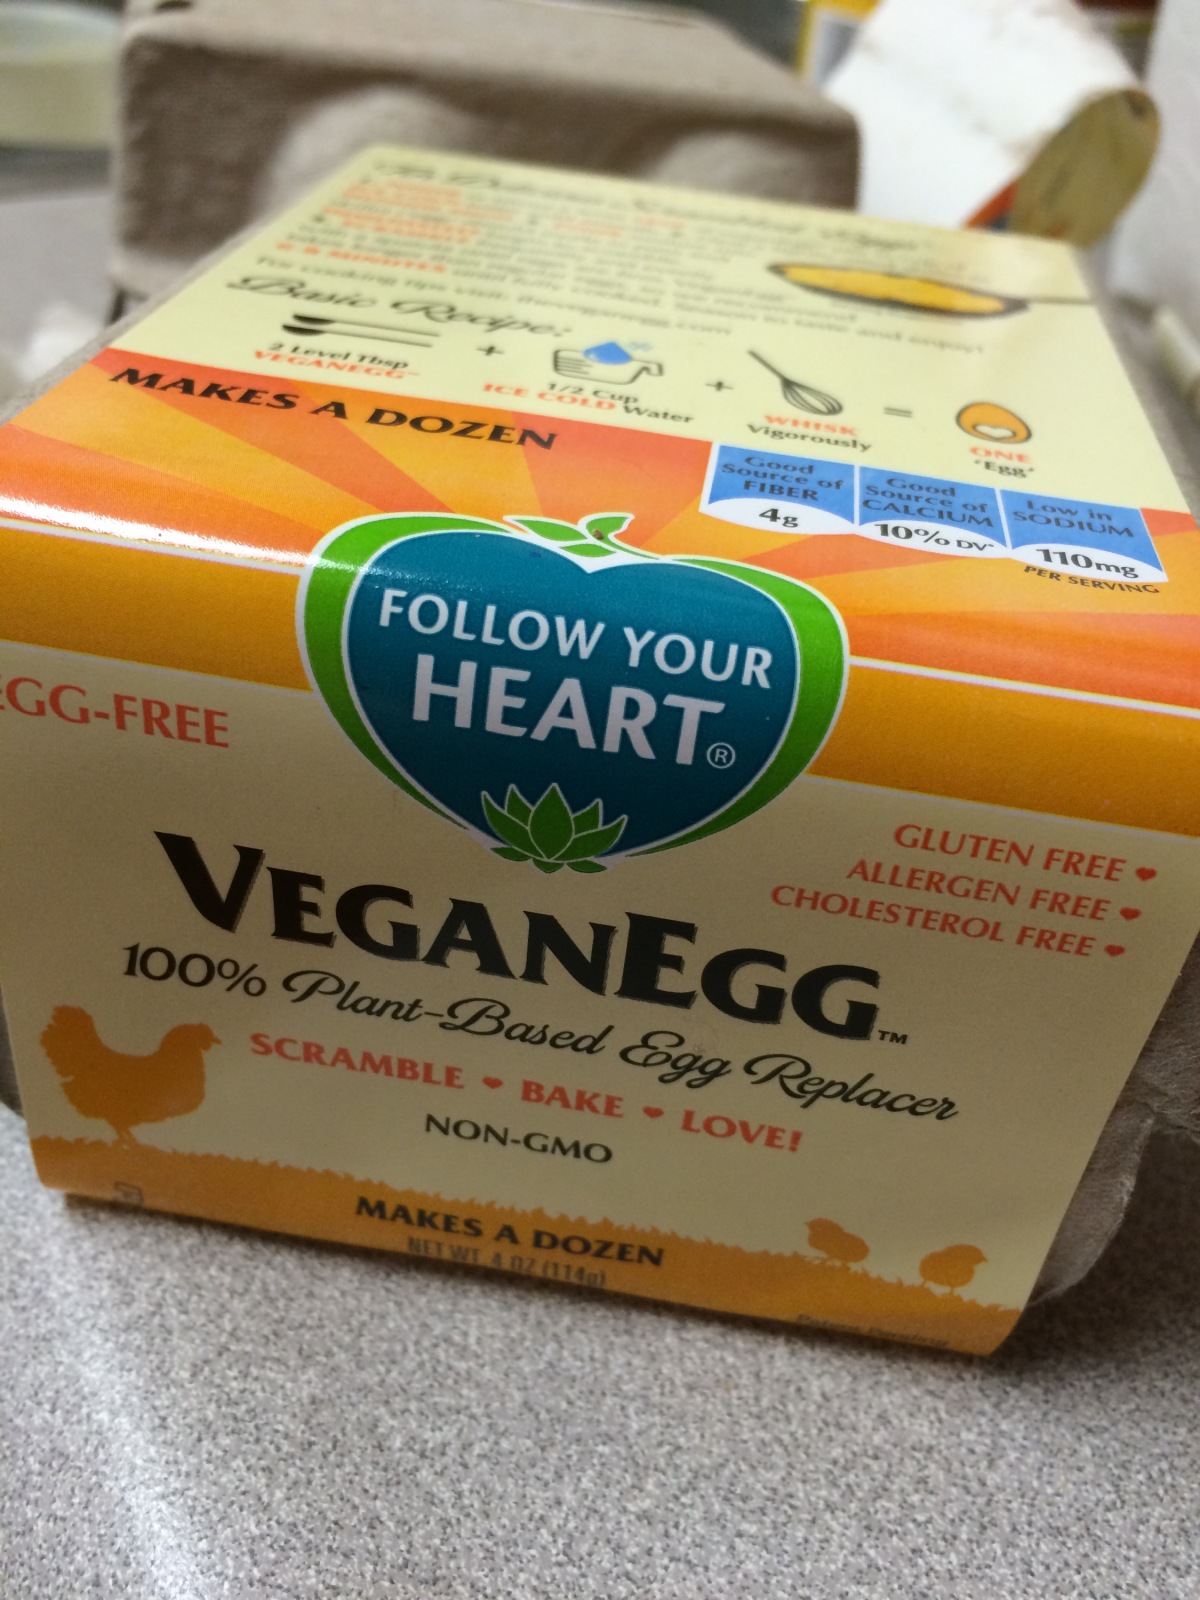
Then I heard that Follow Your Heart was making vegan egg substitute product. And not just another egg replacer for baking, these could be used just like real beaten eggs. Scrambles, quiches, omelette, and baking! 

My first question was what the heck is it made of? Jack is also allergic to soy and cashews, two very common sources of vegan protein. I asked on their Facebook page and they quickly answered it was soy and nut free!  It’s main ingredient is an algae dervitive, algal

My mom asked what she could make for me and jack instead of scrambled eggs for Christmas Brunch, so I decided to order some finally. Luckily a local vegan grocery store in Portland Food Fight had some in stock, so they arrived just in time before Christmas morning. 

They come in cute little eggs cartons, but inside is really a package of powder. 

   
The instructions are easy and straightforward. In a nutshell, add correct amount of powder to correct amount of water, get lumps out, cook in a hot pan until firm. The key is to do what the directions say (duh). Too much water and they come out rubbery. Too much powder and they come out clumpy. And they are dead serious about letting it cook the full 6-8 minutes in an already hot pan. Otherwise it’s just goo that has no resemblance in texture to eggs. 


So how are they? I can happily say good! The texture is totally on point. Not too slimy, not to dense.  Fluffy and satisfying feel.  The taste is pretty close, but just a tiny bit off. I can’t really explain how it’s off…it’s like lacking that umami taste satisfaction. But I added a little sea salt and paprika before cooking and it helped a lot. 

 Did they pass the toddler test? Kinda. But Jack was more excited for the ham and maple syrup. He took a bite of the scramble, didn’t hate it but didn’t love it. 

I think this is a great product, I plan on buying it again and hope it becomes available in stores soon. A great vegan protein source that is soy-free. I’m going to try baking with it soon so look out for that recipe.  

 But For now, I highly suggest some over toast with salsa and hot sauce for breakfast. 

Advertisement

Holiday Lentil Loaf 

What does a vegan who is nursing a toddler who’s allergic to soy, wheat, and cashews have for Thanksgiving? Lentils! I actually had this last year too before Jack developed his food allergies, because it’s that good!

I posted a lentil loaf recipe before, and I still make that one often. It’s more of a meatloaf than a holiday dinner.

I should have posted this last week, but life got in the way. My apologies! But this is good for any holiday as a poluty substitute. I actually assembled the loaf the night before and baked it the next day. It is very allergy-friendly and tastes great! Even my  meat-loving husband took several bites!

Holiday Lentil Loaf IMG_0439
1 cup red quinoa
2 cups brown lentils
2 carrots, chopped fine
2 stalls of celery, 
chopped fine
1/4 finely chopped onion
2 cloves of garlic, 
minced
1/4 tsp fresh rosemary, 
minced
1/4 tsp fresh sage, 
minced
1/4 tsp thyme, minced
1 tsp poultry seasoning
1/4 gluten-free flour
1/4 nutritional yeast
1/2 cup coconut aminos
1/4 cup olive oil
Salt and pepper to taste 

Cook lentils according to directions on the package.

Cook lentils according to the directions on the package.

While those are cooking, sautée the carrots, celery, and onions in a little bit of olive oil in a medium skillet over medium heat. Add garlic and cook for one minute. Then remove from heat and set aside.

In a small bowl, add all remaining ingriedents, expect the salt and pepper, and whisk together.

Drain both the lentils and quinoa, add to a large mixing bowl.

Add the sautée vegetables and mix well.

Add the liquid mixture and also mix well.

Spray a roasting pan or baking sheet with cooking spray. Form a loaf on the pan with the lentil mixture.

Bake for 25-30 minutes, until heated through and a light crust forms.

Cut off a slice and top with some vegan gravy. Enjoy a taste of the holiday season everyone can enjoy!

Edamame Wasabi Dip

IMG_5340You know when you are standing in the grocery store staring at all the options, and nothing really looks good? You pick up one thing, and think “Meh” or “I always get this…” That was me last week. I picked up my favorite brand of hummus and was like nah. Then I looked at the guacamole, and was still like nah…. I went through all the dips and wasn’t feeling any of them. So I walked away from the case sad, my dip-needs unfulfilled.

I walked down the freezer and randomly threw a bag of frozen edamame it in the cart. I like to put them in fried rice. Then when I was in the bean aisle, I saw chickpeas and thought about making my own hummus recipe. As I set the can in the cart, I saw the frozen bag. Then I randomly imagined a creamy but spicy edamame dip! So here we are with this post….

Edamame Wasabi DipIMG_5343
 16 oz bag frozen shelled edamame
 2 tbs tahini paste
 1 tbs red miso paste
 1 clove of garlic, minced
 1 tps ginger paste
 Wasabi powder, to taste
 Salt, to taste

Steam or microwave the frozen edamame until thawed and cooked. Let it cool to slightly above room temperature.

In a food processor, add the bag of edamame. Pulse a few times to get it started.

Then add all ingredients except the wasabi powder and salt. Blend until smooth.

Add the wasabi powder until desired hotness is reached. I don’t want to give you a set amount because everyone is different. But I would not go too much more than a 1/2 tsp if you like it mild. Likewise, I would not go over a 2 tbs if you like it hot. Just a bit, pulse and taste until you get to what you want.

Add salt as needed.

Spread into a serving dish, and top with a little extra wasabi and miso if you wish.

Let it sit for at least an hour, then enjoy!

IMG_5341

I suggest serving with some cucumber sticks, pita chips, and carrots.


Brownie Energy Balls

IMG_4443

Every Friday this summer, Jack and I will be leading a hike with Hike It Baby. Since toddlers (and mamas) get hungry when working up a sweat, I decided to make treats to take with us. This week I made a variation of the recipe I came across called Five Ingredient Ginger Brownies.  I changed the recipe based on what I had in the house and what Jack likes. The peanut butter and almonds are great protein and energy. The ginger gives it a little zing for a pick-me-up. And who doesn’t love a bit of good dark chocolate!

Brownie Energy BallsIMG_4445

7 ounces of pitted dates
2 tbs almond flour
2 tbs smooth peanut butter
1 tps minced ginger
2 tbs cocoa powder
Unsweetened shredded coconut 

Blend everything but the coconut in a food processor until it comes together. It will make loose dough ball when ready.

Roll into any size ball you desire. I went with bite size.

Sprinkle as much shredded as you like onto a plate. Roll the balls in the coconut to coat.

Eat them now or place in fridge for a hour if you want them firmer.

15 - 1 (3)

Pop them in a bag and enjoy them out on the trail! Or your couch….no one will know 🙂

Chocolate Mousse Parfait

IMG_3607

Happy (late) Mother’s Day! I hope you all had a day full of love and happiness! And I hope you called your mom!

We are finally all settled in Oregon (for now at least) and I can cook again! So I made my mom a little treat. She didn’t want a big fuss, but I love her so much that she deserves something special. I just made the recipe up. It’s similar to Chocolate Mouse I made before, but with a few more easy layers. It’s simple, no baking required, and full of protein!

 Chocolate Mousse ParfaitIMG_3608

  • 1/3 cup raw pecans
  • 1/3 cup raw walnuts
  • Coconut Oil (as needed)
  • Pinch of salt
  • Dash of cinnamon
  • 1/2 block of tofu (I used firm, but silken would be better), drained
  • 1 medium ripe banana
  • 1 cup chocolate chips, melted
  • 1 cup vanilla coconut yogurt

In a food processor, add the pecans and walnuts. Grind into crumbles that pack together. Add coconut oil as needed to get it to come together. Add a pinch of salt and cinnamon for flavor.

Press nut mixture into a pan like a crust. I used a medium Pyrex bowl so you could see the layers.

Rinse out the food processor and add the tofu and banana, blend together well.

To melt the chocolate chips, add them to a microwave safe bowl and microwave them for 45 seconds. Stir and the chips should melt. If not, put it back in for 15 seconds and stir again. Repeat as needed until they are all melted.

Add the melted chocolate to the food processor and blend well.

Pour the chocolate mixture over the nut crust and smooth the top out.

Spread the yogurt over the chocolate mixture evenly.

Lastly, garnish with some nuts, if desired.

Covered and let it set-up in the fridge for at least two hours.

Then scoop out and enjoy!

IMG_3615 (1)

It’s nothing fancy, but healthy and tasty. Make one for your momma today!


Cold Soba Noodle Salad

I have no idea if I got this recipe from somewhere. Maybe I made it up! I don’t recall, but it’s similar to many other Asian noodle salads. But I’ve made it for years. It’s light but satisfying. Especially on a hot summer day (though it’s September and I really over this hot weather now). Very simple to make and tastes better the longer it sits, so make a big batch for leftovers.

Soba noodles are made from buckwheat, a grain that looks like a seed. It’s also gluten free so soba is great alternative to for those with a gluten allergy. Buckwheat is high in fiber and manganese, and is overall a very nutritious food. Soba noodles can be served cold like in this recipe, or hot like in a soup. I’ve tried them both ways, but I prefer cold.

This recipe makes 4 servings.

Cold Soba Noodle Salad
1 bag (12.8 oz) of Soba noodles
1/4 cup sesame oil
3 tbs soy sauce
1 tsp apple cider vinegar
1 clove of garlic, minced
1 tsp ginger, minced
1/4 tsp red pepper flakes
1 large cucumber, chopped
1 large red bell pepper, chopped
Other options:
1 large carrot, shredded
1 cup steam shelled edamame
1 block of extra firm tofu, drained and cubed
1 tbs toasted nori

Cook the soba noodles according the directions on the package. When done, drain well and rinse with cold water immediately. Set aside.

In a small bowl, mixed together the oil, soy sauce, vinegar, garlic, ginger and pepper flakes to make the dressing. Set aside.

Chop your veggies and add to a large bowl.

Add the soba noodles to the veggie bowl.

Add the dressing and mix together well.

Cover and refrigerate for at least an hour.

Top with some toasted nori and enjoy!

My favorite way to make this is adding all the optional ingredients, but that will have to wait until Jack’s older. I left my basic because I was sharing with my little son. We have started to introduce solids through baby-led weaning. I didn’t think he was quite ready for tofu or edamame yet.

Baby approved!

Red Beans and Rice

One pot meals are genius invention. Whether you be busy with work, a fussy 3 month-old or both,  it’s nice to still have a home-cooked meal. And even better when there is only one dish to clean!

I  came up with this one day while Jack was napping and I had a few spare moments to think about dinner. It’s pretty much your standard red beans and rice dish, just with frozen kale instead of bell peppers.

Red Beans and Rice
1 lb bag of Kidney Beans, soaked overnight and rinsed
5 oz frozen kale (about half a bag)
2 cups uncooked brown rice
10 cups water or vegetable broth
3 cloves of garlic, minced
1 large white onion, chopped
1 tbs chili powder
1/2 tbs smoked paprika
1 tps thyme
1 tps oregano
Salt and Pepper, to taste
Tabasco, to taste

Combine all ingredients–except the salt, pepper, and Tabasco– into a large pot.

Bring to boil then reduce to a simmer and cover.

Cook for an hour. The beans will be soft enough to eat but still a little firm. The rice should be fully cooked. There will be a little bit of liquid left, similar to a light sauce.

Season with the salt, pepper, and Tabasco as desired!

There is something so satisfying in a classic simple meal like red beans and rice 🙂

Creamy Spinach Dip

Michael and I got were invited to a co-worker’s house to watch the NFL playoff games last Sunday. Michael asked me to make something to bring along. I knew they would BBQ tons of meat, so I decided to make a vegan dish that I wanted to eat. I suddenly thought of creamy, gooey spinach dip with big pieces of sourdough.

This recipe is similar to traditional creamy dip recipes, just no dairy cheese and all the extra protein of tofu. It is a bit sweeter, so you can add more garlic if you want it more savory. I liked it though, went nicely with the sourness of the sourdough.

This recipe will serve 8-10 people easily.

Spinach Dip
1 block of silken tofu, drained
Small amount of vegan butter (I used Earth Balance)
4 cloves of garlic, minced
1/2 a medium white onion, minced
1/4 cup vegan butter (I used Earth Balance)
1/4 flour
1 cup soy milk
1 tsp garlic powder (more if desired)
6 cups baby spinach, wash and dried well
Salt and pepper, to taste
1/2 cup vegan mozzarella cheese (I used Daiya)

Pre-heat the Oven to 375 degrees.

Spray a small baking pan (I used a disposable one) with cooking spray.

Put your drained tofu into a food processor and process until smooth. Set aside for now.

In a medium pot over medium heat, belt a tiny bit of butter. Saute the minced garlic and onion until golden. Set aside.

In the same pot, add the 1/4 cup butter and the flour. Mix together well and cook the paste for just a minute.

Whisk in the soy milk and smooth out any lumps.

Add the processed tofu and mix together well.

Add the garlic and onions back in. Add the garlic powder too.

Slowly mix in the spinach a handful at a time. Let it wilt down a bit before you add more.

Season with salt and pepper to taste.

Pour the dip into the baking pan.

Cover the top with the mozzarella cheese.

Bake uncover for 20 minutes, until the top is bubbly and very lightly golden.

I served this with sourdough bread pieces but any bread, chips or cracker would be great too. Even some carrots and celery would be lovely.

Sorry I forgot to take a picture of it before everyone dived in, people wanted to try it right away. And I was starving and no one can blame a pregnant mama for wanting to eat!

Apple Walnut Salad with Tofu

Part of my prenatal care includes a nutritionist, which I think all prenatal programs should have. An expert separate from your OB/GYN that just focuses on how you are eating and proper weight gain. As knowledgeable and beneficial my nutritionist is, I am kind of annoyed with her. I told her I was vegan—no animal products, honey, or eggs. Then we went over my diet. She said it was one of the healthiest she has seen in awhile. Then she went over my blood work. Again, is was amazing. And she had no complaints about my weight gain so far. Then she hits me, “I am sorry, but legally I need to classify you as nutritionally high risk.”

WHAT? High risk nutritionally? Because I chose to break from the standard American diet and not to eat meat loaded with fat and antibiotics? Or dairy loaded with hormones?

Then she reassured me that I am healthy and the baby is healthy, so all that matters. It’s just a legal term. Her only suggestion was I eat one more serving of leafy greens every day. So I have made this giant, veggie-packed salad for lunch most days now.

And yes, this salad has plain tofu. If you do not like the taste of plain tofu (I actually do), you can marinade and cooked it first. But honestly, with all the dressing and veggies, you don’t even notice the tofu.

Apple Walnut Salad with Tofu
3 cups leafy greens (any combination of dark lettuce, spinach, kale, arugula, etc.), washed and dried
1/4 cup carrots, chopped or shredded
1 Fuji apple, chopped
1/4 small red onion, chopped
1/4 cup raw walnuts, chopped
3 oz extra firm tofu,  drained and cubed
2 tbs Annie’s Lite Goddess Dressing
Cracked black pepper, to taste

In a big bowl, mix together all the ingredients. It’s that easy!

You can use any dressing you like, but Lite Goddess is amazing! This is just not for pregnancy, but make a great lunch for everybody. The nutrients of the dark green vegetables, vitamin C from the apples, vitamin A in the carrots, and healthy fat from the walnuts. I even suggest throwing in some avocado chunks too. High risk pregnancy my ass…

Hawaiian "Chicken"

I saw a version of Hawaiian Chicken in crockpot on Pintrest and loved the idea.  I never  saw something exactly like this anywhere in Hawaii, so I cannot say it is an authentic dish. However,  almost every party I went to had BBQ chicken or pork, fresh pineapple or other fruits, and plenty of rice.

I used soy strips instead of chicken, which does not need to cook very long, so I did not use a crockpot.  I used canned pineapple, but if you have fresh, use it.

This recipe makes 4 servings.

Hawaiian “Chicken”
1 tbs olive oil
1 red bell pepper, cut into strips
1 green bell pepper, cut into strips
1/2 medium onion, cut into strips
1 bag of Gardein Chick’n Strips, minus the sauce
1/2 cup Teriyaki sauce
1 tbs white vinegar
8 oz can of Pineapple chunks in 100% juice
2 tbs soy sauce
1 clove of garlic, minced
Cooked rice

Heat the olive oil in a pan over medium heat.

Once the pan is hot, add the chopped bell peppers and onion. Cook until tender.

Add the chick’n strips and heat through.

Add remaining ingredients (including the juice from the can of pienapples), except the rice. Cook until the sauce thickens slightly.

Serve over some rice and enjoy some (maybe not authentic) Aloha!

I miss Hawaii so much. I can’t wait until Michael and I can take a vacation back to the Big Island!