Holiday Lentil Loaf 

What does a vegan who is nursing a toddler who’s allergic to soy, wheat, and cashews have for Thanksgiving? Lentils! I actually had this last year too before Jack developed his food allergies, because it’s that good!

I posted a lentil loaf recipe before, and I still make that one often. It’s more of a meatloaf than a holiday dinner.

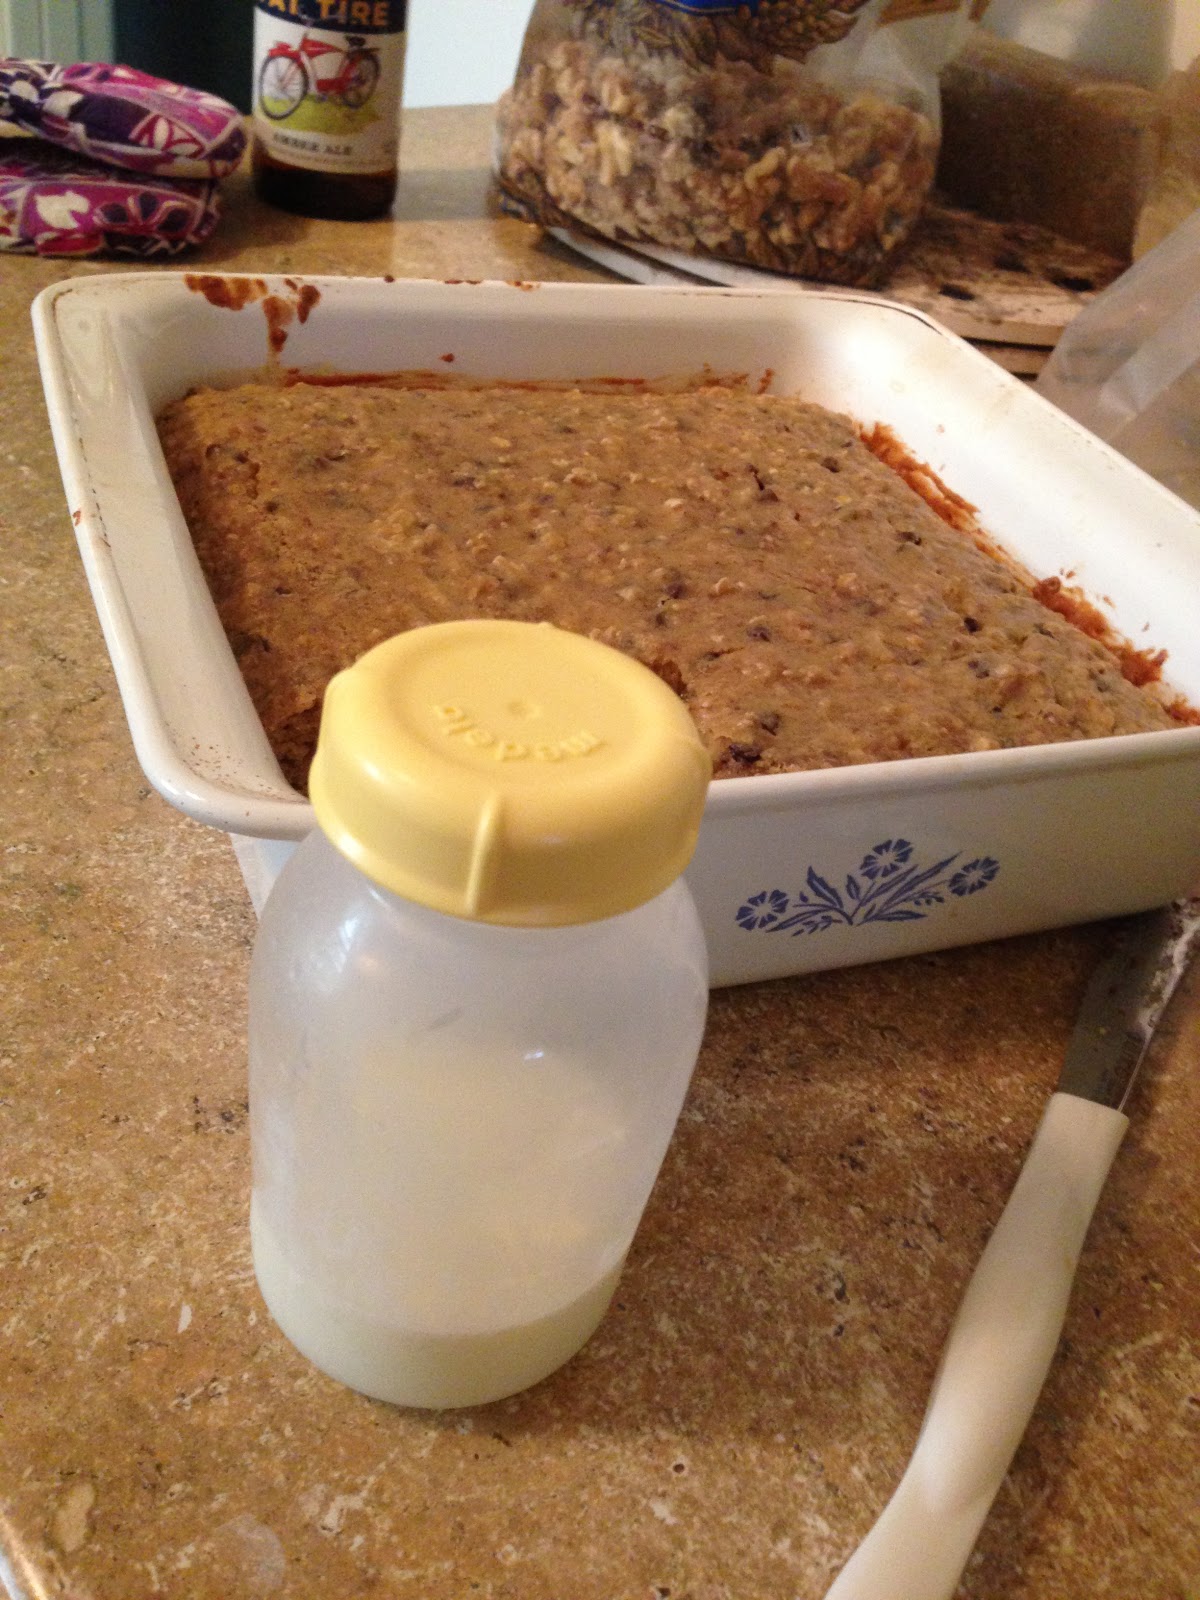
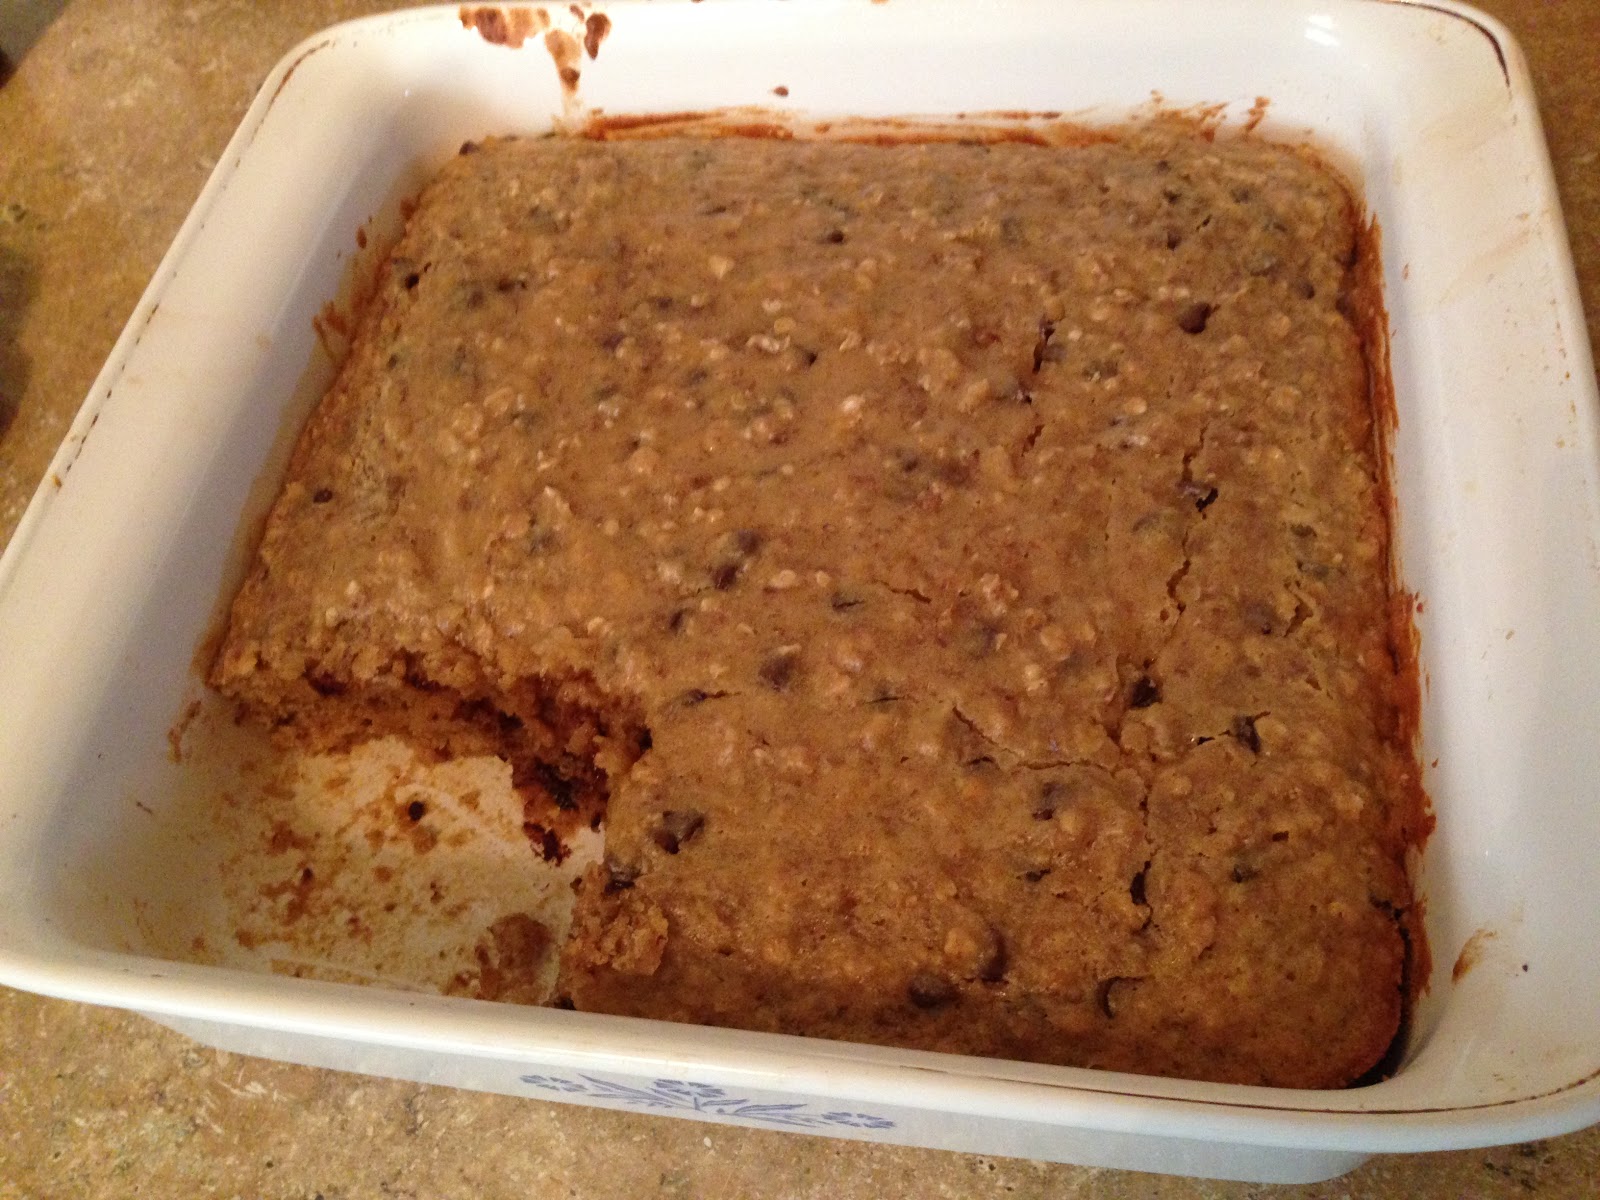
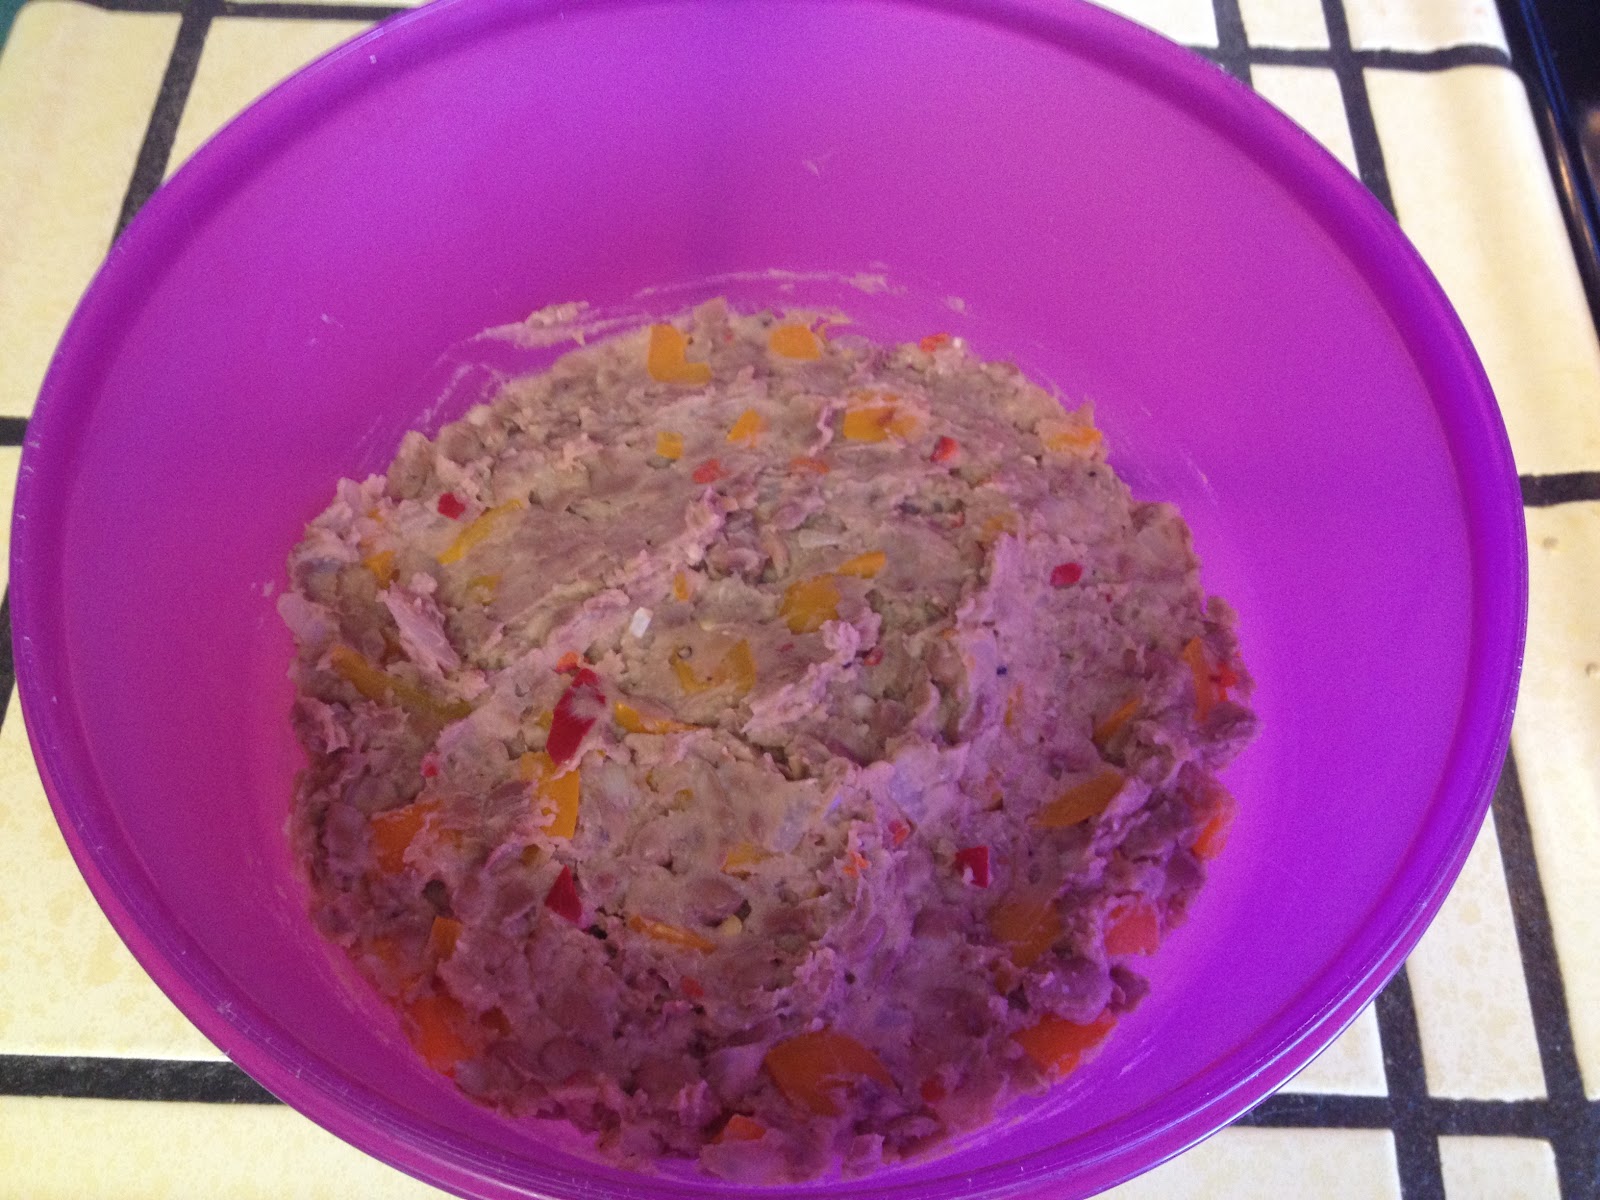
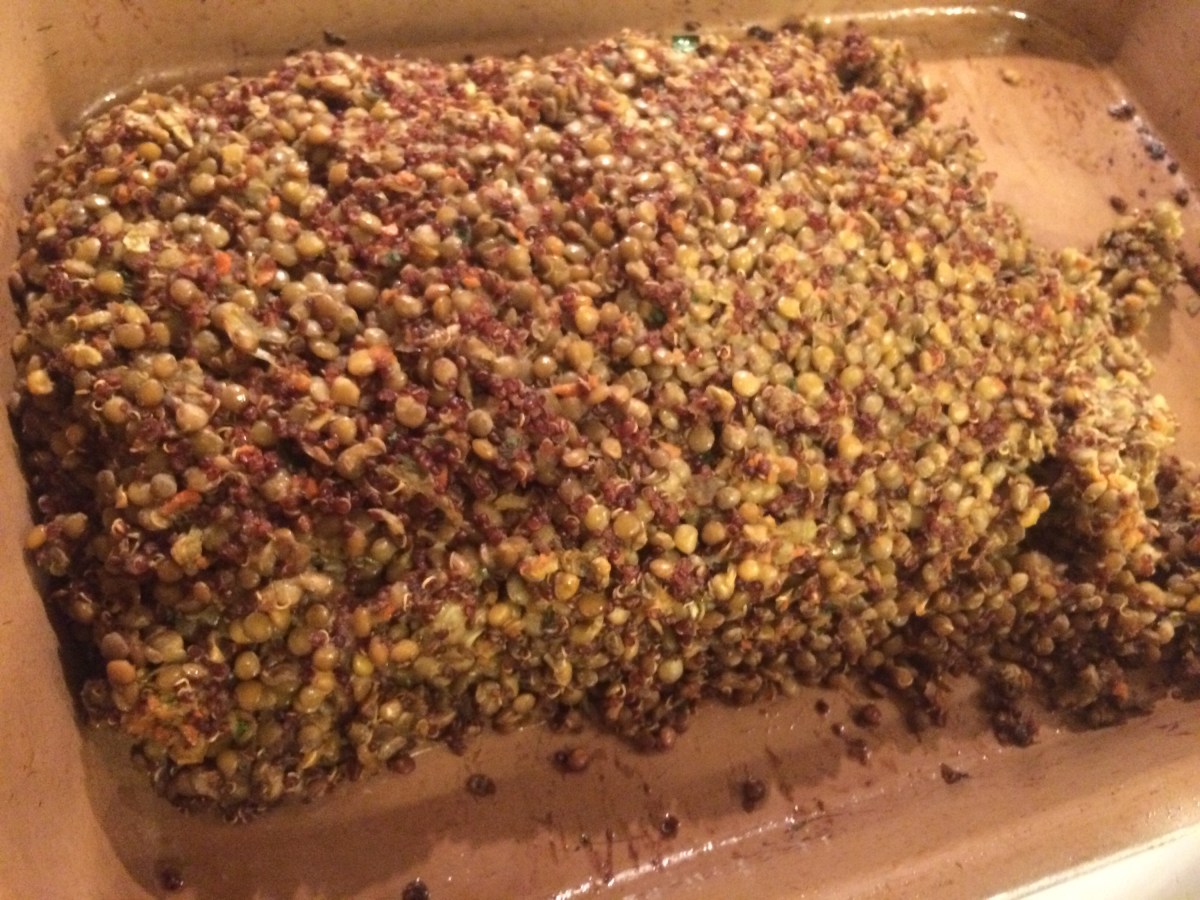
I should have posted this last week, but life got in the way. My apologies! But this is good for any holiday as a poluty substitute. I actually assembled the loaf the night before and baked it the next day. It is very allergy-friendly and tastes great! Even my  meat-loving husband took several bites!

Holiday Lentil Loaf IMG_0439
1 cup red quinoa
2 cups brown lentils
2 carrots, chopped fine
2 stalls of celery, 
chopped fine
1/4 finely chopped onion
2 cloves of garlic, 
minced
1/4 tsp fresh rosemary, 
minced
1/4 tsp fresh sage, 
minced
1/4 tsp thyme, minced
1 tsp poultry seasoning
1/4 gluten-free flour
1/4 nutritional yeast
1/2 cup coconut aminos
1/4 cup olive oil
Salt and pepper to taste 

Cook lentils according to directions on the package.

Cook lentils according to the directions on the package.

While those are cooking, sautée the carrots, celery, and onions in a little bit of olive oil in a medium skillet over medium heat. Add garlic and cook for one minute. Then remove from heat and set aside.

In a small bowl, add all remaining ingriedents, expect the salt and pepper, and whisk together.

Drain both the lentils and quinoa, add to a large mixing bowl.

Add the sautée vegetables and mix well.

Add the liquid mixture and also mix well.

Spray a roasting pan or baking sheet with cooking spray. Form a loaf on the pan with the lentil mixture.

Bake for 25-30 minutes, until heated through and a light crust forms.

Cut off a slice and top with some vegan gravy. Enjoy a taste of the holiday season everyone can enjoy!

Broccoli and Parsnip Risotto

I don’t really have a cute story to go with this recipe. I had orzo pasta, broccoli, and parsnips. I thought a creamy pasta dish with some crisp vegetables would be nice for lunch. Yeah…that’s about it.

One ladle at a time…

I love risotto, but hate that it’s usually loaded with a ton of cheese, cream, and butter. Too rich and heavy. I like creamy without all that junk. My recipe only has a bit of vegan cheese and some olive oil–just it’s still rich and creamy. Also, I don’t love that it takes an hour to make well. And you can’t rush it, just be patience.

“This is taking forever, I’m hungry!”

Jack didn’t like that either, he had to go up in a back carry to keep him happy. However, he was more than happy to eat it!

Broccoli and Parsnip Risotto 
6 cups vegetable broth (or you can do like I did, 5 cups water with 1 cup of pureed vegetable baby food)
2 tbs olive oil, divided
1/2 large onion, chopped
2 cloves of garlic, minced
2 large parsnips, chopped
1 head of broccoli, chopped
1 cup orzo
1/4 cup nutritional yeast
1/2 cup vegan mozzarella cheese
Salt and pepper, to taste

In a large pot, bring the vegetable to a simmer over medium-low heat.

In a skillet over medium-high heat, heat one tablespoon of olive oil. Add the chopped onion and cook until translucent.

Add the parsnips and cook until tender.

Add the garlic and broccoli,  took until the broccoli is tender.

Heat the remaining olive oil in a another large skillet over medium heat.

Add the orzo and brown the pasta lightly. Stir continuously to prevent burning. It’s okay if some pieces are darker than others.

Once orzo is all lightly browned, reduce heat to medium-low. Then add one ladle of hot broth to the pot, stir continuously until it is all absorbed.

Repeat adding one ladle of broth at a time and stirring until it is all absorbed until the pasta is tender and the broth no longer absorbs easily. This will take around an hour to complete. Don’t rush it by turning up the heat or adding more than one ladleful.

Before you add your last ladle or so, add the broccoli and parsnips to the skillet.

Once the pasta is tender, remove from the heat and stir in the nutritional yeast.

Top with the mozzarella and enjoy!

Creamy, filling, and loaded with veggies. Your patience has been rewarded!

Lactation Cookies For Everybody

Check out my other blog Vegan Babymama for the story behind why I made those cookies. And two things before I get to the recipe. First, I know it says cookies but I made bars. When you have a 4 month old baby, you don’t have time to be scooping out dough and baking one batch at a time. So I spread all the dough out into a pan quickly and pop it in the oven on a cooking timer so the oven would shut off when it’s done. That way I could nurse Jack and not worry about anything burning. But if you have the time, these do make wonderful cookies, so by all means scoop away. Second, these cookies are not just for nursing moms. They will not make you lactate if you aren’t already. I’m referring the men who reading this, seriously? You don’t have functioning mammary glands! They are normal ingredients and the cookies taste great. My husband as stolen a few cookies and loves them. But if you lactating, some of these ingredients are lactrogenic, meaning they have been known to increase your milk supply. The oatmeal, flax seed, brewer’s yeast, walnuts, and whole wheat flour in this recipe are all lactrogenic.

This recipe is based on these two recipes I found on Pinterest: Lactation Cookie Bars and Lactation Cookies for Nursing Moms.
Lactation Cookies
1 cup vegan butter (I used Earth Balance)
1.5 cups brown sugar
1/2 cup ground flax seed
1 cup hot water
2 cups whole wheat flour
2 cups rolled oats
2 heaping tbs brewer’s yeast
1 tsp baking soda
3/4 cup dark chocolate chips (make sure they are dairy-free)
pinch of salt
1/2 cup unsweetened shredded coconut
1/2 cup chopped walnuts, optional
Pre-heat the oven to 350 and spray a baking pan with cooking spray. I used a 9 x 9 ceramic.
In a large bowl, cream together the butter and sugar.
In a small bowl, add the ground flax seed and hot water. Let it sit for 5 minutes.
Add the flax seed mixture to the butter mixture. Mix well (though it will be very sloppy).
Add the flour, rolled oats, brewer’s yeast and baking soda the bowl. Mix well.
Stir in the chocolate chips and salt.
Stir in the coconut and walnuts, if using.

Spread evenly into the baking pan and bake for 30-35 minutes. They are done when a toothpick inserted into the middle comes out clean.

Note to self: Take pic before you take a piece,
despite how amazing it smells.
These cookies really are for everyone. Don’t let the title scare you away. They are high in fiber and contains good fats. Plus they are very tasty. I really suggest either the coconut or walnuts, or both! And this is a wonderful treat for nursing momma. You earned it, taking care of a baby is hard!

"Cheesy" Rice

Awhile ago I saw something on Pinterest that said mac and cheese comes out creamier if you cook the noodles in milk. I thought why not try it with rice? I added some nutritional yeast and veggies, and ended up with a big pot of creamy and cheesy rice.

This makes 4 servings.

“Cheesy” Rice
1 cup of rice
2 cups soy milk
1 tbs vegan butter
1 clove of garlic, minced
3/4 cup nutritional yeast
1 cup of frozen veggies (I used the standard carrots, corn, and peas mix)
Salt and Pepper to taste

In a large pot, add the rice and soy milk.  Cover and bring to a boil.

Once boiling, reduce to a simmer and cook until all the liquid is absorbed and the rice is cooked. Watch it so it does not burn. Add more liquid if necessary to keep it from burning. Try not to open the lid too much though.

Once the rice is cooked, remove from the heat and add the butter. Mix together well.

Spray a skillet with cooking spray and heat over medium-low heat. Add the garlic and frozen veggies. Cooked until the veggies are heated through.

Add the veggies to the rice and mix together well.

Season with salt and pepper.

This is a basic recipe, feel free to add any veggies, seasonings or anything else you like!

Bac’n Mac and Cheese

Guess what other American classic is actually vegan? McCorkmick’s Bac’n Pieces! It is made from soy. Once again, it is a processed food and needs to be eaten in moderation. But it can provide that “meaty” flavor to your favorite dish on occasion. I decided to add them to my mac and cheese, along with some veggies.

I have posted a recipe for mac and cheese awhile ago that uses Daiya Cheese and nutritional yeast. This recipe only uses nutritional yeast because I was trying to cut down on calories and processed ingredients.

Bacon Bits Mac and Cheese
8 ounces macaroni
1 small onion, minced
2 carrots, finely chopped
3 stalks of celery, finely chopped
1/4 cup vegan butter (I used Earth Balance)
1 cup nutritional yeast
2 cups soy milk
1 tsp mustard
1 tbs soy sauce
1 clove of garlic, minced
Salt and Pepper to Taste
Cook the macaroni according to the directions on the package. Drain and set aside.
In a large pot, sauté the chopped onions, carrots, and celery in the 1/4 cup of butter.
Once the veggies are soft, add the nutritional yeast. Mix together until it makes a lumpy paste.
Now add the soy milk, mustard, and garlic. Whisk to get the lumps out.
Add the cooked macaroni and the Bacon Bits.  Mix it all together and season to taste.
Now you have bacon mac and cheese without all that cholesterol!

Five Layer Dip


*This is repost, since for some unknown reason, the first one got deleted.


I hope you all had a fun Fourth of July!

Once again, so for not posting very often. As I mentioned in my last post, I am moving to California. I am still staying with Michael’s parents and looking for a job (got some good leads so far!). Hopefully soon I will have a job and my own place so I get back to posting more. 

Yesterday Michael’s parents had a little BBQ so I thought I would make something nice for everyone too: five layer dip. I made this for a party before and it was gone within minutes. What’s not to love about layers of spicy beans, creamy guacamole, tangy Tofutti sour cream, fresh salsa and gooey cheese sauce? 


Some of the layers are from recipes I have posted before, so I will spare you the repeat and just post the links. 

Five Layer Dip:

First layer: Spicy Beans
16 can of pinto beans, drained and rinsed
1/4 of a medium onion
1 large bell pepper
1 clove of garlic
Red pepper flakes, to taste
Salt and pepper, to taste
1 jalapeño pepper, minced


Drain and rinse the beans. Set aside. 


Chop the onion and peppers into bite-sized pieces. Mince the jalapeño. 


Spray a large skillet with cooking spray and heat over medium heat.


Saute the onions and peppers until slightly golden.


Add the beans, garlics, and red pepper flakes. 


Cook until the beans are heated through. Mash the beans into a paste as it cooks. 


Season with red pepper flakes, salt and pepper, and add the jalapeño. 


Remove from heat and set aside to cool.


Second layer: Basic Guacamole 
Third layer: Tofutti Sour Cream


Fourth layer: Fresh Salsa 
2 large tomatoes, diced
1/4 of a medium onion, diced
1 clove of garlic, minced
1 jalapeño, minced
Handful of cilantro
Salt and pepper to taste


Dice tomatoes and onions, then add to a large bowl.


Mince the garlic and jalapeños and, add to the bowl. 


Add the cilantro and mix. Season with salt and pepper to taste. 


Cover and refrigerate until ready to use. 


Fifth layer: Cheese Sauce


Assembly:
I suggest doing this in a large see-through (I know I did it in a pink one, it was the biggest one I could find) bowl or dish so you can see all the contrasting layers.


In the bottom of the large bowl, spread an even layer of the Spicy Beans. 


Second, spread on the Basic Guacamole.


Next, cover with as much sour cream as you like. 


Then, put the salsa on top of the sour cream.

Lastly, pour on the cheese sauce. Garnish with some red pepper flakes and cilantro. 


This was big hit! We munched on this while the grill heated up and it was devoured quickly. 


Go Ducks: Yell-O and Green Nachos

For the past 6 years of my life, every Saturday from September to December is taken over by Oregon Duck football. I am proud graduate University of Oregon and needless to say, I bleed green and yellow. I loved going to the games with my sorority sisters and yelling “O” until we went hoarse. I have sadly had to spend the past seasons and this one cheering from Hawaii. But just because I am in the middle of  the Pacific doesn’t mean I don’t get all ducked-out. I either go to a local sports bar or watch from home, but regardless I have my jersey on and shout like a maniac.

Today the Ducks face off against LSU, a game that will sure deserve a special blog post. So I decided to make something green and yellow (U of O colors), and finally settled on nachos. I made queso sauce from nutritional yeast and used salsa verde for the colors. Plus some jalapeños for some spice and because they are little O’s. I wanted to top it all off with some vegan sour cream, but my store was sold out.

I just realized this is also fitting because our coach is named Chip.

Yell-O and Green Nacho
Queso sauce:
4 tbs vegan butter
1 and 1/4 cup nutritional yeast, divided

3/4 cup vegetable broth
1/2 cup unsweetened, plain soy milk

1/2 tbs garlic powder
1tps cumin
1 tps parkia
1 tps chili powder
1/2 tsp pepper
The rest of the stuff:
1/4 medium onion, chopped
1 cup soy” beef” crumbles (I used Smart Ground)
Tortilla chips
Salsa verde
Jalapeños
Vegan sour cream

To make the queso sauce, add the vegan butter and 1 cup of the nutritional yeast to saucepan over medium/low heat. Incorporate the two together to make a sort of roux. It should clump together and get a little golden.

Add the vegetable broth and soy milk. Whisk together so there are no lumps.

Add the garlic powder, cumin, paprika, chili powder and pepper. You can add salt if you like, but mine didn’t need it. Mix together well.

Reduce the heat to low. Let it reduce and thicken, stirring frequently. Taste it after awhile, if it need more “cheese” flavor, add some more nutritional yeast.

In skillet, lightly brown the chopped onion. Then add the soy crumbles. Cooked until heated through.

Once the queso sauce is smooth and thicken slightly, it’s time to assemble.

On a large plate or platter, scatter desired amount of chips. There is enough sauce for at least 5 serving so be generous.

Next sprinkle on the soy crumble mixture.

Now pour on the queso sauce.

Now add the desired about of salsa verde.

If your store didn’t run out of sour cream like mine did, add a few dollops.

Top with desired about of jalapeños so your nachos are yelling “O”.

Turn on the Ducks game, open a Widmer (or any other fine Oregon brew) and get ready to cheer! Win the days boys!

Mac and Cheese

Bet you didn’t think vegans eat mac and cheese? Well, we do. I don’t think I could be a vegan if I couldn’t have it. Of course it’s not real cheese. There are two ways to make it, with nutritional yeast or with alternative cheeses.

It smells kind of like Parmesan.

Nutritional yeast is deactivated yeast made from cultured sugarcane or molasses. It’s similar to brewer’s yeast, the left over stuff from making beer, but way less “yeasty” tasting. I had never heard of the stuff until I became a vegan. It has a slight earthy/cheesy/yeasty flavor that can boost up any dish that normally has cheese or meat in it. It’s available at health food stores, usually in bulk but I have seen it in packages too. It is fairly inexpensive, so don’t be a afraid to buy some. It’s good on popcorn or pasta for a “cheesy” topping.

It looks like cheese…

I stated before in my Pad Thai Pizza post that I am not a big fan of most alternative cheeses. Although some claim they “really melt,” they don’t. I choose the word pliable to describe them. They are more pliable when heated but not melty and bubbly.  However, I  heard all these rants and raves about Daiya. So I thought I would give it a try. It tasted pretty good out of the bag. The texture is not quite right, but way better then some other brands I’ve tried. It didn’t totally melt, but it got pretty bubbly and gooey. For something I am not a big fan of, I do like this soy cheese. I used both nutritional yeast and the soy cheese in this recipe. 

Mac and Cheese
3 cups elbow macaroni
2 tbs vegan butter

Cheese Sauce:
1 cup nutritional yeast
1 cup non-sweetened soy milk
1 tps mustard 
1 cup soy cheese (I suggest Daiya)
1/2 tps turmeric
1/2 tps cumin
1 tps garlic powder
1 tps soy sauce
1/4 tps pepper

Pre-heat oven to 350 degrees F, if you want to bake it.

Cook macaroni according to directions. Return to pot or a large bowl after it’s drained for mixing. If you are baking it, leave the pasta a little undercooked, it will finish cooking in the oven.

It’s not quite a roux but it keeps the sauce together.

In a small sauce pan, heat butter over medium until melted, then add the nutritional yeast. It will make a lumpy mixture, just stir until everything is well mixed.

I was skeptical when I saw the cheese clump, but it smoothed out

Add milk and mustard, whisk well.  Add soy cheese while continuously whisking. It may clump on the bottom, but should come together as it warms. 

Add turmeric, cumin, garlic powder, soy sauce, and pepper. Heat until it starts to simmer. Taste, it may need a bit of salt.

Pour the sauce over the macaroni and mix thoroughly.

If you like stove-top style,  you can eat it just like this. But if you prefer baked, pour into a baking dish and pop it in the oven for 15 minutes or until it gets golden-brown and bubbly.

Since I’m only cooking for one, I baked mine in individual ramekins. 

I topped mine with some extra cheese and red pepper flakes before I baked it. Breadcrumbs are a good choice too, gives it a nice crunch.

It’s creamy and gooey just like dairy mac and cheese. See, being a vegan does not mean just boring vegetables.

Here are some other recipes to try too:
http://vegweb.com/index.php?topic=8295.0
http://www.thekindlife.com/user_recipe/view/10014/115/1 
http://allrecipes.com//Recipe/vegan-mac-and-no-cheese/Detail.aspx