French Onion Soup

I have no idea why, but last week I was sitting in the couch watching TV and all the sudden wanted french onion soup. I have made Alton Brown’s recipe from Good Eats before and loved it. I didn’t feel like looking up his recipe so I did it off the top of my head. The real recipe calls for butter, beef broth, and wine. I don’t eat butter or beef broth, so I used vegan margarine, vegetable broth. I also used beer  because I did not feel like buying a bottle of wine and my boyfriend has plenty of beer in the fridge. The beer did give a different flavor, a little bit more yeasty/salty, but I liked it. Michael did not complain either.

Onions are amazing. They can help clean out your digestive system, have anti-inflammatory and antioxidant properties. Some research even suggests they have cancer fighting abilities. Ever why onions make you cry? Wouldn’t you try to blind your enemy if they were trying to cut you open and eat you!

This makes 2-3 servings.

French Onion Soup
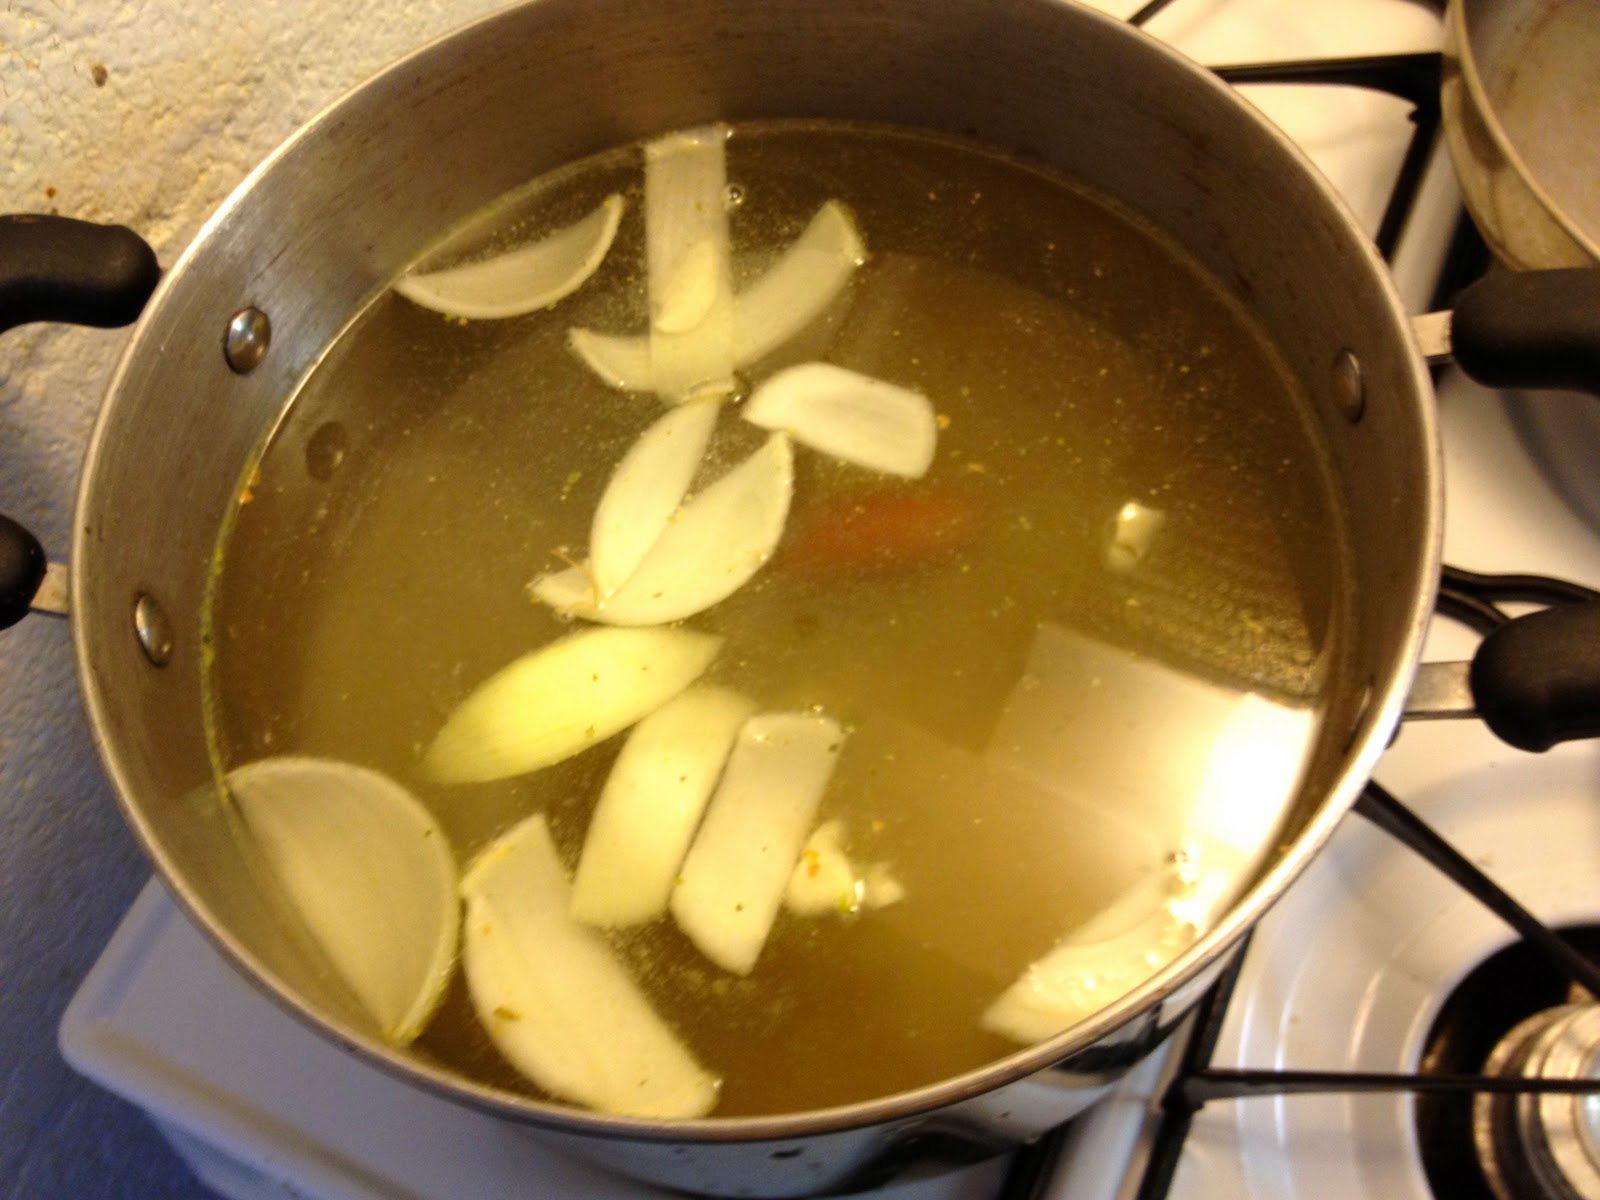
2 large white onions, cut into thin half slices
3 tbs of vegan margarine
Pinch of salt
1 clove of garlic, minced
1 bottle of beer (I used Long Board)
1 can of vegetable broth
3 cup of water
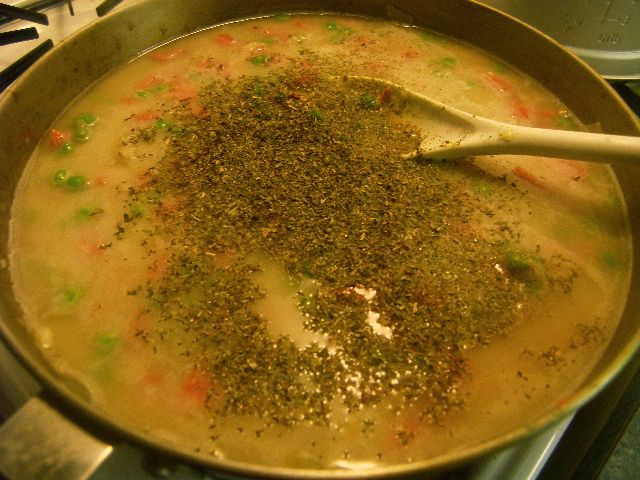
Salt and Pepper to better

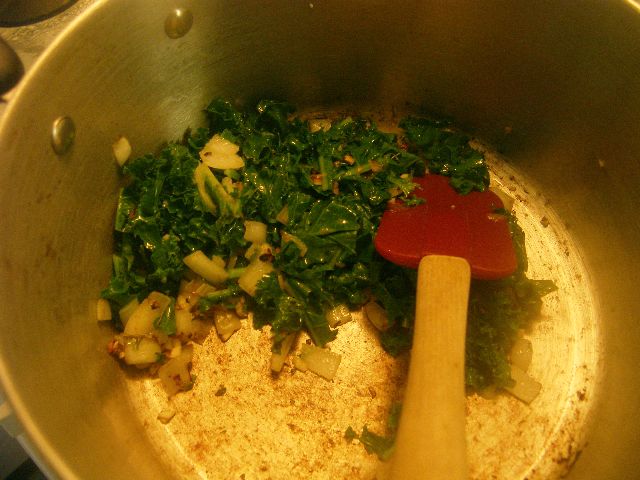
Cut onions in half, then into thin slices. Mince the garlic.

In a large pot over medium heat, melt the butter.

Add the onions and a pinch of salt.

Stir everything together well and spread into a even layer on the bottom of the pan. Let it sauté for a few minutes, stir and spread out evenly again. Repeat until all the onions are brown and caramelized. This could take awhile, be patient and don’t crank up the heat.

Add the garlic and sauté for a minute or two.

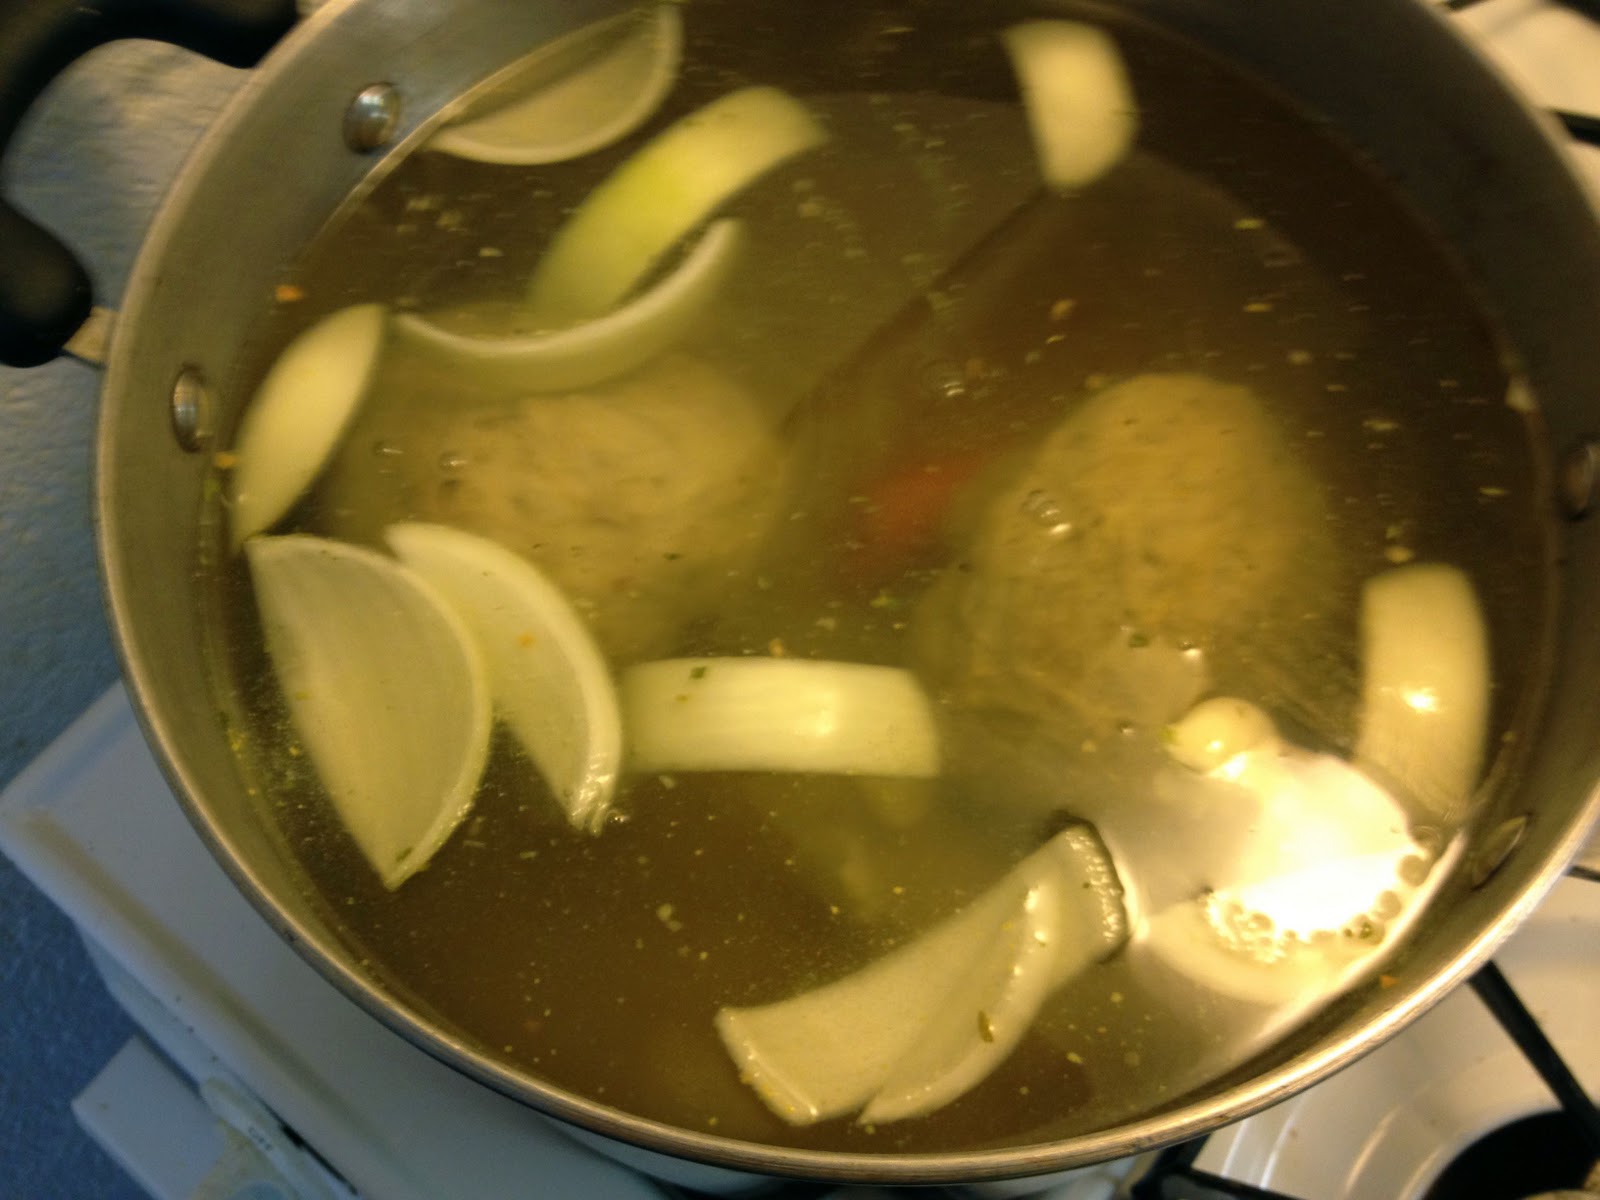
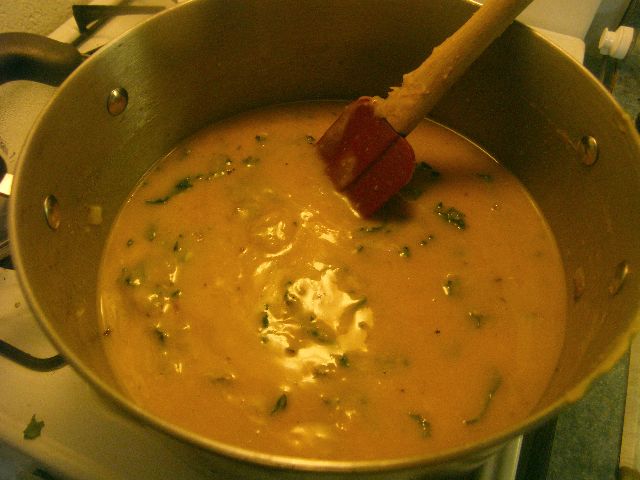
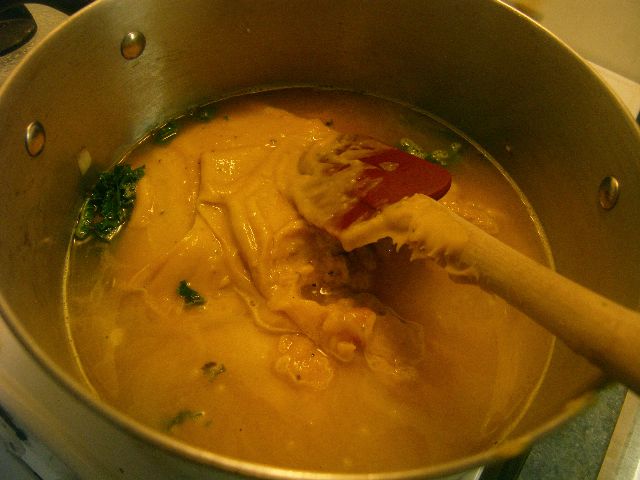
Add the beer and scrap up all stuff from the bottom of the pot.

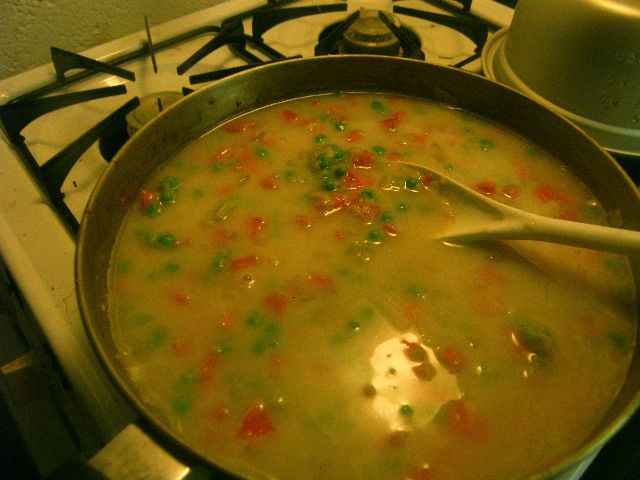
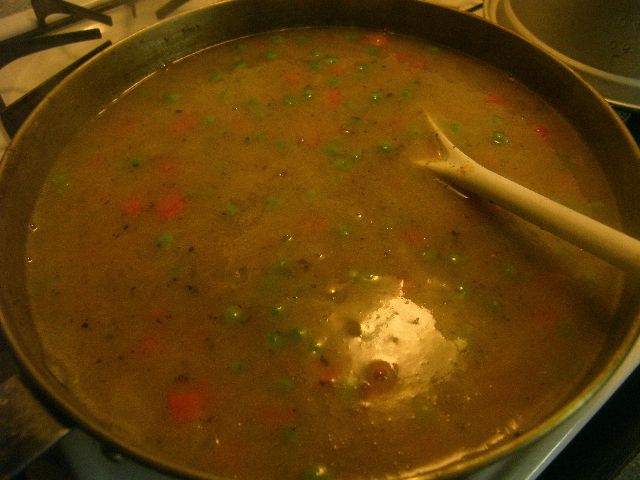
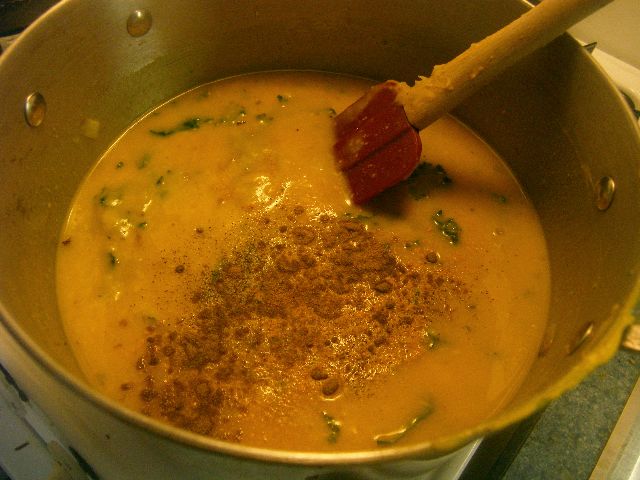
Add the broth and water, and bring to a boil.

Reduce to a simmer and cover. Let it cook for 30 minutes.

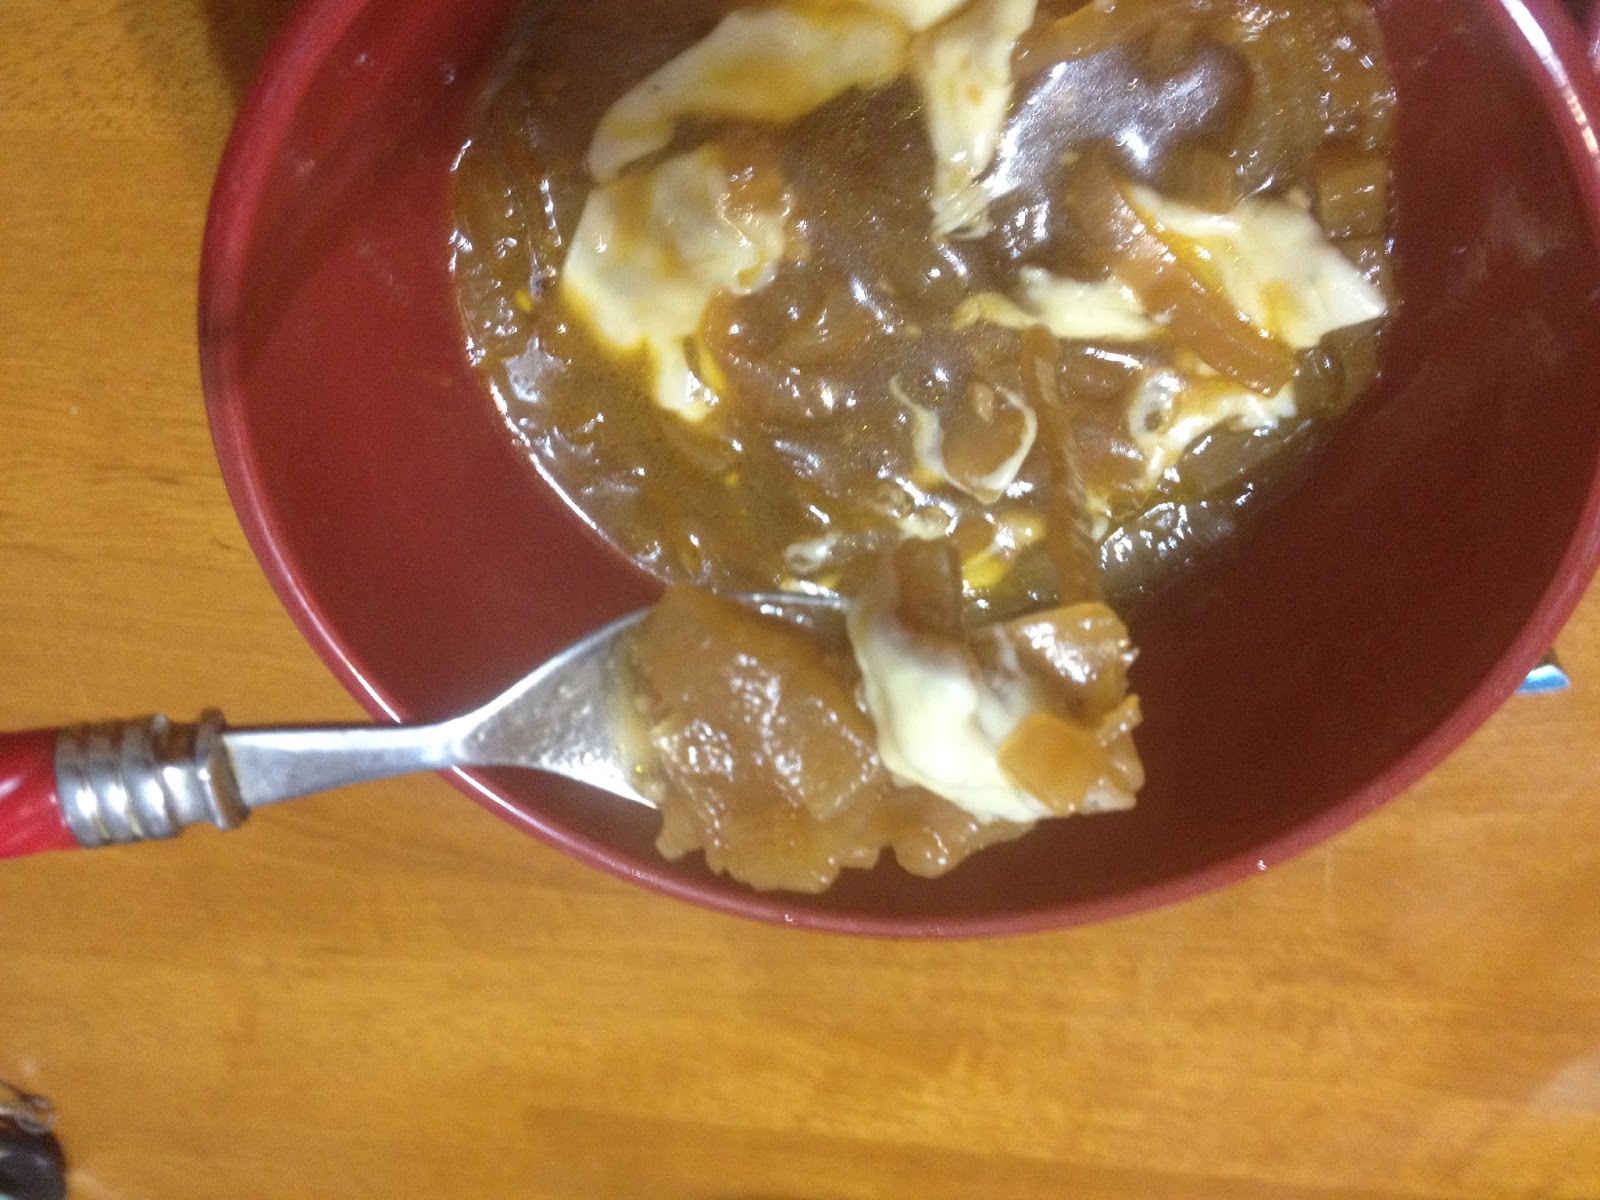
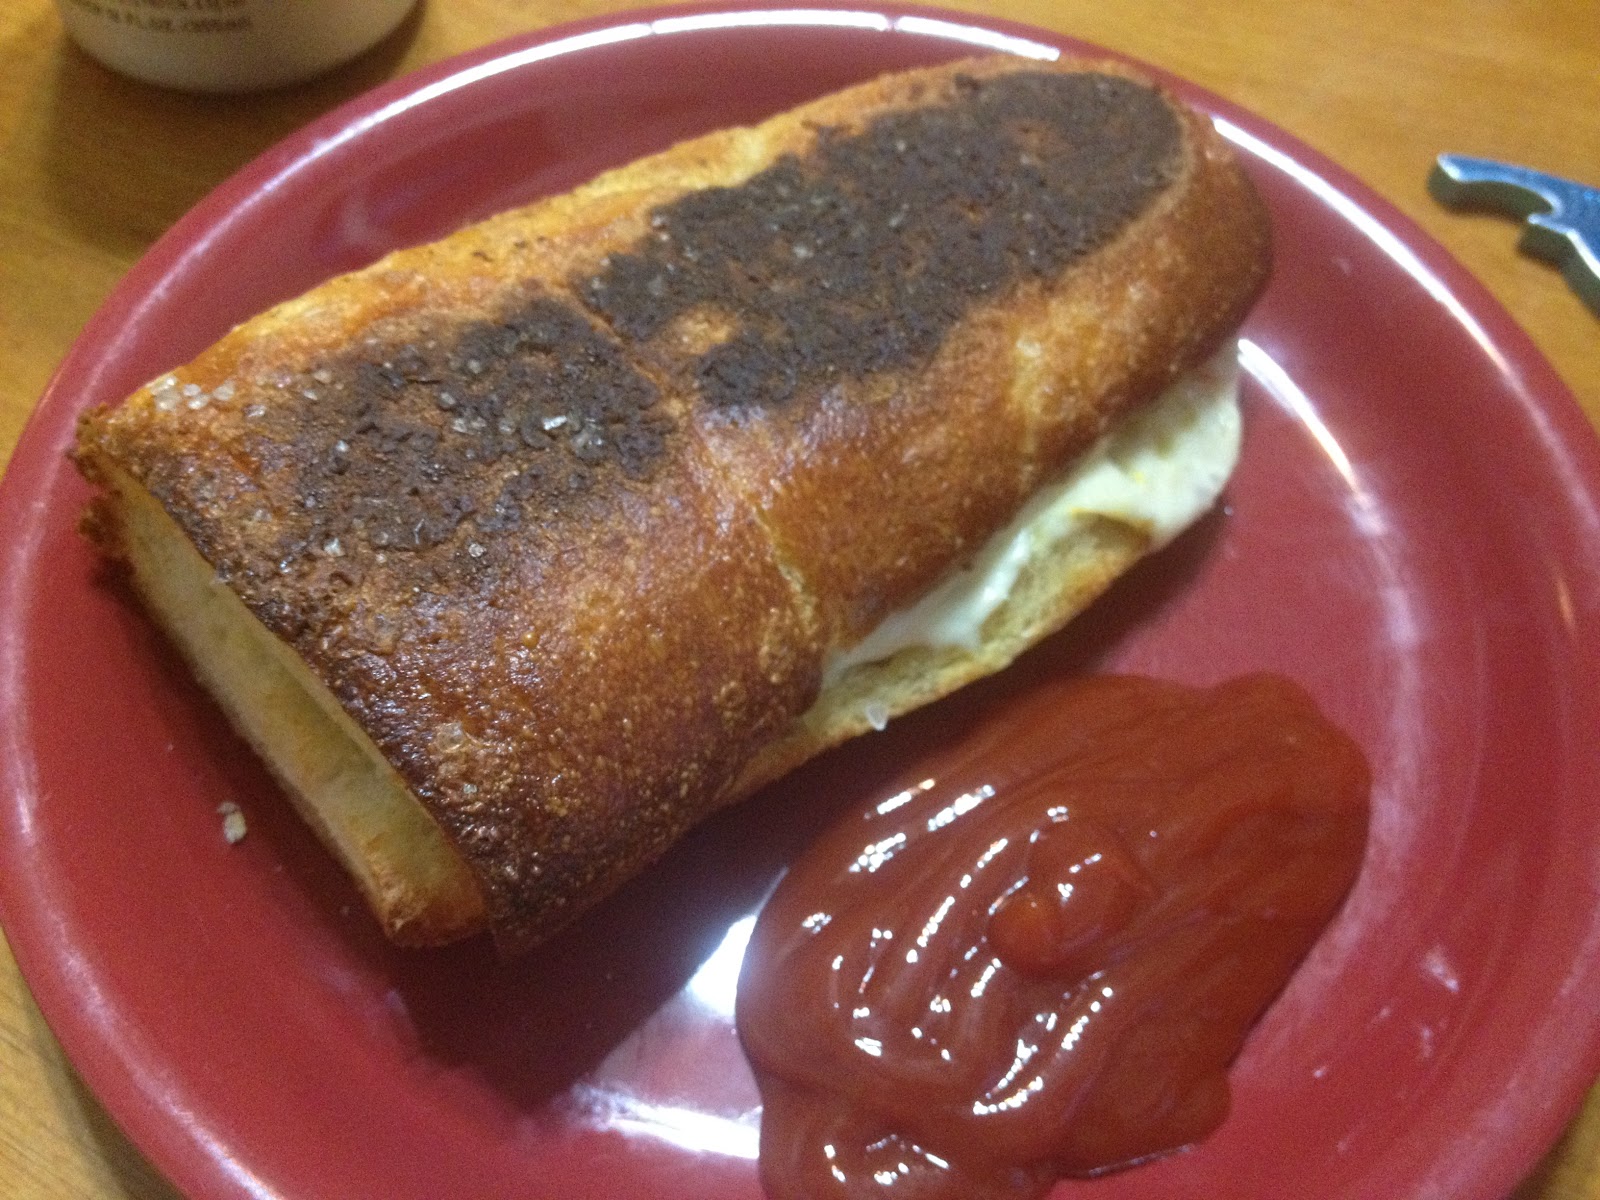
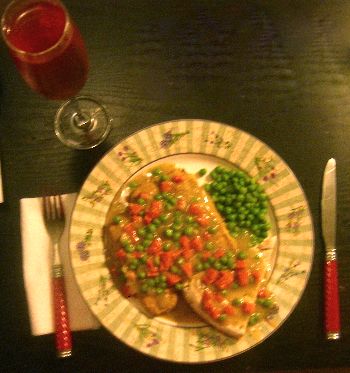
You can get all fancy and put in little ramekins and cover them with a cheese-covered crouton and bake in them in the oven. Or, do what I did and put a little cheese on top and serve them with grilled cheese sandwiches.

Huli Huli "Chicken"

Out past Pahoa is one of my favorite spots on the Big Island, the Ahalanui warm spring. It’s a natural geothermal pool that has been retained by a cement foundation and is refreshed with ocean waves. I love going there early before all the people arrive and swim a few laps in the nice warm water—just be warned there are little fish that will pester you every time you stop.

On the drive to the warm spring, I’d always past this sign for homemade huli huli chicken, and always wondered what it was. One time I finally Googled it and learned it essentially Hawaiian barbecue chicken.  Huli means turn in Hawaiian and it’s called “turn turn” chicken because it is traditionally cooked on a spit so it would turn and turn as it cooked over a fire.

But, I am vegan there is no real chicken and I am broke college kid so no spit fire roasting. Instead, I used seitan strips and cooked it in a skillet over a stove. I have made this several times before and finally decided to post the recipe.

This makes 2 servings.

Huli Huli “Chicken”
2 servings of vegan chicken (any form is fine, I used strips)
1/4 cup ketchup
4 tbs soy sauce
1/4 cup brown sugar
2 tbs white wine vinegar
1 1/2 inch piece of ginger, minced
2 cloves of garlic, minced

In a large bowl, mix together all the ingredients, except the fake chicken.

Now at the chicken and it it marinade for at least a half an hour.

Heat a large skillet over medium-high heat.

Add the marinaded fake chicken and the sauce. Cook until the fake meat is heated and the sauce has thickened.

I served mine with cole slaw and rice. Tangy, sweet, and totally worth trying. I think Hawaiian barbecue is my favorite style.

Aloo Mattar

Sorry I haven’t posted in so long, I’ve just been lazy. But I am going to make up for it with a totally awesome meal. The other day I couldn’t decide what I want to make for dinner, so I asked my boyfriend. He usually says “I don’t know”, but this time he actually had a request! He wanted this gravy peas and potato dish his mom used to make. After some research on the internet, I found what he was talking about. This recipe is based on the one from Manjula’s Kitchen called Aloo Mattar (Potatoes and Green Peas). And, he’s family eats roti, which I’d never heard of before. I am used to naan bread, but I thought I would try making it. And, since I had cilantro in the fridge, I decided to make a chutney too. I will post the other two recipes later, but here is the aloo mattar for now. 


A few of the spices might take a bit of work to find, but if I can find them on the Big Island, I am sure you can too. 

Aloo Mattar

3 medium boiled potatoes

2 tablespoons oil
1 small onion, chopped
1 1/2 inch piece of ginger, minced
2 cloves of garlic, minced

3/4 cup frozen green peas

1 minced green chili, minced

1 teaspoon cumin
1/8 teaspoon asafetida
2 tablespoons coriander 
1/4 teaspoon turmeric
1 teaspoon paprika 
2 teaspoon garam masala
2 medium tomatoes, chopped
Salt and pepper to taste
Cilantro 


Peal and cut the potatoes into bite-sized pieces.  
Add them to a pot of cold water and bring to boil on the stove. Cook until soft. Drain and set aside.
Heat the oil in a large skillet over medium heat. 
Add the onions and cook until translucent. 
Add the garlic and ginger and cook until fragrant. 
Add the frozen peas and cook until warmed. 
Add the potatoes. 
Add the minced green chili, cumin, asafetida, coriander, turmeric, paprika, turmeric, and gram masala.  Mix together well and cook until for about 10 minutes, covered, and stirring occasionally. 
Add the chopped tomatoes and cook until they are soft. 
Season with salt and pepper to taste, and garnish with some cilantro. 
It is good on it’s own, but it is amazing with the cilantro chutney, which I will post tomorrow. Michael’s only complaint was it is more like “white people Indian food”….my answer was “well, a white girl made it!” hahahaha.  I really suggest this dish, it’s easy and so freaking good. 

Spinach Tofu Quiche

I am so sorry I have not posted in awhile. Life got busy all the sudden. But let me update you! I am doing much better after my car accident. My back is sprained and my neck is still stiff, but I am up and about so it’s okay. I also got a new kitty, kind of a long story so I will spare you. Her name is Zoey and she is a stray who is still in the process of being tamed. She and Penny are getting along like sisters now. Love my little ohana 🙂  And, I also have a boyfriend now! Which brings me to my recipe for this post….

Zoey ‘Uala

Michael, my boyfriend, has been really sweet and helping me figure out what is wrong with the power steering on my car so I thought I’d make him something nice. He is a meat eater, but what guy would turned down any home-cooked meal from a girl? I was bored in class so I was searching recipes on VegWeb and came across The Best Spinach Quiche Ever, and thought it sounded amazing. And, like I said, I figured Michael would eat it anyways. I did some variations from the recipe, mainly using red pepper instead of zucchini and added some turmeric. I used silken tofu because I think it has a more egg-like texture, but it didn’t quite set-up right like extra firm tofu would have. It made it harder to take out of the pan while hot, but overall no big deal. It was delicious, had the nice fluffy egg texture, and Michael enjoyed it too.

Spinach Tofu Quiche
Olive oil
1 pie crust (I used a pre-made Pilsbury one)
1 red bell pepper
1/2 of an onion
1 carton of sliced mushrooms
1/2 cup white wine
3 cloves of garlic
2 cups fresh spinach
crushed red pepper flakes
Salt and pepper
1 and 1/2 block silken tofu
Turmeric

Pre-heat the oven to 350 degrees

Roll out the pie crust into the pan,  here is a video if you don’t know how to do so.

Chop the bell pepper, onion, and any really big mushroom slices into bite size pieces.

Heat some olive oil in a large skillet over medium-high heat. Add the veggies and saute until the begin to caramelize.

Pour the wine in to deglaze the pan. Once all the liquid is absorbed, remove from the heat.

In another skillet, heat more olive oil over medium heat. Add the garlic, spinach, and red pepper flakes. Cook until the spinach is wilted. Remove from the heat.

In a blender, add the tofu and the spinach mixture and blend together until smooth. Season with salt and pepper to taste.

In a large bowl, add the tofu mixture and the red pepper mixture. Mix together well.

Now pour the the filling into the pie crust and smooth out the top.

Bake in the oven for 45-50 minutes. The center will be a little jiggly but firms as it cools.

Michael’s only complaint was it needed more salt, which as I’ve mentioned before I am a salt queen so I held back on the salt while making it so he would not be overwhelmed.

But I loved it, so making this again sometime.

I promise I will post blog more regularly again now that my life is back together!

Thanksgiving 2011: Seitan Roast

I saw the recipe on VegWeb for a Holiday Seitan Roast awhile ago and thought it sounded interesting. I love seitan, as evident in my two other posts about it, so I decided this year I would give the roast a try. But I deviated a from the recipe quite a bit. I boiled the roasts (the recipes makes two small loaves) first because I like the texture of boiled then baked seitan. Overall, I REALLY loved this dish. It was easy to make, flavorful and juicy. It even sops up gravy well. I am definitely be making this again sometime.

Seitan Roast
Broth:
5 cups vegetable stock
1 tbs soy sauce
1/4 an onion, cut into chunks
1 carrot, cut into chunks
A small pinch of salt and pepper 
Dough:
2 cups vital wheat gluten
1/4 cup nutritional yeast
1 cup vegetable broth 
1/4 cup low sodium soy sauce
2 cloves garlic, minced
1 tsp Italian seasoning
1 tsp house seasoning
A small pinch of salt and pepper 
Baste:
2 carrots, quartered 
1 small onion, quartered and sliced divided

2 cups vegetable broth (you can use the broth you boiled the seitan in)
2 tbs low sodium soy sauce 
1 tsp cumin
1 tbs Italian seasoning

In a large pot, add all the ingredients for the broth together and set aside. Do not turn the burner on yet. 

In a large bowl, add the vital wheat gluten and nutritional yeast and mix together lightly. 

Add the remanning ingredients and stir until it is too thick for a spoon.

Knead the dough the rest of the way until it comes together and is smooth. This should only take a minute or two so don’t over knead. 


Divided in half and form into small loaves. 

Put the loaves into the broth, turn on the heat, and bring to a boil. Make sure to cover with a lid. 

Once it starts to boil, reduce to a simmer and keep the lid on. Boil for about 30 minutes total. 

While that boils, pre heat the oven to 350 and spray a baking pan with cooking spray.

Combine the all baste ingredients except the carrots and onion.

Remove the loaves from the broth and place them in the baking pan. Spread the quartered carrots and onions around the loaves and cover with half the baste.

Bake for 15-20 minutes, until the broth is absorbed. Cover with the remaining baste and bake for another 10-15 minutes.

Plate, slice, and serve. I topped mine with some mushroom gravy. I think I will make this again for Christmas. 

Lentil Burgers and Homemade French Fries

As awesome and convenient as frozen, pre-made veggie burgers are, they are still a processed food. Just because something is meat and dairy free, doesn’t mean it still doesn’t have preservatives and fillers. On occasion when you are working late or in a hurry, they can make a fine dinner. But, the best way to get a good meat-free burger is to make it yourself. My favorite alternative burger is lentil. I first had one in this little restaurant by the Opera House in Sydney, Australia. It had great flavor and a meat-like texture. Like beef, it will take on the flavor of whatever you season it with, so you can make Southwest burgers with chili and cilantro, Indian with cumin and curry—or any other flavors you like. These are just basic burgers, so feel free to experiments with the spices. This recipe makes about 2 burgers and can be easily multiplied.

And what would a good burger be without fries. Making your own fries is just as easy as opening up a bag of processed frozen ones. Just cut, soak, season, and bake. And yes bake, not fry. Baking is so much healthier, no one needs to be eating deep fried foods. This recipe makes one serving and be easily multiplied as well.

Lentil Burgers

1 cup dried lentils
1/4 cup breadcrumbs (I used Italians ones, but it plain is fine)
1/4 cup onion, pealed 
2 cloves garlic, pealed 
1 tsp cumin
1 tsp house seasoning

Pre-heat the oven to 375 degrees.

Rinse and pick through the lentils.

Cooking the lentils according to the directions on the package.

Drain the lentils and let them cool for a bit.

In a food processor or blender, at the lentils and remaining ingredients. Process until blender and fairly smooth. It’s okay if there are some big chunks.

Form into patties and let them chill in the fridge for a few hours. This allows them to firm up and hold up better while cooking.

Now, you can fry them in a pan but I get better results baking in the oven. Lightly spray a baking sheet and place the patties on. Bake in the oven for 10 to 12 minutes, flipping half way through.

Since you have the oven all hot, might as well be efficient and throw some fries on the pan too.

Homemade French Fries
1 small russet potatoes
Water
1 tsp salt
1-2 tsp house seasoning, depending on taste

Wash the potato very well.

Cut the potato in 1/4 inch strips.

In the small bowl, add enough water to submerge the potatoes and then stir in the salt. Add the potatoes and soak for 15 minutes. This will add some flavor and remove some of the starch.

Drain the potatoes well and lightly dry.

In small bowl, add the potato sticks and house seasoning. Coat the sticks well.

You can cook them at the same time as the burgers on the same baking sheet. Spread the sticks in an even layer on part of the baking sheet.

Bake for 10 to 12 minutes, same as the burgers, until golden.


I didn’t have any buns, so I just ate mine plain. But I suggest a nice whole wheat bun, lettuce, tomato, red onion, and a good pickle on the side. I dipped my fries in some mustard and sweet chili sauce mix. If you go for ketchup, get the unsweetened all natural stuff. A lot of the big commercial brands are loaded with sugar and high fructose corn syrup.

A classic American meal with a fantastic healthy twist. Loves it!

Udon Noodle Attempt

Awhile ago a posted a blog for sushi with a video link to a YouTube channel called Cooking With Dog. It’s weird that she cooks with a cute little dog, but she makes some interesting Japanese dishes. Most aren’t vegan and some are kinda complicated. But I was surprised to see that udon noodles were vegan and fairly simple.

I didn’t use the special kind of flour the video calls for and I only had a tiny big of starch so my noodles were not as soft as they should have been. Plus, I am not familiar with Japanese cooking techniques so they are no where near as pretty the dog lady’s noodles. That being said, they did taste like udon noodles and had the right outer texture. I was very happy with my first attempt.

Since I followed the video pretty closely, it would be silly re-type everything. So watch the video and look at the lovely photo sequence of my attempt.

As a good food blogger, I will actually post an original recipe too. This is a simple stir-fry I make often, just made it up one day with the random things I had in the fridge. It was a lovely accompaniment for the udon noodles.

Spinach and Tofu Stir-Fry
1/4 cup frozen or 1 cup fresh spinach
1/4 onion, diced
1 clove of garlic
1/4 of a block of firm tofu
1 tbs soy sauce
2 tps sesame seeds
1 tps red chili sauce

Heat some water or veggie broth in a skillet over medium heat.

Add spinach, onions, garlic, and tofu. Cook until the spinach is done (defrosted for frozen or wilted for fresh), and the tofu is heated through and lost most of its moisture.

Add the soy sauce and sesame seeds, cook for a minute or two more.

Remove from the heat and garnish with the chili sauce. Serve it over the udon noodles or whatever else you like.

Peas and Carrots Gravy, Brought to you by Foodbuzz and Green Giant

You know what is even better than delicious vegetables? Free delicious vegetables! Foodbuzz Tastemaker program selected me for a free product coupon from Green Giant. I’ve preached the benefits of fresh produce on my blog several times before, but I sadly know that fresh produce is impractical for some people. Sometimes life gets in the way of using that lovely fresh spinach or broccoli that you bought with the best intentions. You might be too busy, too broke, or have picky kids. This is not an excuse to cut vegetables out of diet all together. It means frozen produce is your best bet. And, as if always ripe veggies all year round wasn’t cool enough, Green Giant has steamer bags. You don’t have to dirty another dish.

I was very excited when my coupon came in the mail, mainly because I hardly ever win things. But sadly, when I got to the store, I got a little discouraged. I had a hard time finding a steamer bag product that was vegan. In order to make their products as convenient as possible, some of the steamer bags come in their own sauce, usually a butter or cheese sauce. Now, I want to stress that my discouragement is not Green Giant’s fault. They have several products in their line that are sauce-free and vegan. The lack of options was because I live on an island in the middle of the Pacific. I went to another larger grocery store, I found a bag of delicious Green Giant sweet peas. 

The minute I saw the bag, for some reason I thought of white gravy with peas and carrots. I imagined it over some breaded and baked tofu with a roll on the side. A very tasty Sunday night dinner. 

Peas and Carrots Gravy

1/2 of an onion, minced
3 cloves of garlic, minced
2 large carrots, diced into pea-sized pieces
1/2 bag Green Giant Valley Fresh Steamers Sweet Peas
1/2 cup to 1 cup of water or vegetable broth, for cooking the vegetables 
1 cup vegetable broth
1 tbs soy sauce
1/2 cup flour
2 cups water
1 tsp ground sage
1 tsp oregano 
Salt and pepper to taste 

Chop the onions, garlic, and carrots. 

So, realized I didn’t have any oil or butter after I had chopped everything. I didn’t have enough money to run out and buy some, so I thought I would have to postpone this to Friday when I get paid again. Then I remembered a trick I saw on  VegWeb TV’s Youtube Channel. Sauté your veggies in a bit of water or vegetable broth! This won’t work if you want to caramelize, but just cooking through and softening is fine. This also cuts down on the fat too.

In a large skillet, heat about 1/4 cup of water or broth over medium heat. Once the water is heated, add the onions. Cook until the onions are translucent and the water is mostly gone.

Add some more water or broth, and then add the garlic and carrots. Cook until the carrots are soft and the water is mostly gone. 

While the carrots cook, microwave the bag of sweet peas according to the instructions. 

Add half the bag to the skillet, and save the rest for either a side dish or for something else. 

In a small bowl, mix together the 1 cup vegetable broth, soy sauce and flour into a slurry. Mix well to get the lumps out. 

Turn the heat down to low, and add the slurry to the skillet. The flour will start to cook and it will thicken up quickly. Just keep mixing so it doesn’t get lumpy. 

Add the final 2 cups of water and continue to mix until smooth. 

Add the sage, oregano. Season with salt and pepper to taste. 

Let it cook a few more minutes on low to thicken up. 

I served the gravy generously over some breaded tofu from my South Dinner post, except I baked it instead of frying it, and a homemade roll. I even had some peas on the side for some extra green. 
The gravy is creamy, rich, and just a hint of sweetness from the peas. I will happily be eating the leftover gravy for the next few days. Thank you Foodbuzz and Green Giant! 

Indian Inspired Pizza

I have toyed with the idea of making an Indian style pizza for awhile. Should it be on naan bread? Should I try to make my own naan bread? Cheese or no cheese? Curry sauce? Tomato sauce? I could never make-up my mind so I never made it. This Friday, I really wanted some curry spice for dinner so decided to just give it a try and tweak is next time I make it. I decided to make it on normal pizza dough for now, no cheese, and both curry and tomato sauce. It came out pretty good but I think naan bread would be better for next time.

Indian Inspired Pizza
1 ball of pizza dough (try mine)
1/2 cup hummus (try mine)
1/2 cup diced tomatoes
1/2 cup curry sauce (try mine)
1/4 cup frozen spinach
1/4 cup frozen corn

Pre-heat the oven to as high as it will go .

Microwave the frozen veggies and then stir in the curry sauce.  Set aside.

Roll the dough out into desire shape and thickness.

Spread on the hummus.

Pour on the diced tomatoes.

Lastly top with the veggies.


Bake for 10-15 minutes, until the crust is golden and the toppings are hot. 

I love the contrast between the spicy veggies and the creamy hummus. Went lovely with a glass of rosé. Next time I will attempt to make my own naan. 

Kabocha Squash Soup

I love when good things are cheap. My local health food store had variety of locally grown squash on sale. The minute I saw them, I thought of hot bowl of creamy soup. I first picked-up a butternut squash but then a lovely little green one caught my eye. I didn’t know what kind it was but it wad lighter (hence cheaper) so I bought it. After a bit of Google and asking my mom, I learned it was a kabocha.

Kabocha is a Japanese winter squash. It looks like a squat green pumpkin. It has the texture of pumpkin but tastes more like a sweeter butternut squash. It is high in iron, vitamin C, and potassium. It’s meat is bright orange and it’s packed full of seeds too (I roasted them, a bit chewier than pumpkin seeds but still good). 
I came up with this recipe on my own, but it’s pretty much like any basic squash soup. This would also be wonderful with most other squash varieties as well. 

Kabocha Squash Soup

1 kabocha squash
1/2 cup coconut milk
2 cup vegetable broth 
1 onion, diced
2 cloves garlic, diced
2 cups of kale, chopped
3 cups water
1 tsp cumin
1 tsp turmeric
1 tsp chili powder
Salt and pepper to taste

Pre-heat the oven to 400 degrees. 
Cut the squash in half and scoop out the seeds. 

Spray a baking sheet or pan with cooking spray and lay the squash cut side down.

Bake for about an hour, until totally soft. 
While that roasts, chop up the veggies. 

In a large pot, heat a some oil and sauté the onions until translucent. 

Add the garlic and cook for a few more minutes. 

Add the kale and cook until tender. Add the 3 cups water. Remove from heat and set aside. 

Once the squash is done and cooled, scoop out the meat into a blender. 

Add the coconut milk and vegetable broth. Blend until smooth. You may need to add a bit of water if it’s too thick.  ( I don’t know what happened to the picture of this step, sorry!)

Add the squash puree to the pot and turn the burner on to medium-low heat. 

Add the spices and salt and pepper to taste. Bring up to desired temperature and serve hot. 
I have a bit of a cold again so I had my with a lovely glass of Theraflu. Hopefully the vitamin C in the squash will do me some good.